Showing posts with label main dish. Show all posts

Thursday, February 16, 2023

CrockPot Swiss Chicken and Stuffing

I'm a fan of Crockpot cooking. 
 
Fix it.
Forget it for several hours.
Add some sides.
Enjoy a hot dinner with minimal effort.
 
I saw the recipe for CrockPot Swiss Chicken and Stuffing from Plowing through Life in a Facebook link. Thinking it might be a nice alternative for a "holiday" meal for just Randy and me, I tried it out. Though beef is our usual go-to meat, it was a tasty addition to the CrockPot meals I keep on standby.
 
I made it again when chicken breasts were on sale at my local grocery store. I put it in before going downstairs to work, and the CrockPot did the work for me.  I added green beans and a salad and viola! Dinner was ready with minimal effort and mess.

Crockpot Swiss Chicken and Stuffing
Adapted from Plowing Through Life 
 
3 to 4 chicken breasts
6-8 slices Swiss cheese (or equivalent amount of grated Swiss cheese)
1 can cream of chicken soup
1/4 cup chicken broth (or water with bouillon)
1 box stuffing mix
1/4 cup butter, melted
 
Line Crockpot with liner or spray with nonstick cooking spray. 
 
Put chicken in bottom of crockpot in a single layer. Place at least one slice of cheese on each piece of chicken. (I had some Swiss cheese in a block leftover from another recipe. I just grated a good amount of top of the chicken. I probably used more cheese than the original recipe called for.) Mix cream of chicken soup and the broth. Pour over chicken. Sprinkle stuffing over soup layer. Pour melted butter over stuffing.
 
Cover and cook on low for 3 to 4 hours. 
 
Note: This was the second time I made this recipe. The first time, I cooked it 3 hours or so and the stuffing didn't get as dark on top. This time, it cooked at least 4 hours. (I should have checked it a little earlier.) It tasted great; it just got a little dark on top.
 
Plowing through Life (a blog from a farm in Ohio) says you can convert this recipe to the oven. Use 6 to 8 small chicken breasts and the same amount of stuffing and other ingredients.  Bake in a 9 x 13 pan for 45 to 55 minutes or until a digital meat thermometer reads 165ºF.
 
Serve with veggies and a salad.  

This was when I left it to cook about 4 hours. I would suggest the 3-hour cooking time - or, at least, check it. I was downstairs in the office and didn't check it until noon.

Thursday, February 2, 2023

Creamy Chicken Noodle Soup

I could eat soup every day during the winter. Really. Now if I could just convince Randy of that. 

In reality, he's easy to feed. He doesn't complain, though he will give subtle hints about what he prefers. He doesn't prefer peanut butter. Or lemon (unless it's in his iced tea or our family-favorite Lemonade Dessert. That doesn't make a lot of sense to me, but I have my idiosyncrasies, too.) As you might expect from a Kansas beef producer, he prefers beef over chicken. 

But he still will eat chicken on occasion. And he doesn't complain when it makes an appearance on the menu. I love chicken and noodles in any form - over mashed potatoes, in a casserole or a soup. This Creamy Chicken Noodle Soup was a hit with both of us.

January was National Soup Month, but I don't quit making soup when the calendar flips to February (or March, for that matter). Soup always is a great warm-up when the skies are gloomy and the wind chills are hovering way below the freezing mark like they have been this week. 

It's Groundhog Day today, and Punxsutawney Phil saw his shadow. That is supposed to signify another 6 weeks of winter. If Phil is right, I guess there will be plenty of time to put this soup on your meal plan.

The recipe came from Sally's Baking Addiction. Her blog is a go-to for baking for both Jill and me, but I really hadn't seen a lot of main-dish recipes on the site. I'm glad this one caught my eye.

She used rotisserie chicken in her soup. I don't have that option at my hometown grocery store, so I just seasoned frozen chicken breasts and microwaved them. The other ingredients were all ones I had in my fridge or pantry. 

Serve with relishes, crackers and fruit. And you'll have a meal that warms you from the inside out. 

 Creamy Chicken Noodle Soup
Adapted from Sally's Baking Addiction
 
1 tbsp. butter
3/4 cup chopped yellow onion
1 cup sliced or diced carrots
1 cup sliced or diced celery
2 garlic cloves, minced
1/4 cup flour
1/2 tsp. salt
1/4 tsp. to 1/2 tsp. ground pepper (to taste)
1/2 tsp. ground thyme
1/2 tsp. dried oregano
8 cups chicken broth
1 1/2 cups potato, diced
2 cups cooked chicken, shredded or chopped
1 cup half and half or whole milk
3-4 cups uncooked noodles (I used 3 cups)

Melt the butter in a large pot or Dutch oven (4 quart or larger) over medium heat. Add the onion, carrots, celery and garlic. Cook, stirring occasionally, for 5 minutes or until vegetables have softened. Stir in flour and seasonings. Cook for 2 minutes.

Add the chicken broth and diced potatoes. Stir, then increase the heat to medium high. Bring the soup to a boil, without stirring and boil for 3 minutes. Reduce heat to medium-low, partially cover the pot, and allow to simmer 25 minutes or until the potatoes have softened. Taste the soup and add more seasonings to taste, if desired. 
 
Add the chicken, half and half and noodles. Cook for 10 minutes until the noodles are tender and the soup has thickened. Once again, taste the soup and adjust the seasonings to taste. 
 
Refrigerate leftovers for up to a week. To reheat, you will likely need to add a little additional chicken broth (or bouillon in water) since pasta absorbs the liquid.

Makes about 12 cups of soup.

NOTES:
  • For the chicken: You may use rotisserie chicken (if you have it available in your area). You could use leftover chicken or turkey. I just seasoned some frozen chicken breasts and microwaved them until done, then cut them up.
  • Sally's Baking Addiction says to use 3 to 4 cups of WIDE egg noodles. I didn't have wide noodles. You can use regular-sized noodles or other pasta or 1 cup uncooked rice. 
  • Also from Sally's - Slow Cooker Instructions: Soften the onion, carrots, celery and garlic on the stovetop, as directed in the recipe. Transfer to a slow cooker and add chicken broth. Allow to cook for 2 hours on low. Then add the potato, chicken, half/half and noodles. Cook on low an additional 1 to 2 hours. 

***

WINNER, WINNER!

And now, a little bit of housekeeping: Diana Hemphill is the winner of the blogiversary gift celebrating my 13 years of Kim's County Line. She chose the notecards. Thanks to all who commented and participated! 

Thursday, January 19, 2023

Tomato Tortellini Soup

There is nothing like soup.
It is by nature eccentric:
No two are ever alike, unless of course,
you get your soup from a can.
Laurie Colwin, Author of "Home Cooking"


There's nothing wrong with soup from a can. I am definitely not a food snob, and prepared soups offer tons of convenience and versatility. This recipe actually uses a couple of cans of tomato soup to add flavor and body to the final finished product. I am not averse to using a can of cream of chicken soup or cream of celery soup in a casserole or some other recipe either.

But I do love making homemade soups in the wintertime. I have my old standbys. But I'm always on the lookout for something new, too, and I couldn't resist this one while scrolling through Facebook. See? Something good comes from Facebook. 

I did some recipe revision since I couldn't get all the ingredients locally. And I think it turned out well. But I've also included a link to the original recipe, which used a slow cooker. That would be a great option if you're going to be gone all day.

I was surprised the recipe didn't have added salt. However, the flavorful Italian sausage, the prepared tomato soup and the chicken broth offered just the right amount of salt without adding more. 

If you have leftovers - like we did - you will likely need to add a little milk as you reheat it. Pasta invariably absorbs liquid. If you try it, let me know what you think!


Tomato Tortellini Soup
Adapted from Plain Chicken blog
 
1 lb. Italian sausage
32 oz. chicken broth (or water plus bouillon)
28 oz. can petite diced tomatoes with sweet onions
2 cans tomato soup
1 tsp. dried chives
1 20-oz. package refrigerated cheese tortellini, uncooked
1 8-oz. package cream cheese, softened

In a Dutch oven, brown Italian sausage; drain fat. Add chicken broth, tomatoes, tomato soup and dried chives. Cover and bring to boiling. Turn down heat to low. Add cheese tortellini and cook until done. Put heat on low and add cream cheese, stirring frequently to melt. Serve when cream cheese has melted and made a creamy broth.

The original recipe used a slow cooker. You can combine the broth, tomatoes and chives and cook on low for 6 to 8 hours. When it's 15 to 30 minutes before you want to serve the meal, put the tortellini and cream cheese in the slow cooker with the broth and turn it up to high. 

Note: The original recipe used two 8-ounce containers of chives and onion cream cheese spread, softened. That's not an ingredient I can buy locally. I used only 1 regular 8-ounce cream cheese and added the dried chives. HERE is the link to the original recipe from the Plain Chicken blog.


Tuesday, July 26, 2022

Three-Cheese Mac and Cheese

Homemade macaroni and cheese probably doesn't sound like a very "summertime centric" selection for a July meal.

But, when your summer includes getting a tooth pulled? Then maybe you'd be looking for soft comfort food, too.

It was one of those recipes that catches your eye as you're strolling through Facebook. C'mon ... you know you do it, too. My mouth was throbbing, and a summer salad just wasn't going to make the cut for a few meals.


So when the recipe said The BEST Homemade Baked Mac and Cheese? Of course, I clicked. (Yes, BEST was capitalized in the recipe's title, so how could I resist?)

Sharp Cheddar cheese is a staple in my refrigerator, but I didn't have Gruyere cheese. So I substituted Swiss. Desperate times call for desperate measures. I know I can't get Gruyere cheese at my Stafford grocery store. Actually, I think I'd have to go to the big cheese counter at the super-sized Dillon's to even find any in Hutchinson. 

The topping included Parmesan cheese along with the panko and butter, so it gave it an extra boost of cheese flavor. The recipe didn't disappoint. Because it didn't use processed American cheese, it wasn't quite as smooth as recipes using that as an ingredient. However, the sharp Cheddar and Swiss, combined with some Parmesan flavor on top, gave a big boost of taste.

And even though Randy didn't get a tooth pulled, he liked it. too.  (He had a side of ham to go with his mac and cheese.) If you try it, let me know what you think!

Three-Cheese Baked Mac & Cheese
Modified from Mom on Timeout blog

16 oz. pasta (elbow, rotini, etc.)
1 tbsp. extra virgin olive oil
6 tbsp. butter
1/3 cup flour
3 cups whole milk
1 cup heavy whipping cream
4 cups sharp Cheddar cheese (freshly grated)
2 cups Gruyere cheese (freshly grated) * 
Salt and pepper to taste
Topping:
4 tbsp. butter, melted
1 1/2 cups panko crumbs
1/2 cup grated Parmesan cheese
1/4 tsp. smoked paprika
 
*I substituted Swiss cheese for Gruyere.

Preheat oven to 350 degrees. Spray 3- or 4-quart baking dish with cooking spray and set aside. 

Shred your own cheeses; already grated cheeses don't melt as well. After both kinds of cheese are grated, combine and set aside.

Cook the pasta about 1 minute shy of al dente, according to package directions. While pasta is cooking prepare cheese sauce. (If you don't have the cheese sauce completed when the pasta is al dente, drain the pasta and coat it with the olive oil; set aside until ready to combine with cheese sauce.)

To prepare cheese sauce: Melt butter in a deep saucepan or large skillet. Whisk in flour over medium heat and continue whisking for about 1 minute until bubbly and golden. Gradually whisk in the milk and heavy cream until smooth. Continue whisking until you see bubbles on the surface. Continue cooking and whisking for another 2 minutes. Add salt and pepper to taste. Add 2 cups of shredded cheese and whisk until smooth. Add another 2 cups of shredded cheese and continue whisking until creamy and smooth. (Retain 2 cups cheese.) Sauce should be smooth and thick.
 
Stir in the pasta until combined and pasta is fully coated with the cheese sauce. Pour half of the mac and cheese into the prepared baking dish. Top with remaining 2 cups of shredded cheese and then top with remaining mac and cheese. 
 
In a small bowl, combine panko, Parmesan, melted butter and paprika. Sprinkle over top and bake until bubbly and golden brown, about 30 minutes. Serve immediately.
 

Thursday, July 21, 2022

Stick to Your "Core" Meals


Back when I was a Pratt County 4-Her, we worked in the fair's concession stand during the county fair. Sloppy joes provided the mainstay of the noon-day meal. 

As a kid, you don't give a lot of thought to the behind-the-scenes work required. You just show up during your scheduled shift and do the assigned tasks.

But, as I became the 4-H parent and community leader in Stafford County, I remembered those sloppy joes. Then, I was the one responsible for the Stafford County Fair clean-up meal or fundraisers that required a roaster full of a main dish. And my mom got the inevitable phone call asking about that old recipe. I've passed that torch on to the next generation of 4-H parents.

It's Pratt County Fair time this week, but I won't make it to my home county for the fair. There are bigger attractions for me to the east at the Shawnee County Fair. Kinley is back for another year exhibiting in the fair, and Brooke is a first-year 4-Her, showing her projects for the first time. So Grandma and Grandpa will go and check out their fair entries. (Today is foods judging, so I'm anxious to hear how they did.)

I'm not sure whether sloppy joes are still a staple at Pratt County or not. But I'm still using the old Pratt County sloppy joe recipe for things like the Stafford Core meal. Core is a program that helps our community's families overcome poverty through budgeting, peer counseling and fellowship. Each Monday, different community groups provide the meal for Core families before their scheduled meeting. 

I'm the organizer for our church's efforts. It was our turn again last month. As is usually the case, Randy provided the muscle in carting everything to the car and then into the church.

Sloppy joes were on the menu. (I've done other meals, too - meatballs, tostadoes, cavatini, taco soup and a baked potato bar - most more than once).

With our sloppy joes, we also served baked beans, potato chips and coleslaw with homemade dressing. And, of course, there were homemade cookies for dessert. (I had some pretzel bites left over from the rehearsal dinner, too, so I shared those, too.)


As we sat at the tables, visiting with Core members, I noticed this sign:

Isn't that the truth?

Do you need a meal for a crowd? These are tried-and-true recipes to add to your recipe arsenal.

Sloppy Joes for a Crowd
Pratt County Fair concession stand
10 pounds browned hamburger (Brown with chopped onion or dried minced onion)
4 cans regular chicken gumbo soup 
1 1/2 cups ketchup
3/4 cup mustard
1 tsp. salt
Pepper to taste
 
Brown meat and onion and drain. Put meat in a roaster and add all other ingredients. Simmer in a roaster until thickened and ready to serve. The original recipe said it served 100. Servings must have been a lot smaller back. Today, I'd say it serves half of that (probably bigger buns). 

NOTE: Chicken gumbo soup is difficult to find these days. This time, I substituted Campbell's Old-Fashioned Tomato Rice. It worked well.

Coleslaw Dressing for a Crowd 
Recipe origin unknown
3/4 cup vinegar
1 cup salad oil
1 1/4 cups sugar
1/2 tsp. pepper
1 tsp. salt
1 tbsp. celery seed
1 cup salad dressing or mayonnaise

Blend all ingredients in a blender until smooth and emulsified. Pour into a quart jar and refrigerate until ready to use. Use over shredded cabbage or coleslaw mix. I usually keep a jar of this dressing in my refrigerator each summer to use on home-grown cucumbers. (I like my cucumbers with vinegar, but Randy likes a more creamy version. This dressing recipe has fit the bill.)

For the Core meal, this amount of dressing covered about 4 bags of coleslaw mix. You can certainly shred or chop your own. Using packaged coleslaw mix just saved me some time and effort when I was making all the other components in the meal.

Tuesday, April 12, 2022

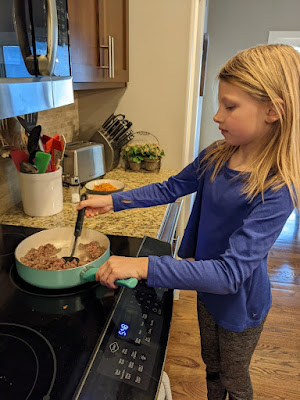
Brooke, the Chef


Thanks to Jill for all the photos!
 

We aren't sending Brooke to the Culinary Institute of America - at least, not quite yet. But a monthly cooking box for kids is helping her develop culinary skills beyond chocolate chip cookies.

For the girls' birthdays the past several years, we've purchased monthly subscription boxes. Rather than add another stuffed animal to a menagerie that already threatens to push the girl out of bed or another toy that ends up neglected on a playroom shelf, they get "experiences" every month. Great Grandma and Grandpa Moore kick in what they would have spent on a gift, and Randy and I fund the rest.


This year, we tried a new subscription, Yummy Crate, for Brooke, a 7-year-old first grader. For the past several years, we'd ordered Little Passports for her. And while she liked them, she was ready for a change. 

Kinley has been receiving Kiwi Crates from the same company.  A couple of years ago, we switched her to Doodle Crates, also from KiwiCo,, which provides an art project each month. Kinley has loved them and has made some fun crafts. So, when a brand new alternative launched from the company, we decided to go with Yummy Crates for Brooke. So far, so good!


As a first-year member of the Auburn 4-H Club, Brooke chose foods and nutrition as one of her 4-H projects. The monthly crate will offer just one more excuse to get in the kitchen and get cookin'!

 

Here's what she gets each month in the kit, which arrives by mail:

  • A porfolio of recipe cards: three family-friendly recipes that teach kitchen skills and explore the science of cooking;
  • STEAM activities: Experiment with a specialty cooking tool (the bibimbap kit included a colander), plus 2 hands-on projects for more creative fun and learning in (and out) of the kitchen;
  • Yummy Zine magazine: Kid-friendly science, comics, history, and fun facts about food; &
  • Shopping List: A grownup's guide to customize the grocery list for the family’s preferences

With one of the boxes, she made Bibimbap, a Korean dish, a bowl of warm white rice with toppings. It was a hit at their house among all four diners.

The crate comes with illustrated instructions. Here's just an example from that kit.

Child nutrition experts always say that involving children in food preparation makes them more willing to try new things. With a mom who's a dietitian, our girls are already pretty good about that, but any extra boost is good.

Photo from https://www.kiwico.com/yummy

If you want to try it for yourself, here's the recipe for
Korean Bibimbap:

Photo of Brooke's finished masterpiece!

Korean Bibimbap
From Yummy Crates
 
11/2 cups uncooked rice, rinsed
3/4 lb. ground or thinly sliced beef
1 medium cucumber, washed
2 cups shredded carrots
4 eggs
3/8 cup (90 ml) soy sauce, divided
3 tbsp. white sugar, divided
About 3 tbsp. toasted sesame oil, divided
2 tsp. garlic powder, divided
1 tsp. salt
1/2 cup white vinegar
1 cup water
 
Optional:
1 tbsp. gochujang (Korean chili paste)
Additional toppings
 
Follow your package directions to cook rice in a pot or use a rice cooker.
 
In medium bowl, mix together 2 tablespoons sesame oil, 2 tablespoons soy sauce, 2 tablespoons sugar and 1 teaspoon garlic powder for marinade. Add beef; set aside for 30 minutes.

On a cutting board, cut cucumber in half long ways, with a sharp knife. Chop into thin slices. In a clean bowl, use a fork to mix together marinade of vinegar, water, 1 teaspoon sugar and 1 teaspoon salt. Add sliced cucumbers. Set aside while you cook the rest of your toppings.

Cook your toppings. Spread 1/2 tablespoon sesame oil around a frying pan. Heat the pan on stovetop on medium heat, about 2 to 4 minutes. Cook shredded carrots in pan for about 4-5 minutes, stirring occasionally. Move the cooked carrots to a small bowl when they're done. 

Cook the beef mixture in the same pan for about 4 minutes, stirring occasionally until it's browned. Move cooked meat to a small bowl.

Crack 4 eggs into the pan and cook for about 3 minutes or until the whites are firm. Flip the eggs over with a spatula. Cook for another 3 minutes or until the yolk is set. 

Build the rice bowls: 
 
Mix Sauce: In a medium bowl, mix together the sauce ingredients: 1/4 cup soy sauce, 1 teaspoon sesame oil, 1 teaspoon garlic powder, 2 teaspoons sugar and 1 tablespoon gochujang (optional). 

Scoop 1/2 cup cooked rice into each serving bowl. Slide an egg on top of each scoop. 

Pour the cucumber mixture into a colander, draining off the liquid over a bowl or the sink.

Pile the toppings around each egg and drizzle some sauce. As you eat, mix everything together to get different flavor combos in each bite. 
 
Other suggested toppings:  Red cabbage, sauteed spinach, sauteed bean sprouts, sauteed zucchini, sauteed mushrooms, toasted sesame seeds.


All done? Tidy up the kitchen! (I'm sure the parents like that step!)

Thursday, July 1, 2021

Big Mac Sloppy Joes


Anybody else feel like they get stuck in a "same-ol' same ol'" rut in the menu department? If not, congrats! If so, here's a variation on a supper-time staple ... Sloppy Joes.

During this time of year, I'm always on the lookout for sandwich varieties that I can make and transport to the field for supper. When clothes are already dirty from dirt, grease, wheat chaff and assorted other unidentified stains, "sloppy" seems to fit right in. Nobody's likely to ruin any good clothes as the inside of these sandwiches "slops" out.

But you don't have to serve these along a Kansas dirt road. They also make a tasty addition to the supper lineup at home - where there are plenty of napkins.

The original recipe called for the Sloppy Joes to be assembled like Big Macs. I didn't add an additional bun in the middle for our version and make a triple-decker sandwich. But the rest of the ingredients got a "thumbs up" from the harvest crew. 

If Big Macs aren't your sandwich of choice, there are some other tried-and-true recipes at the bottom of this post. And for all you in the harvest field? Keep the faith and keep on truckin'. I hope this recipe helps you with your "to-go" menu. 

And, I hope we'll be able "to-go" to the field again soon. We got another 0.80" of rain last night. And I hear the thunder rumbling this morning, too.  Fingers crossed that the weather forecast of dry weather for the 4th of July weekend comes true. We'll skip the fireworks if we can just cut wheat.

Big Mac Sloppy Joes

Ground Beef Mixture 

1 1/2 lbs. ground beef
1/2 yellow onion, finely chopped
1/4 cup hamburger pickles, chopped
1 teaspoon salt
1/4 teaspoon ground pepper
2 teaspoons Worcestershire sauce

McDonald's Secret Sauce Recipe:

1 cup mayonnaise
1/4 cup French dressing
2 tablespoons sweet relish
1 tablespoon ketchup
1 teaspoon white vinegar
1/4 teaspoon onion powder
1/8 teaspoon salt

To Assemble Double Decker: (I just did a single decker)

8 hamburger buns 
2 cups iceberg lettuce , shredded
12 hamburger pickle chips
4 slices cheese
Additional sauce, optional
Brown your ground beef halfway, about 3-4 minutes, in your large skillet then add in the chopped onions, salt, pepper and Worcestershire sauce. Cook the beef until fully browned, about 3-4 minutes, then add in the chopped pickles and stir. Mix the McDonald's Copycat Big Mac Sauce ingredients in a medium bowl and stir well.
 
Add 1 cup of the secret sauce to the pan, reserve the rest for your buns. Cook 1 additional minute then serve on hamburger buns (stacking order in notes below). 
 
Stacking order from the bottom up (if doing a double decker bun)
  1. Bun bottom
  2. Secret Sauce
  3. Lettuce
  4. American Cheese
  5. Meat
  6. Bun Bottom
  7. Secret Sauce
  8. Lettuce
  9. Pickles
  10. Meat
  11. Bun Top
 ***

Looking for other harvest - or summer - suppers? Here are a couple more tried and true recipes:


Sloppy Joe Grilled Cheese
 

Thursday, March 4, 2021

Tortellini Primavera


It's a sad state of affairs. Our freezer is dangerously close to running out of beef. When the pandemic hit last year and grocery stores were having trouble stocking essentials, consumers suddenly wanted to purchase beef and other meats from farmers and ranchers.
 
That's a great thing for the industry. But it created a new problem. Suddenly, producers were booking extra harvest dates for their animals at the small butcher shops. 
 
It pushed wait times for appointments to more than a year away. We called our processing plant a year ago. The first available date was September 2021!
 
While we normally would have butchered a couple of steers this spring, we are now waiting until September. I'm already out of our homegrown hamburger, and I've already gone through the first extra 20 pounds we purchased from Ellinwood Packing. 

So I've found some recipes that don't use my go-to freezer beef. This Tortellini Primavera was one we enjoyed. 

It's loaded with veggies. It also used up some frozen tri-color tortellini that had been hanging around in my freezer. So win-win!
 
If you have leftovers, add a splash of cream or milk. Pasta always absorbs liquid after it's refrigerated.  

Enjoy!
 
 
Tortellini Primavera
Adapted from The Pioneer Woman blog
 
2 tbsp. butter
1 small onion, finely diced
2 cloves garlic, minced (you can use jarred minced garlic)
3 whole carrots, peeled and diced
1 cup broccoli florets, rough chopped
1/2 cup chicken broth 
1/3 cup heavy cream
1/2 cup grated Parmesan cheese
Salt and pepper to taste
3/4 cup cooked ham, diced
1 cup frozen peas
1 pound cheese, spinach or tri-color tortellini
Extra Parmesan for serving

Cook tortellini a couple of minutes less than package directions call for. Drain and set aside.

Melt butter in a large skillet over medium-high heat. Add onion and garlic and cook for 1 minute. Add carrots and broccoli, stir and cook for another 2 minutes. Add chicken broth, and cook for another 2-3 minutes until the liquid reduces a bit. Stir in cream and 1/2 cup grated Parmesan and stir.

When the mixture is hot and a cream sauce has formed, stir in peas, ham, salt and pepper. Allow them to heat through. When the sauce is hot, stir in the tortellini. Check seasonings and add more salt and/or pepper, if needed. Allow the pasta to heat back up, then serve with extra Parmesan. Serves 6.

If you have leftovers, add a splash of cream or milk. Pasta always absorbs liquid after it's refrigerated.


Thursday, February 18, 2021

Biscuit & Gravy Bake


Does anyone else have a "to-be-tried" recipe pile? Don't tell Jill, but mine is in danger of an avalanche.

Jill likes recipes just as much as I do. She just isn't a fan of all my paper. I think she's envisioning having to clean out my house some day. She would much rather pull up the recipes on her phone or her laptop.

And, in the rush to get dinner on the table, I often ignore the burgeoning pile and make something I've already made a million times. (OK, probably not a million, but you get the idea.)

But every so often, I add to the pile anyway. As I'm scrolling through Facebook, something invariably looks tempting. And if it's shared by a Facebook friend, the temptation grows.


I delved into my "to-be-tried" recipe file recently and found a winner. (Thanks Julie Christie!) This Biscuit & Gravy Bake was a big hit with Randy. That's not a big surprise, since biscuits and gravy are often his choice on a restaurant breakfast menu. I liked it, too.

Though I initially made it for dinner (our 12 noon meal), it later became a rerun at breakfast for Randy. (The whole "dinner" vs. "lunch" vs. "supper" debate rages on with Jill's sibling.) But no matter the meal, Randy definitely wasn't complaining about leftovers. It really could be served morning, noon or night.

Whether you save this recipe by printing it out ... or pulling it up on your phone ... you won't be sorry you tried it! Enjoy!

Biscuit and Gravy Bake
Adapted from Tasty.com

12 oz. canister refrigerated biscuits
6 eggs
1/2 cup milk
1/4 tsp. pepper
1/2 tsp. salt
1 lb. browned sausage
1 cup shredded cheese

Gravy:
4 tbsp. butter
1/4 cup flour
Salt to taste
Pepper, to taste
2 cups milk

Cut each biscuit into 8 pieces. Set aside. 

In a bowl, mix the eggs, milk, pepper and salt. Set aside.

For the gravy, melt the butter in a skillet over medium heat. Stir in flour and seasonings and stir until well combined and bubbly. Slowly add the 2 cups of milk.  Increase to medium-high, bring to a simmer, stirring until gravy is thickened.

In a greased 9- by 13-inch glass baking dish, layer the biscuits, sausage, cheese, egg mixture and gravy.
Bake at 350°F for 35-45 min, until the eggs are cooked.
 
Serve with fresh fruit. 
 
Notes: 
  • Make sure your 9- by 13-inch pan is deep enough. I had some spillage in my oven.  Just beware!
  • If you are browning your sausage as you make the recipe, you could substitute sausage fat from the bottom of your skillet for some of the butter for the gravy. (I happened to have browned extra sausage at Thanksgiving as I was making my dressing and had it in the freezer, so I used the butter called for in the recipe.) 
  • You could certainly make your own biscuit dough if you have the time and inclination. The refrigerated biscuits were a fast alternative on a busy day.


Thursday, January 14, 2021

Pasta Alla Vodka

I'll admit it: I have often used prepared spaghetti sauce as a jumping off point for a quick meal. And, most of the time, it's an inexpensive canned sauce, not a name-brand jarred sauce. Sure, I add some seasonings, and I stir in browned ground beef. I may add some pepperoni, too, if I'm throwing together a quick cavatini. 

However, after Jill made a from-scratch version the last time we visited, I may be a changed woman.


Her homemade sauce was quick and easy and a whole lot tastier than my doctored-up prepared sauce. And it was still ready in 30 minutes or less. Win - win!

She often serves it meatless. But, because she knows her dad is a "meat-is-a-meal kind of guy," Eric grilled some chicken breasts to go with the pasta. I did the same when I re-created the recipe here at home. We both added a tossed salad. 

Jill says it reminds her of her favorite restaurant pasta sauce. Brooke prefers her pasta without sauce. Rigatoni pasta creates great finger jewelry for kindergarteners - just in case you wanted to know. The rest of us ate it with a fork. 

I've made it twice here at home since. One time, like Jill, I served it with grilled chicken. 
The next time, I added about 3/4 of a pound of already browned hamburger to the sauce. 
 
The original recipe called for 16 ounces of pasta. I decided I'd rather have it a little "saucier," so I decreased to about 12 ounces of dried pasta when I served it with the chicken. For my hamburger version, I used about 8 ounces of pasta so that there was plenty of sauce.
It's also important to save some of the pasta water as you drain the noodles. I've heard chefs say that on Food Network, but I hadn't necessarily followed suit. The need for this was confirmed this week with one of those random articles that your search engine promotes. I actually clicked on the one titled "36 Common Cooking Mistakes You Should Actually Ditch ASAP" from Buzzfeed. A few of the mistakes were related to pasta:
  • You undersalt the water: When adding pasta to boiling water, the pasta will absorb part of the water as it cooks. If you don't salt the water, the food will remain bland. But if you do, it'll be seasoned from within, which is a sure-fire way to achieve pasta greatness. If you're wondering how much salt you should add to the water, the answer is: more than you think! Italians will tell you it should be "as salty as the sea," and while that's a charming overstatement, it's not that far from the truth. Most of the salt you add will get lost in the water, so to make sure some of it gets in the pasta, you need to be generous.
  • When cooking pasta, you don't reserve any of the pasta water. Pasta cooking water is filled with starch — that will help bind the pasta and sauce together and make the sauce silkier. It's also already salted, making it more flavorful than basic water. So the next time you make pasta, save 1/2 a cup of cooking water that you can then use in the sauce. (This recipe says to save more, and I probably used more than 1/2 cup, but not nearly 2 cups.) 
  • You rinse pasta after draining it: Rinsing the pasta will strip it of its starch, which is something you need if you want to make your sauce super silky and yummy. The only times when it's fine to rinse pasta is if you're making pasta salad or using it in a stir-fry.
Bon appetit!
 
 Pasta Alla Vodka
Adapted from Delish.com
 
3 tbsp. butter
1 shallot or 1 small onion, minced
2 cloves, garlic, minced
1/2 cup tomato paste
2 tbsp. vodka
Salt to taste
8 to 12 ounces tubed pasta, such as penne or rigatoni
1/2 cup cream or half and half
1/2 cup freshly grated Parmesan (plus more for serving)
Fresh basil for serving (if available)
1/2 tsp. crushed red pepper flakes (opt.) 
 
In a large skillet over medium heat, melt butter. Add shallot or onion and garlic; cook, stirring frequently, until softened, 4 to 5 minutes.
 
Add tomato paste and red pepper flakes (if desired) and cook; stirring frequently, until paste has coated shallots and garlic and it's beginning to darken, 5 minutes. Don't burn.
 
Add vodka to pot and stir to incorporate, scraping up any browned bits from the bottom of the skillet. Turn off heat.
 
Bring a large pot of salted water to a boil. Cook pasta until al dente. (I used rigatoni.) Reserve 2 cups of pasta water before draining. 
 
Return sauce to medium heat and add 1/4 cup pasta water and cream, stirring to combine. Add half of the Parmesan and stir until melted. Turn off heat and stir in cooked pasta. Fold in remaining Parmesan, adding more pasta water - about a tablespoon at a time - if the sauce is looking dry. Season with salt, if needed. Serve topped with more Parmesan and torn basil leaves. If you don't have fresh basil, you can sprinkle in a little dried basil with the tomato paste, if desired. 

Notes:
  • We don't like spicy food, so I didn't use any red pepper flakes. I got this recipe from Jill after she served it to us. She didn't add red pepper flakes when serving to us. However, she and Eric added some at the table. 
  • The original recipe called for 16 ounces of pasta. I decided I'd rather have it a little "saucier," so I decreased to about 12 ounces of dried pasta when I served it with grilled chicken. When I added 3/4 pound of hamburger to the sauce, I used only 8 ounces of pasta.
  • As the recipe says, be sure and save some of the pasta water to "loosen" up the sauce. To reheat any leftover pasta, you may want to add another splash of cream. Pasta always needs a little help with moisture when it comes to leftovers, but the extras are tasty anyway!

Thursday, July 23, 2020

Baked Monte Cristo French Toast

Somehow, a chain restaurant didn't make the cut for Taste Atlas' Top 6 Monte Cristo sandwiches. I think Bennigan's in Wichita was the only place I ever personally tried this sandwich. (Bennigan's is no more in Wichita, so we're outta luck - at least, at that restaurant.)

A variation appeared on The County Line table when Jill's family visited during wheat harvest. The day before, I had prepared a spiral ham, so I knew I needed ways to use the extra meat. The Baked Monte Cristo French Toast recipe was in my "to-try" pile, so it was perfect timing to begin the day with a hearty breakfast. 

Taste Atlas describes it as: "an American sandwich consisting of two slices of white bread filled with a slice of cheese, ham and turkey or chicken meat. The combination is dipped in beaten eggs and fried in butter, resulting in a delicious, calorie-packed concoction that is crispy on the exterior while tender and custardy on the interior."

What's not to like, right?

That website says the first Monte Cristo was served in the 1950s in southern California, but some people claim that the sandwich is just a variation on the classic French Croque Monsieur.

What's Cooking America's website says the croque monsieur was originated in a Paris cafe in 1910 and consisted of Gruyere cheese and lean ham between two slices of crust-less bread, fried in clarified butter. This sandwich is still a popular snack or casual meal throughout France and Switzerland in most bars and cafes.

Many American cookbooks, published in the 1930s to 1960s, featured this sandwich under different names such as French Sandwich, Toasted Ham Sandwich and French Toasted Cheese Sandwich. Although there are no existing documents to support the claim, it is believed that the Monte Cristo Sandwich was first served in southern California in the 1950s.

Then, in 1966 at Disneyland in Anaheim, it appeared on their menu of the Blue Bayou and Tahitian Terrace restaurants in New Orleans Square and has continued to be a popular menu item to this day.
The recipe originator - Favorite Family Recipes - used a boysenberry syrup. I had blueberry syrup on hand, so we used that. You can also fruit jam - rather than syrup - for dipping.

Baked Monte Cristo French Toast
From Favorite Family Recipes
1 loaf French bread, cut into 1-inch slices
8 tbsp. whipped cream cheese
1/2 lb. deli black forest ham
1/2 lb. deli turkey
1/2 lb. Swiss cheese
4 eggs
1 cup milk
1/4 cup sugar
1/4 tsp. salt
1/4 tsp. cinnamon
1/4 cup butter, melted
Powdered sugar for dusting
Fruit syrup or jam

Place 7-8 slices of French bread in the baking dish, trying not to over-crowd and squish too much. Spread cream cheese over each slice of bread, then layer on ham, turkey, and Swiss cheese.
Top with remaining slices of French bread (making "sandwiches").

In a large bowl, beat together the eggs, milk, sugar, salt, and cinnamon. Pour over bread and let sit for 5 minutes. Turn bread over and cover pan with plastic wrap. Refrigerate at least 30 minutes or even overnight. (I refrigerated it overnight.)

Drizzle melted butter over the top and bake at 400 degrees for 25 to 30 minutes. Dust with sifted powdered sugar over the top. Serve immediately with syrup or jam.

I also served with fresh fruit.

***
If you're looking for a more savory way to use leftover ham, try this Ham & Cheese Quiche recipe.
Plantation Turkey is a favorite recipe from a contest sponsored by The Hutchinson News. Despite its name, it also uses diced ham. (I've gotten better at food photos since I took this photo in 2011; however, the recipe is one we usually have if there's leftover ham in the fridge.)