Showing posts with label cake. Show all posts

Tuesday, April 27, 2021

Microwave Mug Cake for a Zoom Celebration

My favorite flour company posted a photo of a mug cake recently. Hudson Cream Flour has a baking community on Facebook. Hudson Cream Flour is produced right in our home county - Stafford County, Kansas, by Stafford County Flour Mills. (We actually live on the Reno County side of the county line, but we identify as "Stafford County." That sounds like a buzz-worthy thing to say these days, don't you think?) You can become a member by checking out Hudson Cream Baking Community on Facebook.

Anyway, it reminded me that I had never posted a recipe of a microwave mug cake that was part of a 100-year-anniversary celebration for my Stafford PEO group.

On March 23, we celebrated 100 years of Chapter BK, PEO, an international organization that advocates for education for women, as well as other philanthropic endeavors.

I agreed to chair the anniversary committee. But with the regulations still in place for meetings due to Covid-19, we opted to have a Zoom party, rather than gather in person.

The 12 founders from 1921 would probably have been appalled. On their initiation day, the 12 Stafford ladies gathered for a formal meal, prepared by the Stafford High School home economics students. Then, for the chapter's 50th anniversary, the women had a luncheon at the Brown Tea Room in Stafford. The Golden Girls (the remaining 50-year members) arrived to the festivities in a limousine, chauffeured by one of the husbands. They had a meal of escalloped chicken, glazed carrots, creamed peas in timbale shells, perfection salad, rolls and lemon chiffon pie. (I had to look up "timbale." I'd never heard of it before, but it sounds fancy to me!)

I'm thinking that a microwave cake and a paper bag of party supplies would not have sufficed for the gentile ladies of yesteryear.  Of course, back in 1921, there were no microwaves anyway!


The committee members prepared "party packs" that were delivered to each members' front porch ahead of time. It included a commemorative mug in which to make the microwave cake, a cake "kit" (complete with candle), a craft kit to make a paper daisy, party hat, party blowers and a daisy napkin. (Our PEO flower is the marguerite - a daisy.)

I experimented with several recipes. Randy wasn't complaining. Eventually, I came up with one in which our committee could supply all the ingredients except for 1/4 cup of milk, which each member provided on her own.

My friend, Betty, packaged the dry ingredients into snack-sized plastic bags. She put the liquid ingredients in a 2-ounce plastic cup. I provided a 2-ounce container of prepared buttercream frosting, tinting it yellow and using a star-tip to swirl it for a "party" effect. (I thought I'd gotten a photo, but I guess not!) We added a small baggie with extra sprinkles and a candle to make it party-worthy!

This is one of the  pages from A Century of Sisterhood, a book I made to celebration the anniversary, and shows our Zoom party and mug cakes.

Then the ladies made their own cakes at home and ate them while I gave the program. 

I went through history books and other anniversary programs and ultimately did a 26-page book.

It included biographic information about each founder and photos when available. The book also had information from the 25-, 40-, 50- and 75-year anniversaries. I also included summaries about what the world was like at each of those milestone anniversaries, which occurred in 1921, 1946, 1971 and 1996.

This was from the silver anniversary and showed the remaining founders at that time.

This was a double-page spread from the 50th anniversary at the Brown Tea Room.

And here's a photo from the 40th birthday. Things were definitely more formal back in those days. They didn't plan a special event, yet look how dressed up they all were for a regular meeting!


As I said, I'm not sure our microwave cake would have passed inspection back in the day. But we 2021 ladies were surprised how good they were. (Of course, warm cake is good anytime. And the buttercream frosting certainly makes anything taste better!)

 
Microwave Mug Cake
for a Zoom Party
Put the following dry ingredients in a snack-sized bag:
1/4 cup plus 2 tablespoons flour
2 tablespoons sugar
1/4 tsp. baking powder
1/8 tsp. salt
1 tablespoon sprinkles

Put the following into a 2-ounce plastic cup with secure lid:
2 tablespoons canola oil
1/2 teaspoon vanilla
1/4 teaspoon almond flavoring
 
PARTYGOER WOULD NEED TO ADD:
1/4 cup milk
 
BEFORE THE PARTY:
1) Wash & dry your mug.
2) Have 1/4 cup milk available to use.
3) Have a match or lighter available to light the candle!

TO PREPARE MUG CAKE (We will do this during the party!):
1) Put measured (provided) dry ingredients in the provided mug.
2) Add plastic container of wet ingredients (provided.)
3) Add 1/4 cup milk. (YOU PROVIDE.)
4) Stir well with one of the forks, thoroughly combining wet & dry ingredients.
5) Place mug on a plate or paper towel in your microwave (just to catch any overflow).
6) Microwave 90 seconds. It WON'T look like a cake baked in the oven because it doesn't brown. But it should "spring back" like a "normal" cake. If it doesn't seem done, put back in for a few more seconds. However, don't overcook. It will continue baking after removing from MW.
7) It's hot! Use a potholder to remove.
8) Top with provided frosting, light the candle & ENJOY!
 
I also provided a 2-ounce container of prepared buttercream frosting in each partygoer's sack. We had 22 possible participants, so I used 1 1/2 times the recipe from Sally's Baking Addiction.
 
Vanilla Buttercream
Recipe and commentary from Sally's Baking Addiction blog
1 cup unsalted butter, softened to room temperature
4-5 cups powdered sugar
1/4 cup heavy cream, half and half or whole milk at room temp
1 tsp. pure vanilla extract
1 tsp. almond extract
Food coloring (as desired)

With a handheld or stand mixer fitted with a paddle attachment, beat the butter on medium speed until creamy, about 2 minutes. Add 4 and 1/2 cups confectioners’ sugar, the heavy cream, and extracts. Beat on low speed for 30 seconds, then increase to medium-high speed and beat for 2 full minutes. Taste. Add a pinch of salt if frosting is too sweet. I always add 1/8 teaspoon.

Adjust if needed: You can control the consistency at this point– add up to 1/2 cup more confectioners’ sugar if frosting is too thin or more heavy cream if frosting is too thick (add only 1 Tablespoon at a time, beat together, then taste and add more if desired).

Use immediately or cover tightly and store for up to 1 week in the refrigerator or up to 3 months in the freezer. After freezing, thaw in the refrigerator then beat the frosting on medium speed for a few seconds so it’s creamy again. After thawing or refrigerating, beating in a splash of heavy cream or milk will help thin the frosting out again, if needed.

  1. Quantity: This recipe is enough to frost 12-16 cupcakes or a thin layer on a 9×13 inch quarter sheet cake. Follow these ratios for a 2 layer cake and these ratios for a 3 layer cake.
  2. Confectioners’ Sugar: If your confectioners’ sugar is particularly lumpy, I recommend sifting it 1-2x before measuring and using.
  3. Heavy Cream: I love using heavy cream for the creamiest consistency. You can use half-and-half or whole milk instead if needed. The lower the fat, the less creamy your buttercream will be. Whichever you use, make sure it’s at room temperature. Otherwise your frosting could separate or appear grainy.

Thursday, May 16, 2019

Banana Caramel Coffee Cake

It could be argued that I buy too many bananas.

I am picky about the bananas I consume "as is." They need to have the perfect tinge of green. And if they start showing their age spots, they are no longer in the eat-as-is category. (I know I should be more tolerant of age spots these days. I certainly have my share.)

Randy is less picky than I am and will eat some of what I deem too far gone. Invariably, though, I end up with bananas languishing on my kitchen counter.

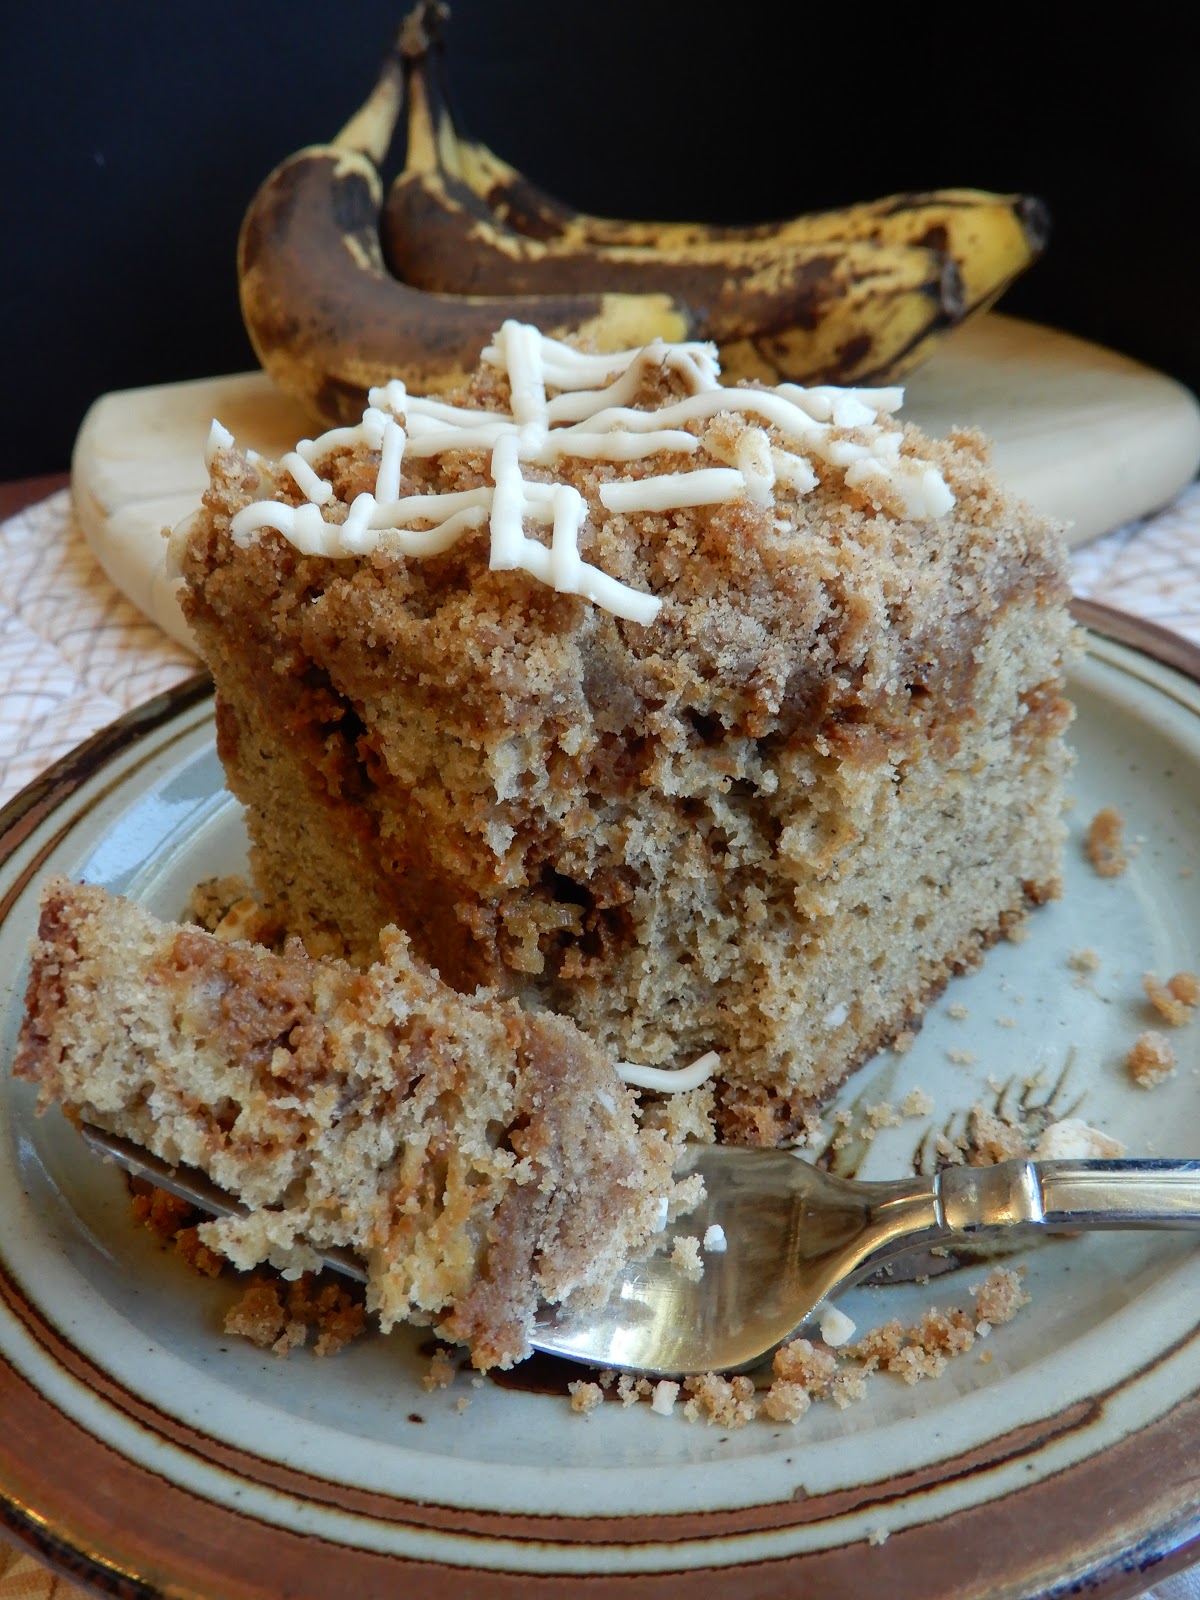
There is an upside: There's no shortage of ripe banana recipes in this world. And I tried a new one last weekend - Banana Caramel Coffee Cake. It was Mother's Day weekend, so a special breakfast treat only made sense, right? This one has several parts, which may seem daunting when looking at the recipe, but the combination of tender cake, tangy cream cheese caramel swirl, buttery crumb topping and glaze made for a yummy combination and was worth the extra steps to produce the finished coffee cake.

The swirl is made by canned dulce de leche, which can be found in many grocery stores near the sweetened condensed milk or in the Mexican food aisle.
 
With graduation ceremonies on the calendar for many this coming weekend, this recipe would be a perfect addition to a breakfast or brunch buffet to celebrate a graduate ... or the end of school ... or a lazy weekend morning ... or just any old day. Enjoy!
Banana Caramel Coffee Cake
For the Cake:
1/2 cup butter, softened
8 ounces cream cheese, softened
3/4 cup brown sugar
1/2 cup sugar
2 eggs
1 cup mashed ripe bananas
2 tsp. vanilla
2 1/4 cups flour
1 1/2 tsp. baking powder
1 tsp. baking soda
1/2 tsp. salt
1 tsp. cinnamon

For the Caramel Filling
1 14-ounce can dulce de leche
4 ounces cream cheese, softened

For the Crumb Topping
1 cup flour
1/2 cup brown sugar
2 tsp. cinnamon
6 tbsp. butter, softened

For the glaze
1 cup powdered sugar
5 teaspoons butter
Milk, as needed

Preheat oven to 350 degrees. Spray a 9- by 13-inch baking pan with nonstick spray. Set aside.

For cake: Beat the butter, cream cheese and sugars until creamy. Add the eggs, banana and vanilla and beat again. Mix together dry ingredients and add slowly to the creamed mixture. Spread in the prepared pan. The batter is fairly thick. Set aside.

For filling: Put dulce de leche into a microwave-safe bowl. Heat for 15 to 20 seconds or until slightly softened. Mix the cream cheese in until it is incorporated and creamy. Place big spoonfuls of the caramel mixture on top of the batter. Use a knife to swirl into batter evenly.

For crumb topping: Mix together all ingredients until big crumbs form. Sprinkle on top of cake. Bake for 55 minutes to 1 hour or until the cake tests done with a toothpick inserted in the center. Cool completely.

For glaze: Mix together powdered sugar and melted butter. Add milk, if necessary, to make glaze consistency. Drizzle over top of the cake and serve. Note: You can pour on the glaze while the cake is still hot or warm. It will provide a glaze, rather than the "ribbons" of frosting.

Friday, August 25, 2017

Confetti Cupcakes

"It takes a village."

I know there are people who don't like the phrase, since it seems indelibly linked to a certain female politician. But I think there's some value in the notion - no matter your political bent.

Sometimes, it requires a team effort to get things accomplished. So when my friend emailed and asked if I'd make cupcakes for a Back to School bash at our town's elementary school, I agreed right away.

It may have been awhile since I've had elementary-aged students living at my house, but I remember being that person who was looking for volunteers to make cookies or soup or cupcakes for an event or fundraiser. I remember making 10 phone calls to get that one "yes" from someone who'd help at Vacation Bible School. And back then, I vowed I'd never be that older person who said, "No, I've done my time. It's someone else's turn."

The assignment was easy. I could make any kind of cupcakes and frost them with a white frosting. The organizers would add a Superhero decoration later to go along with the school's theme for the year.

I decided it would be fun to make homemade confetti cupcakes, but I didn't have a recipe. Some of the options required separating eggs. I wasn't a fan of using 9 egg whites and then trying to find a use for the abandoned yolks. So when I saw this recipe that used whole eggs and could easily be multiplied, it moved to the top of the list.

It didn't disappoint. Since I volunteered to make 2 dozen, I knew I needed to double the original recipe. And then I figured I'd better triple it so that I'd have some to sample to make sure they were edible. It was a bonus for the guys' supper meal runs, too.

The recipe uses buttermilk and sour cream, making it nice and moist. I had a tube of "confetti sprinkles" in the cabinet. They were thin, round discs, and they seemed to work well. I mixed the sprinkles with a tablespoon of flour, trying to get them to stay distributed in the batter. They sank to the bottom a little, but they still provided a festive surprise when broken open. Since I multiplied the recipe, I didn't have triple the amount of sprinkles needed, so the confetti is a little sparser than ideal. But I still hope they were a fun surprise during the Back to School event!

I frosted the cupcakes with a homemade buttercream frosting. For the ones I took to the school, I left them plain. But if you're serving for a birthday party or other event, top the frosted cupcakes with additional sprinkles. 

I volunteered to make them for granddaughter Brooke's 3rd birthday party next weekend, which has a rainbow theme. Miss Brooke - who definitely knows her mind - wants a cake, not cupcakes. But this recipe can be used for either. Mommy is going to make the rainbow cake. I just need to bring some extra cake pans and some food coloring.

 Easy Homemade Confetti Cake or Cupcakes
Adapted from Averie Cooks blog
1 cup all-purpose flour
3/4 cup granulated sugar
2 tsp. baking powder
1/4 tsp. salt
1 large egg
1/2 cup buttermilk
1/3 cup sour cream
1/4 cup canola or vegetable oil
2 tsp. vanilla extract
1/2 cup sprinkles

Preheat oven to 350 degrees.

Measure flour. Remove 1 tablespoon of flour and mix with 1/2 cup sprinkles. Set aside. In a large bowl, whisk together remaining flour, granulated sugar, baking powder and salt; set aside.

In a separate bowl, whisk together egg, buttermilk, sour cream, oil and vanilla. Add the wet mixture to the dry, mixing until just combined. Don't overmix. Add sprinkles that have been mixed with 1 tablespoon of flour. Gently stir into cake batter.

This recipe makes 1 8-by-8-inch cake layer or 12 cupcakes. If making cake, use cooking spray before pouring batter into the pan or line with parchment or waxed paper, if you want to turn it out of the cake pan after baking.  If doing cupcakes, line tins with cupcake papers before pouring batter. Fill each cupcake tin about 2/3 full.

Bake 22 to 25 minutes or until toothpick inserted comes out clean. When done, place pan on wire rack to cool. Frost as desired and sprinkle with additional sprinkles.

NOTE:  This recipe can easily be doubled or tripled to make a full-size cake or additional cupcakes. 

Friday, November 6, 2015

Apple Sundae Cake with Apple Cider Caramel Sauce

Pumpkin passionless people are put in  a precarious pickle.

Come November, pumpkin takes centerstage on dessert plates far and wide. I, personally, like pumpkin just fine. But one of my sisters is not a fan.

So, when it's my turn to provide the dessert for a November women's group meeting, I buck the trend and turn away from pumpkin. Instead, my PEO sisters and their guests got Apple Sundae Cake with Apple Cider Caramel Sauce this week.

While I like pumpkin, I absolutely love Jonathan apples. Just like the ducks and geese who fly in for a momentary visit to our region each fall, the Jonathan apples return to the produce aisle each autumn. I buy them two bags at a time because you just never know when they will again fly from the store shelves.

I've made this Apple Sundae Cake for years and have always topped it with ice cream and caramel sauce. But this year, I found a new recipe for sauce made with apple cider. It gives it even more fall flavor. I topped the dessert with Blue Bunny's seasonal ice cream, Cinnamon Apple Pie, but you can also choose vanilla, butter brickle, caramel swirl ... you get the idea.

It got good reviews at PEO. Hope it gets good reviews at your table, too!
 
 Apple Sundae Cake
Adapted from the kitchen of Lori Fiscus
5 cups chopped apples (I prefer Jonathan or McIntosh)
1/4 cup sugar
2 tsp. cinnamon
1/2 cup vegetable oil
2 eggs, beaten
1 tsp. vanilla
2 cups flour
1 1/2 cups sugar
2 tsp. baking powder
1 tsp. salt
1 cup chopped pecans
Caramel Sauce (see below)

Heat oven to 350 degrees. Combine chopped apples, 1/4 cup sugar and cinnamon, mixing well. Set aside for 10 minutes. Stir oil, eggs and vanilla into apples, mixing well. Combine dry ingredients in separate bowl, mixing well. Stir in pecans. Add to apple mixture, mixing until well combined. Batter will be stiff.

Spread in lightly greased 13- by 9-inch pan. Bake 45-55 minutes (depending on your oven) or until it tests done.

Serve with ice cream and caramel sauce.

Apple Cider Caramel Sauce
From Cookies and Cups blog
1 cup apple cider
1 cup light brown sugar
1/2 cup salted butter, cut into cubes (room temperature)
1/4 cup heavy cream
1/8 tsp. ground cinnamon
1/4 tsp. salt
1/2 tsp. vanilla

In a heavy-bottomed cooking pot, heat apple cider over medium heat until it comes to a boil. Continue to boil cider for 12 to 13 minutes or until the liquid is reduced to 1/4 cup, stirring only occasionally.

Add in the sugar, butter, cream, cinnamon and salt and stir until combined. Bring the mixture back to a boil and boil for 2 1/2 minutes. Remove from heat and stir in vanilla.

Allow the sauce to cool slightly before using. (When serving for a ladies' group or holiday gathering, I like to heat up the sauce in a small crock pot.) If you're at a location where you can warm the cake, that's great. But having the warm sauce to spoon over the cake warms each serving - at least, a little bit!

***
Today, I'm linked to Weekend Potluck. Thanks to these hostesses. Check out the recipes that others are sharing:

Friday, May 1, 2015

Cream of Coconut Cake

I'm not sure whether a coconut dessert has a place at the table for a Cinco de Mayo celebration. (And Cinco de Mayo, coming up on May 5, seems to be the current theme among food bloggers these days.)

But this Cream of Coconut Cake had good reviews at a church potluck dinner last weekend. And, since my husband is a coconut fan, it also got good reviews for leftovers consumed at home. 

When people ask for a recipe, I always feel a little guilty when it starts with a cake mix. But this one is doctored up with some extras, like pudding and coconut. And who can really argue with easy?

It's essentially a poke cake:  When it comes out of the oven, you use a fork and jab it like a maniac on one of those detective TV shows. Then, for even more subtle coconut flavor, pour cream of coconut over the cake. Cream of coconut can be found where you'd find ingredients for mixed drinks. It doesn't have any alcohol. It just has the tropical flavor. A word to the wise: This isn't coconut milk, so keep looking if that's what you find. It's a syrupy concoction that oozes over the cake and gives it delicious moistness. The bottle I found was 21 ounces, but this isn't an exact science. Don't make yourself crazy looking for that exact amount. If it's an ounce more or less, it's still going to work just fine.

Once the cake has completely cooled, top it with Cool Whip. Or make your own sweetened whipped cream from scratch if you're feeling all virtuous. (I wasn't.) Sprinkle with toasted coconut to make it pretty and add a little more flavor and texture.

So, whether for Cinco de Mayo or for a church potluck or to satisfy your coconut craving, this recipe will be the "cream" of the crop.
Cream of Coconut Cake
1 pkg. yellow cake mix
1 pkg. French vanilla pudding mix
4 eggs
1/4 cup oil
1 1/3 cups water
1 1/3 cups flaked coconut
**
1 21-oz. bottle of cream of coconut (not coconut milk)
1 tub Cool Whip
1 cup coconut, toasted

In a mixer, combine eggs, oil and water and blend until well mixed. Add cake mix and pudding mix. Blend until smooth. Add flaked coconut. Pour into 9- by 13-inch pan which has been sprayed with baking spray. Bake at 350 degrees for 25-30 minutes, until a toothpick inserted in the center comes out clean.

Remove the cake from the oven. Using a fork, poke holes all over the cake. Pour the cream of coconut over the cake. Put in the refrigerator to cool. When the cake is fully cool, spread Cool Whip over the cake. Sprinkle with toasted coconut to garnish.

Keep refrigerated until serving and refrigerate all leftovers. 

Friday, January 16, 2015

Banana Sheet Cake

Just like everyone else, I have a chocolate sheet cake recipe. Sometimes I make it with cinnamon and sometimes not.

I also have these sheet cake versions: strawberry, coconut, pumpkin, peanut butter and white.

But there was nary a banana sheet cake recipe to be found in my extensive arsenal of tried-and-true church and community cookbooks. I called my Mom. She didn't have one either.

So, with a hefty pile of ripe bananas on my counter and a need to make a sheet cake for a funeral dinner, I turned to Google. After looking at several options, I chose one that had sour cream, which always makes a moist, flavorful cake.

The resulting cake got good reviews from kitchen workers at the church and from my husband. The banana icing recipe (which I did have in my recipe files) got even more thumbs up. It includes mashed-up, ripe bananas for even more banana flavor.

Next time, I'll have this tried-and-true recipe ready to go. Now you can, too!

Banana Sheet Cake
2 cups sugar
3/4 cup butter, softened to room temperature
2 eggs
1 tsp. vanilla extract
1/2 tsp. banana extract (opt.)
3 cups flour
1 tsp. salt
1 1/2 tsp. baking powder
1 1/2 tsp. baking soda
1/2 cup milk
1 8-oz. container sour cream
3-4 ripe mashed bananas (about 1 1/2 cups)

Banana Frosting
1/2 cup butter, softened
1/2 cup mashed ripe bananas
1 tsp. lemon juice
1/2 tsp. vanilla
1/2 tsp. banana or coconut extract
4 cups powdered sugar
1 tbsp. milk or cream (or more to make frosting of the proper consistency)

Cake:
Cream together sugar and butter until well incorporated. Add vanilla and eggs, beating well after each addition of an egg. In a separate bowl, combine dry ingredients. Combine milk, sour cream and mashed bananas in another bowl. Beginning and ending with the wet ingredients, add about 1/3 of the milk mixture to the creamed mixture, then 1/3 of the dry ingredients, combining well after each addition. Continue until all the wet and dry ingredients are incorporated, ending with the wet.

Spray sheet pan with nonstick baking spray. Pour batter into pan. Bake in 350-degree, preheated oven for 25-30 minutes. It is done when a toothpick inserted into the center comes out clean. Cool cake completely and then frost with Banana Frosting.

Frosting:
Combine all ingredients in mixing bowl. Add additional milk or cream if needed for proper spreading consistency. (Or, if too wet, add a little additional powdered sugar.)

Note:  I didn't have banana extract, which was called for in the recipe. Instead, I substituted coconut extract. But you could just use vanilla. 

Monday, November 24, 2014

The Anti-Pumpkin Movement: Pear Cake

My homegrown pears may not look as blemish-free and beautiful as their grocery store cousins. But, like people, there's beauty on the inside, even if the outer package isn't perfectly airbrushed.
Our pear trees were laden with fruit this summer. After doing some online research, we picked them and put them in our extra refrigerator in the basement. We've been pulling a few at a time and eating them plain. I've also used them in Waldorf-style salads and Autumn Chopped Salad. Just yesterday, I chopped some up to put on our waffles for our after-church Sunday lunch.

When I needed to provide refreshments for PEO this month, I decided to look for a Pear Cake recipe. In November, pumpkin seems to be the fruit of choice for club meeting desserts.

But I have a sister who doesn't like pumpkin. So, with her in mind, I opted for the pear cake. I topped it with a scoop of cinnamon ice cream and a Caramel Sauce I've been using since Lori Fiscus first served it at a Nu Lambda meeting years ago. But the cake is also yummy just served plain.

I must admit that I ended up making the cake twice. The first time, I put it in a tube pan because I thought it would make prettier slices for the PEO refreshments. I sprayed it with non-stick cooking spray, but I must have not sprayed it well enough because bits of the cake stayed in the pan.

I probably could have "cut" around and come up with enough pretty slices. However, my perfectionist tendencies overtook my common sense. I made the second version in a 9- by 13-inch pan. Since the PEO meeting and our UMW Bazaar were the same day, I didn't want to make the cake a third time.

The moral of the story? If you are using a tube or Bundt pan, spray your pan well with cooking spray. Perhaps even dust it with a little flour to make sure it comes out of the pan. And the 9- by 13-inch pan works fine, too, and the cake is pretty enough to serve to the ladies, especially when dressed up with ice cream and caramel sauce. (Of course, everything is better with caramel sauce!)

The good part of making the cake twice? I still have some cake in the freezer, which we can pull out for Thanksgiving or another gathering.
Fresh Pear Cake
Adapted from Food.Com
2 cups sugar
1 1/2 cups vegetable oil
3 eggs
1 tsp. pure vanilla extract
3 cups all-purpose flour
1 1/2 tsp. baking soda
1 tsp. salt
1 tsp. cinnamon
1 tsp. pumpkin pie spice
1/2 tsp. cloves
3 cups pears, peeled, cored and diced

Preheat oven to 350 degrees. Grease and flour a 10-inch Bundt pan or tube pan. Combine sugar and oil, mixing well. Add eggs and vanilla; mixing well. Mix together flour, baking soda, salt and spices and add to sugar mixture. Add diced pears. It is a thick batter. Put into a prepared pan and bake for 1 to  1 1/4 hours or until done (depending on your oven).

Note:  I made it the first time in a tube pan because I wanted prettier slices for PEO refreshments. However, part stuck in the pan. So, I made it in a 13- by 9-inch pan because I didn't have time to make it a third time!

Caramel Sauce
(From Lori Fiscus)
1/2 cup sugar
1/2 cup brown sugar
2 tbsp. flour
1 cup whipping cream
1/4 cup softened butter
2 tsp. vanilla

Combine sugars and flour in a saucepan. Add whipping cream. Bring to a boil, stirring. Simmer for 3 minutes. Remove from heat and beat in butter and vanilla. Makes 2 cups.

Serve cake with warm caramel sauce and cinnamon or vanilla ice cream, if desired.

Wednesday, February 6, 2013

A Tasty Valentine


My Valentine doesn't care much about cards. Unlike me, a sappy card doesn't seem to pull at his heartstrings.

"The way to a man's heart is through his stomach."

Yep, that sounds about right, at least around these parts.

This recipe for Decadent Glazed Chocolate Torte is from Artfully Done Across the Generations: Recipes of Carlene Banks and Friends with Art from the Wichita Art Museum. Besides tasty recipes, there are lots of photos of the artwork on display at the museum. One of my friends surprised me with this beautiful book several years ago, and I've enjoyed using it ever since.

In honor of Valentine's Day, I made the torte in a heart-shaped pan. A Valentine you can eat ... that's the preferred method to celebrate around here.

Decadent Glazed Chocolate Torte
1/2 cup butter
1/2 cup light corn syrup
1 cup semi-sweet chocolate chips
1/2 cup sugar
3 eggs
1 cup flour
1 cup chopped walnuts (you may substitute pecans, if you prefer)
1 tsp. vanilla extract

Glaze:
1/2 cup chocolate chips
2 tbsp. butter
1 tbsp. corn syrup
1 tsp. vanilla extract
White chocolate or almond bark (opt.)

Preheat oven to 350 degrees. Melt butter and corn syrup in the microwave. Stir in chocolate chips until melted and smooth (If you need to, you can heat in the microwave again at 70 percent power, taking care not to burn the chocolate.)

Add sugar and eggs to chocolate mixture, and stir until well blended. Stir in flour, nuts and vanilla, mixing well.

Bake in a 9-inch buttered, floured, wax paper-lined cake pan for 35 to 40 minutes or until center springs back to touch. Cool in pan for 10 minutes. Loosen and turn out onto wire rack.

Glaze: Prepare glaze by melting all ingredients in the microwave, heating at 70 percent power at 1-minute intervals until it's melted. Take care not to burn the chocolate.

Place a piece of waxed paper under the wire rack. Pour the warm glaze over the cake and spread with a spatula. Chill about 1 hour before transferring to serving dish. Torte freezes well glazed.

If desired, melt white chocolate or almond bark and drizzle over glazed torte with a decorator's tube.

Makes 8 to 10 servings.

***

Some recipe notes, complete with photos:

When I'm making a layer-type cake like this one, I always line the bottom of the cake pan with waxed paper cut to fit. This is a step I added to the original recipe. For Valentine's Day, the Sweetheart Auction at church or other special events, I often use a heart-shaped pan.

I tore off a piece of waxed paper and then used a pen to trace around the cake pan. Then I used scissors to cut it out.

I put the heart-shaped waxed paper on the bottom of the cake pan before pouring the batter in. I had sprayed the pan with cooking spray before putting the waxed paper in.


This is how it looked in the pan after baking. It is supposed to cool 10 minutes before attempting to remove it.
Even with the waxed paper and going around the outside of the cake pan with a knife, I had a little trouble getting the cake to release. I ended up sticking a small spatula underneath the corner of the cake. That finally did the trick.

But I probably should have dusted the pan with cocoa powder as well (I prefer that over flour if I'm making a chocolate cake.)

After you get the cake out of the pan, simply peel the waxed paper off the bottom.

I put the torte over a waxed paper-covered cookie sheet to catch the drips from the glaze.

After it cooled, I used a decorator tube to make the design. I should have tried harder at the sides so that it would look neater.

But, then again, no one complained about the sides that were less than perfect after they got a taste of the torte.

Enjoy with a cup of coffee.

Or enjoy some of these Valentine treats:


***
I'm linked today to Ashley's What's in Your Kitchen Wednesday? Ashley is a Wichita blogger who writes at Kitchen Meets Girl. You'll want to check out what other food bloggers are sharing today.

Friday, January 4, 2013

Let Her Eat Cake!

Kinley's Mommy let her eat cake last Sunday. It was a special occasion, after all. Instead of ordering cake from a bakery, Jill made all the cupcakes and the "smash" cake for Kinley's special day herself. For the uninitiated, this generation of parents hands over a small cake and lets the birthday celebrant smash the cake.

In Kinley's case, it was more a "smoosh" cake. She smooshed the frosting between her fingers and sampled a little bit. But she was much more intent about removing the pretty pink and yellow candy circular discs from the cake.
When all was said and done, I'm not sure Jill thought it was worth the effort. But it did make for a cute cake and added to the celebratory decor.
Jill also made a banner using all of Kinley's monthly photos. Brent told Jill that the 30th of the month was his favorite day to check Facebook, since Jill always posted the monthly photo there. With all the photos in a row, we got to see the miraculous changes that happen in just one year from baby to toddler.
Jill also made a garland using additional cupcake liners, which she hung on their fireplace. You can kind of see it in the background behind Kinley. All this was besides making a baked potato bar lunch, complete with multiple salads, and cleaning house.
While Kinley's reaction to the cake may not have met her Mommy's expectations, the rest of us devoured our portions. Jill made both white cake and marble cake. Neither she or I thought the marble cake was worth sharing. But the White Wedding Cake Cupcakes were good.

As Jill said, she is perfectly capable of making white cake from scratch. She has the purple ribbons from the Stafford County Fair to prove it. But this recipe has enough add-ins to make it taste like a from scratch cake. And when you have a toddler with a temperature who wants Mommy and a bunch of people coming to dinner, you take all the help you can get.

White Wedding Cake Cupcakes
1 (18.25 ounce) box white cake mix
1 cup all-purpose flour
1 cup granulated white sugar
3/4 teaspoon salt
1 1/3 cups water
2 tbsp. vegetable or canola oil
1 tsp. vanilla extract
1 tsp. almond extract
1 cup regular sour cream
4 large egg whites

Preheat oven to 325°F. Place cupcake liners in cupcake pans (you'll need approx. 36).

In a large bowl, whisk together cake mix, flour, sugar and salt. Add remaining ingredients and beat with mixer for 2 minutes, or until well blended. Use ice cream scoop to fill prepared cupcake tins, filling about 3/4 full. Bake about 18 minutes, or until toothpick inserted in center comes out clean.

Note:  This recipe originally came from recipegirl.com.  As she indicated,  most food companies have downsized their cake mixes. Some of her readers made the recipe as indicated using the smaller size mix and still had great success. Others bought a second mix and added in the missing ounces to the first box. Jill just used one mix. It turned out fine.

You can also use this recipe to make cake. Pour into greased and floured cake pans. Bake until toothpick inserted in center comes out clean.

Quick Vanilla Buttercream
Recipe from Food Network
3 cups confectioners' sugar
1 cup butter
1 tsp. vanilla or almond extract
1 to 2 tbsp. whipping cream

In a standing mixer fitted with a whisk, mix together sugar and butter. Mix on low speed until well blended and then increase speed to medium and beat for another 3 minutes.

Add vanilla (or almond) and cream and continue to beat on medium speed for 1 minute more, adding more cream if needed for spreading consistency.

Notes: The love of almond flavoring must be genetic. My mom loves almond flavoring in frosting. So do I. I passed that love along to my daughter. We're already starting the process to expose Kinley to the superiority of almond flavoring to enhance white cake.

Jill used a chocolate buttercream to frost the marble cake. The frosting was better than the cake.
Chocolate Buttercream Frosting
Recipe from Savory Sweet Life
1 cup butter, softened (but not melted!)
3 1/2 cups powdered sugar
1/2 cup cocoa powder
1/2 tsp. table salt
2 tsp. vanilla extract or 1 teaspoon almond extract
4 tbsp. milk or heavy cream
Cream butter for a few minutes in a mixer with the paddle attachment on medium speed. Turn off the mixer. Sift 3 cups powdered sugar and cocoa into the mixing bowl. Turn your mixer on the lowest speed (so the dry ingredients do not blow everywhere) until the sugar and cocoa are absorbed by the butter. Increase mixer speed to medium and add vanilla extract, salt, and milk/cream and beat for 3 minutes. If your frosting needs a more stiff consistency, add a little more sugar. If your frosting needs to be thinned out, add additional milk, 1 tablespoon at a time.

Friday, November 2, 2012

The Tradition Continues

Tradition can get you in hot water. It can also be as soothing as a hot "bath." It's that delicate balance that's the tricky part.

Sometimes people look at tradition as an impediment to change. We get comfortable in our old, comfy shoes, and we don't care if they make us look dumpy. We know a new pair would give our whole look an update, but they might squeeze our toes.

But tradition can also be a way to build the future, while honoring the past. Since 1923, the women of the Stafford United Methodist Church have organized some kind of fundraiser to support church missions. The first fundraisers were banquets, since the church basement was one of the larger places in town. Nobody seems to know when the annual bazaar started, but it's been more than 30 years (since I've been around that long)!

It's pretty amazing when you think about it: For nearly 90 years, United Methodist Women (and some men these days) have worked together to accomplish a common goal.

One of those long-time traditions is UMW Apple Butter. At the end of September, we again got together to make apple butter flavored with red hots.

When I first joined the workdays in the UMW kitchen many years ago, we started the process from scratch. We peeled apples and cooked them down to applesauce. Then we turned it into the brightly-colored spread.
But as lives have gotten busier and there are fewer helping hands, we now start with canned applesauce. I'm sure it was a hard transition to make for people who've been doing it the other way for decades.

But, in the long run, I don't think people can tell the difference. It's still our red-hot colored, cinnamon-flavored spread.

There are other changes to the bazaar. We don't have the "treasure" room or the used clothing room anymore. But we will still have some of those hallmarks that make the bazaar the bazaar - like apple butter, frozen apple pies and chicken & noodles.

If you come to the Stafford UMW bazaar on Election Day, November 6, from 9 AM to 2 PM, you'll still see tradition. It might even be wearing new shoes.

Note: This blog post is reprinted from last year (with a few minor updates). Besides two days of cattle duties, I've been making quick breads and cookies for the bazaar. Today, it's cinnamon rolls and crescent rolls! Thus, here's a re-run. Have a wonderful weekend! We will. Kinley is coming to the farm, along with her parents, of course.

***

I always have to pick up a few jars of apple butter so that I can make one of our favorite coffeecakes. Jill wants me to get some for her this year, so she can make it, too. Enjoy!
Apple Butter Coffee Cake
1/2 cup butter
1 cup sugar
2 eggs
2 cups flour
1 tsp. soda
1 tsp. baking powder
1 cup apple butter
1 cup dairy sour cream
1 tsp. vanilla
Topping (see below)

Cream butter and sugar. Add eggs and beat well. Mix dry ingredients together, and add alternately with sour cream. Add vanilla and apple butter. Put half the batter into a greased 13- by 9-inch pan. Sprinkle with topping. Place other half on batter on top and sprinkle with rest of the topping. Bake at 350 degrees for 45-50 minutes or until toothpick inserted comes out clean.

Topping
1/3 cup flour
2 tbsp. butter
1 tsp. cinnamon
3/4 cup brown sugar
3/4 cup chopped nuts
1/2 tsp. nutmeg

Combine all ingredients and sprinkle over batter.

If you want a "fancier" presentation, you may put this is a Bundt or tube pan. I usually put half the batter into the pan and sprinkle with half the topping. Then I use the rest of the batter and sprinkle on the remaining topping. Let the cake cool in the pan for 10 minutes before removing onto a pretty serving platter.

I usually glaze the coffee cake with a thin frosting made of melted butter, powdered sugar, vanilla and a little milk. This time, I made a brown sugar icing by melting butter and brown sugar together until the sugar was dissolved. Then add powdered sugar, vanilla and milk to make a frosting glaze.

If you're making a Bundt or tube cake, drizzle the frosting in "swags," creating a decorative pattern. You will need to wait for it to cool a little before frosting, so the frosting stays in place and doesn't puddle on the plate.

When I use the extra large tube pan (the cake pictured above), I make 1 1/2 recipes to fill it. 

When I make this recipe, I use the UMW Apple Butter. The red hot cinnamon candies in the recipe give our version the distinctive pink color. But you may use any apple butter. It just might not have that lovely pink tinge.


Monday, September 19, 2011

Eating: The Newest Spectator Sport

Have you ever had people intently watching you eat? It's a little disconcerting. Is there a smear of chocolate on my lip? Has my smile become obscured with chocolate frosting?

With rides on the midway and beautifully crafted quilts just steps away, you'd think people would have better things to do than watch a couple of home economists eat cake. But food judging is a spectator sport every year in the Domestic Arts Building at the Kansas State Fair.

I got to judge the C&H Chocolate Cake special contest at this year's Kansas State Fair, along with fellow judge Lois Schlichau. I try to keep my glances toward the crowd at a minimum. I'm not the best at keeping a poker face. (That's probably not the best quality for a judge.)

Wendy Rowe was one of the observers intently watching our every move. Her husband Jimmy was so nervous he didn't sit down the whole time. But the wait was worth it for Wendy, whose Dark Chocolate Cake with Raspberry Filling took home the second prize the special contest.

It was a tough choice, and Wendy's cake was definitely in contention for the top prize. Like the first-place winner, she had added some elements to her chocolate cake and filling to make it stand out in the crowd.

She says she's trying to build a cake business, so getting a nod from judges at the state fair is another building block toward her goal. Jimmy is her best PR guy. At his job at Siemens Wind Energy, he's helping her build a client base of customers.

Someday, Wendy would like to open a storefront bakery. For now, she bakes to relax after long days as an assistant manager at Sirloin Stockade in Hutchinson.

If you're looking for something special, try Wendy's cake. Enjoy!


Dark Chocolate Cake
2 cups C&H sugar
1 3/4 cups all-purpose flour
3/4 cup dark cocoa
1 1/2 tsp. baking powder
1 1/2 tsp. baking soda
1 tsp. salt
2 eggs
1 cup milk
1/2 cup vegetable oil
2 tsp. vanilla
1 cup boiling water

Heat oven to 350 degrees. Grease and flour three 9-inch-round pans. Stir together sugar, flour, cocoa, baking powder, baking soda and salt in large bowl. Add eggs, milk, oil and vanilla; beat on medium speed of electric mixer 2 minutes. Stir in boiling water (batter will be thin). Pour batter into prepared pans.

Bake 30 to 35 minutes for round pans or until wooden pick inserted in center comes out clean. Cool 10 minutes; remove from pans to wire racks. Cool completely.

Raspberry Filling
1 8-oz. whipped cream
1 8-oz. pkg. raspberry gelatin

Combine gelatin and whipped cream. Mix until evenly blended. Refrigerate until ready to use.

Chocolate Buttercream Frosting
1/2 cup butter
1/2 cup shortening
1 tsp. vanilla
1 tsp. raspberry extract
1 lb. C & H powdered sugar
1 tbsp. milk
3/4 cup dark cocoa

Cream together butter and shortening. Add vanilla and mix well. Slowly add powdered sugar and cocoa. Continue to blend all ingredients until well mixed. Add milk as needed until icing is smooth and creamy.

To assemble: Put one layer on the serving platter. Top with half the raspberry cream. Top with next cake layer and the rest of the raspberry cream. Top with third cake layer. Cover all with Chocolate Buttercream Frosting. Pipe design and decorate with washed, well-drained raspberries, if desired.

Note: If I were making this cake, I wouldn't use the raspberry flavoring in the frosting.

Tuesday, September 13, 2011

It's a Tough Job ...

It's a tough job, but someone has to do it. I realize that judging scrumptious chocolate cakes doesn't sound like a daunting task. The tasting part is certainly easy enough. It's just picking the winner that's the trouble.

Fellow judge Lois Schlickau and I chose the winners in the Kansas State Fair C&H Sugar Chocolate Cake contest last Friday. I'm glad there weren't more than seven cakes. It would have made the decision even more difficult.

Denise Pounds of Hutchinson had the winning combination of yummy cake and unusual frosting. She is a perennial fair entrant. She wasn't at the judging to bask in her "crowning" with the first-place ribbon. (The third-place winner was a 15-year-old girl, so there's a wide range of people participating - from experienced fair entrant to novice!)

In a nationally-sponsored contest, I think judges are looking for something a bit unusual and not just a standard chocolate cake. The espresso powder in the cake enhanced the chocolate taste without overpowering it. Using C&H brown sugar in a meringue-style buttercream frosting was an unusual and tasty choice, which set Denise's cake apart from others.

Your mom told you not to judge a book by its cover. Same goes for state fair food contests. The contest isn't solely about outward appearance. In fact, that only counts 10 percent. (Scoring criteria for the cake is 40 percent aroma and flavor and 25 percent each for texture and grain. The frosting is split down the middle with consistency and flavor.)

Randy is eventually hoping for a taste test of his own on this cake. (OK, he'd be happy tasting any of these beautiful cakes! More recipes to follow ...)

Mocha Almond Toffee Cake

Cake:

18 tbsp. unsalted butter, softened but still cool
1 3/4 cups plus 2 tbsp. C&H granulated sugar
3 large eggs at room temperature
2 cups & 2 tbsp. cake flour, plus more for dusting pans
1 1/4 tsp. baking soda
3/4 tsp. salt
3/4 cup dutched cocoa powder
2 tsp. espresso powder
1 cup milk
3/4 cup buttermilk
1 tbsp. pure vanilla extract
1 tsp. pure almond extract

Filling
3/4 cup Heath English Toffee baking bits, divided

Garnish
1 1/4 cups sliced almonds

Preheat oven to 350 degrees. Generously grease and flour three, 8-inch cake pans (Denise used square pans). Beat the butter at medium-high speed until smooth and shiny, about 30 seconds. Gradually sprinkle in sugar; beat until the mixture is fluffy and almost white, approximately 3 to 5 minutes. Add the eggs, 1 at a time, beating 1 full minute after each addition.

Whisk together the dry ingredients. Combine the milk, buttermilk and flavorings in a separate measuring cup. With the mixer at the lowest speed, add about a third of the dry ingredients followed by a third of the milk mixture; continue until all the ingredients are incorporated. Scrape sides of bowl and mix 15 seconds longer until the batter is satiny.

Divide into 3 pans. Spread the top smooth. Bake for 23-30 minutes. Check for doneness with a toothpick or when cake springs back in the center when pressed lightly. Let cakes cool in the pans for 10 minutes. Loosen sides from the pans and invert on wire racks to cool completely.

Brown Sugar Swiss Meringue Buttercream
5 large egg whites
1 2/3 cups packed C&H dark brown sugar
1/4 tsp. salt
2 cups unsalted butter, room temperature

Put egg whites, sugar and salt into a heatproof bowl set over a pan of simmering water. Whisk until mixture registers 160 degrees, about 4 minutes.

Beat on high speed until stiff, glossy peaks form, about 6 minutes. Reduce speed to medium-low. Add butter, 2 tablespoons at a time, beating after each addition. (Meringue will deflate slightly as butter is added.) Beat until frosting is smooth and glossy, 3 to 5 minutes.

Assemble the cake:
Put the first layer on a serving platter or cake stand. Spread some frosting on the first layer. Sprinkle with half the toffee chips. Top with second layer of the cake. Put on additional frosting. Sprinkle with the rest of the toffee chips. Top with final layer of the cake. Spread remaining frosting over the top and sides of the cake, gently swirling on top.

Garnish: Toast almond slices in 350-degree oven for 8 to 10 minutes or until they are just starting to brown. Cool completely. Carefully push the almonds onto the sides of the cake.