Showing posts with label quick bread. Show all posts

Thursday, March 17, 2022

Top O' the Mornin'


Top o' the mornin' to you! This is your friendly reminder that today is St. Patrick's Day. A lot of elementary school students will avoid the inevitable pinch for forgetting their green today, since many are on spring break this week.

My childhood breakfast table was usually the site of my first pinch of the day, back in my elementary school days. Unless I searched my pajama wardrobe or underwear drawer for a hint of green among floral prints as I went to bed on March 16, I could usually count on one of my siblings to provide the first pinch of the day as we consumed our bowl of Lucky Charms. (It may have been Frosted Flakes or Sugar Smacks or Apple Jacks cereal, but those don't sound as leprechaun-inspired, do they?)

Today's recipe calls for a "pinch" of a different kind - or, more accurately - a measured amount of baking soda. Irish Bread is one of the hallmarks from the Emerald Isle. It's a quick bread that uses soda, rather than yeast, for leavening.

However, the website www.myrecipes.com says that the Irish bakers weren't the first cooks to use soda to leaven bread. American Indians first used pearl ash—a natural form of soda created from the ashes of wood—to leaven their breads without the presence of yeast. However, it wasn’t until this process was later discovered and replicated by the Irish that it earned a reputation worldwide. 

Irish Soda Bread was first created in the late 1830s, when the first iteration of baking soda—or bicarbonate soda—was introduced to the United Kingdom. The first versions were created out of necessity. Irish cooks were having trouble finding quality flour, since Ireland's climate raises a lower-gluten variety of wheat than we're known for here in the heart of Kansas. The soda was added to other basic ingredients, like the “soft” wheat flour,  salt, and soured milk.

At the time, many lower-class and farmhouse kitchens lacked ovens, so the bread was cooked in iron pots or on griddles over open hearths. This cooking method resulted in the signature dense texture, hard crust, and slight sourness that's characteristic for soda bread. The unique texture of this bread is the result of a reaction between acid and baking soda that results in the formation of small bubbles of carbon dioxide within the dough. Sour milk was most commonly used in the early days of the bread’s history, thanks to its high acidity levels, but now buttermilk is typically used in its place.

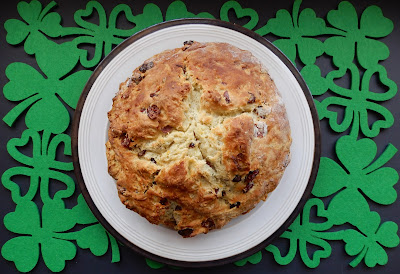
The bread traditionally has a cross cut into the top before baking. 

Other fun St. Patrick Day ideas, especially for kids:

  • Take 2 refrigerated biscuits per child and tear each in half. Place three of the pieces together to form a shamrock and use the other one to roll into a stem. Sprinkle with green sugar and bake.
  • Another easy green treat: Combine equal parts cream cheese and marshmallow cream. Tint green and serve as dip for green apples.
  • Gold Cookies (for the pot of gold at the end of the rainbow!): Take two Ritz crackers. Put peanut butter between them. Dip them in melted butterscotch chips. Place on waxed paper until set up.
  • Substitute Lucky Charms for some (or all) of the cereal in your Rice Krispie treats.
Here's hoping you find some St. Patrick's Day "Luck o' the Irish" at the end of your rainbow ... or in your kitchen. (There are some more ideas and links after the Irish Soda Bread recipe.)
 
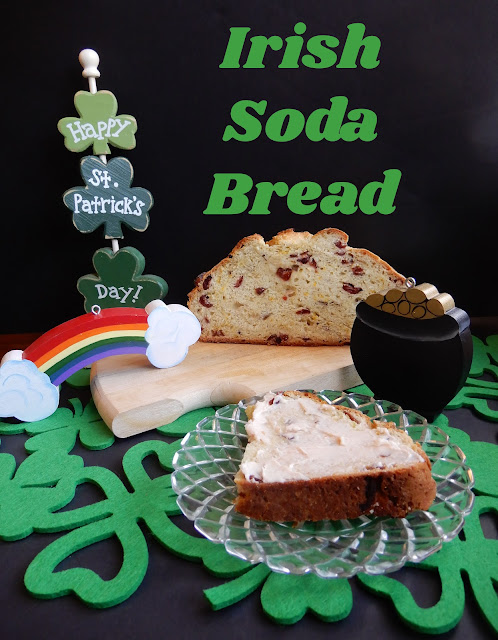
I used a recipe from Sally's Baking Addiction for this version of Irish Soda Bread. (Sally's is one of my and Jill's go-to baking blogs.) However, after perusing several other recipes, I made some adjustments. Her recipe said raisins were optional. Another recipe developer used whiskey-soaked raisins or craisins. A couple of them suggested orange zest. (I'm guessing that 1800s-era Irish cooks didn't have access to oranges or orange zest.) Did they have dried fruit? I don't know.
 
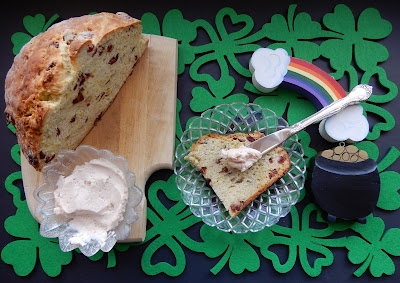
But soaking dried fruit in orange juice and adding orange zest do provide a nice bit of flavor. And, of course, you have to drain the fruit before using it in the bread. However, one recipe used the reserved liquid - whether whiskey or orange juice or a combination - to combine with softened butter for a spread for the bread. I also added that for an extra treat.
Grandma's Irish Soda Bread
Adapted from Sally's Baking Addiction
 
1 3/4 cups buttermilk
1 large egg
4 1/4 cups all-purpose flour
3 tbsp. sugar
1 tsp. baking soda
1 tsp. salt
5 tbsp. butter (cold and cubed)
1 cup raisins, currants or craisins (opt.)
2 tsp. orange zest (opt.) 

Butter Spread (optional)
1/2 cup room temperature butter
Liquid (whiskey, orange juice or combination) retained after plumping the dried fruit
 
IF DESIRED: Rehydrate dried fruit of your choice in 1/2 cup Irish whiskey, orange juice or a combination of the two. To do this quickly, you may add the fruit and liquid to a glass measuring cup. Microwave for 2 minutes. Set aside to cool and to rehydrate for an hour or so.
 
Preheat oven to 400 degrees. Prepare a baking pan. I used a 9-inch cake pan, lined with parchment paper. Other options are using a seasoned cast iron skillet or a 5-quart Dutch oven without the lid. Another option is to use only a baking sheet lined with parchment paper, though the bread spreads out a little more.
 
Whisk the buttermilk and egg together. (If you don't have buttermilk available, you can make a substitution by putting 1 tablespoon of vinegar in a glass measuring cup and then adding milk to make 1 3/4 cups. Stir together, and let sit for 5 minutes before adding egg and using.)
 
Combine flour, sugar, baking soda and salt in a large mixing bowl. Cut in cold butter with a pastry blender. There's a lot of flour compared to the amount of butter, but keep working to break the butter down into pea-sized crumbs. Stir in orange zest, if desired.

Drain the fruit well, if you have chosen to plump the fruit in advance. Reserve the liquid if you plan to make the butter spread. 

Stir fruit into the flour mixture and stir to distribute. Pour in the buttermilk/egg mixture. Gently fold together until the dough it too stiff to stir. Pour crumbly dough onto a lightly-floured work surface. With floured hands, work the dough into a ball as well as you can, then knead for about 30 seconds or until the flour is moistened. If the dough is too sticky, add a little more flour. (You will likely have to do this if you've plumped your fruit in liquid.)

Transfer the dough to the prepared pan. Using a very sharp knife, score an X into the top. Bake for 20 minutes, then put a piece of foil on top to prevent overbrowning. Bake for another 20-25 minutes until the bread is golden brown and center appears cooked through. 

Remove from oven and allow bread to cool for 10 minutes, then transfer to a wire rack. Serve warm, at room temperature or toasted. Serve with whipped butter spread, if desired.

Butter Spread
Whip softened-to-room-temperature butter with a stand or hand mixer until light and fluffy. Add in about 2 tablespoons of the reserved liquid, whipping together until it's well blended. Add more, if desired. Serve with warm bread. (Because I used craisins, it gave the butter a slight pink tinge since some of the color leached out when the fruit was soaking.)

***

And, if you're looking for other lucky treats, here are some other St. Patty's Day foods I've shared here in the past:

Good As Gold Snack Mix

Kinley and Brooke helped me make these Mint Chocolate Chip Cookies when they were visiting a couple years ago:

For a main dish with an Irish twist, try Reuben Crescent Bake. (Well, at least, it's got corned beef and cabbage. I don't think it's very Irish.)

For cabbage minus the corned beef, try this slaw recipe:

Slaw Salad 

May your troubles be less and your blessings be more
And nothing but happiness come through your door.
Thursday, March 11, 2021

Luck of the Irish: Soda Bread


Top o' the mornin' to you!

I have shamrocks and leprechauns out at home as St. Patrick's Day approaches on March 17. When the kids were little, we always changed table and mantel decor and did little crafts for the holidays. And even though I just do it for myself these days, I still pull out each seasonal tub and make the holiday transitions. (Randy doesn't really care ... as long as he doesn't have to do it.)

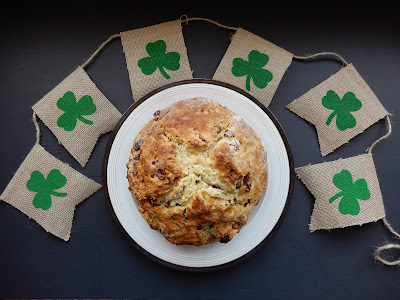
It made me think about a quick bread recipe I used to make with my 4-H cooking kids - Irish Soda Bread. It was a fun March meeting for beginning cooks. There's no yeast involved, and there's a tasty product in a fraction of the time. At this point, I don't remember where I got the original recipe.

The bread is best served warm. I continued the Irish theme by serving it with baked potatoes topped with Goop. The potatoes are Irish ... the Goop not so much. It's way better than it sounds. But a fun family St. Patrick's Day dinner would be a baked potato bar with lots of different toppings to suit every taste. Serve a fresh green salad on the side to complete the meal.

Even though the bread is best still warm, Randy will vouch for it later in the day, too, spread with a little cherry jam we got as a Christmas gift.

If you have kids or grandkids who need a weekend kitchen project, Irish Soda Bread is a good one to try. (It is supposed to be chilly and rainy this weekend around here, so a kitchen project sounds good.)

Other fun St. Patrick Day ideas, especially for kids:

  • Take 2 refrigerated biscuits per child and tear each in half. Place three of the pieces together to form a shamrock and use the other one to roll into a stem. Sprinkle with green sugar and bake.
  • Another easy green treat: Combine equal parts cream cheese and marshmallow cream. Tint green and serve as dip for green apples.
  • Gold Cookies (for the pot of gold at the end of the rainbow!): Take two Ritz crackers. Put peanut butter between them. Dip them in melted butterscotch chips. Place on waxed paper until set up.
  • Substitute Lucky Charms for some (or all) of the cereal in your Rice Krispie treats.

Here's hoping you find some St. Patrick's Day "Luck o' the Irish" at the end of your rainbow ... or in your kitchen. (There are some more ideas and links after the Irish Soda Bread recipe.)

Irish Soda Bread

2 1/2 cups all-purpose flour
3 tbsp. sugar
2 tsp. baking powder
1 tsp. baking soda
1/2 tsp. salt
1/3 cup cold butter (no substitutes)
1 1/4 cups buttermilk**
1/2 cup currants, raisins or dried cranberries

Note: The original recipe called for currants or raisins. I used dried cranberries this time.

Heat oven to 375 degrees. Combine all ingredients except buttermilk and dried fruit in large bowl; cut in butter with pastry blender until mixture resembles coarse crumbs. Stir in dried fruit. Add buttermilk and stir until just moistened.

Turn dough onto lightly floured surface; knead gently 10 times. Shape into ball. Place on parchment paper on a baking sheet. Pat into 6-inch circle. Cut 1/2-inch deep "X" in top of dough with sharp knife.

Bake for 30 to 35 minutes or until golden brown. Serve warm.

Recipe note: If you don't have buttermilk, substitute 4 teaspoons vinegar or lemon juice plus enough milk to equal 1 1/4 cups. Let stand 10 minutes before using.

Here are some other St. Patty's Day foods I've shared here in the past:

Good As Gold Snack Mix

Kinley and Brooke helped me make these Mint Chocolate Chip Cookies when they were visiting a year ago:

I made those same cookies for the Core meal I delivered to the church this week. I figured they might enjoy a little holiday-themed treat, too!

For a main dish with an Irish twist, try Reuben Crescent Bake. (Well, at least, it's got corned beef and cabbage. I don't think it's very Irish.)

For cabbage minus the corned beef, try this slaw recipe:

Slaw Salad 

May your troubles be less and your blessings be more
And nothing but happiness come through your door.


Tuesday, July 7, 2020

Operation Zucchini Bread

 
Our zucchini plants must have taken lessons from movie serial killers. You know those movies when the serial killer is lurking underneath the blanket in the backseat? As the music swells, the bad guy comes out of nowhere and attacks the poor, unsuspecting victim.

Thankfully, our garden zucchini don't have much in common with bad guys except for that propensity for hiding in plain sight. One day, you don't see a zucchini big enough to harvest. Seemingly overnight, it becomes this behemoth that's only suitable for grating and adding to zucchini bread.

The girls helped harvest zucchini, potatoes and onions when they visited. While our gardening efforts pale in comparison to their paternal grandparents, they still had fun picking vegetables and then eating them in the meals we fixed during their visit. 

I grated one of those mammoth squashes last week and got 14 cups of grated zucchini for my troubles. (Well, actually, the food processor did most of the work.)

I thumbed through cookbooks and found a couple of zucchini bread recipes to try. The guys got some for treats in their harvest suppers.

One was combined with blueberries, which I knew would make my farmer happy.
The other used crushed pineapple.
Honestly, they were pretty similar in makeup. The main difference came in the spices added. Both were tasty. I just wished they used a little more zucchini per recipe. Remember? I have 14 cups! Some of it is in my freezer for another baking project.

Now ... if only those green tomatoes would turn red. That seems to be taking forever. Until then, here are the zucchini bread recipes to try. Let me know what you think if you try them!
Blueberry Zucchini Bread
From Stafford County Hospital Cookbook: 
Working Hands, Caring Hearts
3 eggs
1 cup oil
2 cups sugar
2 cup grated zucchini
3 tsp. vanilla
3 cups flour
1 tsp. salt
1 tsp. baking soda
1 tsp. baking powder
3 tsp. cinnamon
1 cup chopped nuts (opt.)
2 cups blueberries, fresh or frozen

Beat eggs until light and fluffy. Add oil, sugar and vanilla, mixing well. Mix in zucchini, mixing lightly. Combine dry ingredients and add to creamed mixture. Fold in blueberries and nuts (if desired). Grease and flour two 9- by 5-loaf pans (or use 4 smaller loaf pans). Pour mixture into pans. Bake at 325 degrees for 60-70 minutes for large loaves. Test with toothpick and remove after toothpick comes out clean.
Zucchini Pineapple Bread
From Kansas Country Kitchens
Recipes from the Rural Electric Cooperatives of Kansas
3 eggs
1 cup oil
2 cups sugar
2 tsp. vanilla
3 cups flour
2 tsp. soda
1 tsp. salt
1 tsp. pumpkin pie spice
1 1/2 tsp. cinnamon
1 cup nuts, chopped (I used walnuts)
2 cups zucchini, grated
1 8-oz. can crushed pineapple, drained

Beat eggs, oil, sugar and vanilla together until thick and foamy. Add dry ingredients and mix until batter is smooth. Fold in nuts, zucchini and pineapple. Divide batter evenly and put into two greased 9- by 5-inch loaf pan (or 4 smaller pans). Bake at 350 degrees for 1 hour. Cool for 10 minutes in pan on wire rack. Turn out of pans and cool completely.

***

Looking for savory recipes for zucchini? Here are a couple from past blog posts on The County Line. Just click on the link.


Tuesday, March 19, 2019

Streusel-Topped Banana Bread

I probably don't need another banana bread recipe. I've tried plenty of versions over the years. But I most often end up using the one I know practically by heart from my well-used Byers United Methodist Church cookbook.  (Click here for that recipe and the variations.)
It  probably wins the prize for the most battered and stained cookbook in my whole cookbook collection (and I have an impressive collection). Banana bread likely has something to do with that.

But when I saw the words "streusel-topped," I couldn't resist. And then, caramel icing? Well, that was enough to send me to the counter for my overripe bananas.

It didn't disappoint.

I usually double the recipe when making banana bread and then freeze part of loaves. A caveat: If you've frosted the loaves, the frosting is still tasty after freezing ... but the drizzle gets messed up and the loaves aren't as pretty.
Streusel-Topped Banana Bread
Adapted from Butter with A Side of Bread blog
2 cups flour
1 1/2 tsp. baking powder
1/2 tsp. baking soda
1/2 tsp. salt
1 tsp. ground cinnamon
1/4 tsp. ground nutmeg
1/4 tsp. ground ginger
2 eggs
1 cup sugar
1/2 cup melted butter
1 1/2 cups mashed ripe bananas
1/4 cup chopped pecans or walnuts

Streusel Topping
1/4 cup brown sugar
3 tbsp. flour
2 tbsp. cold butter
1/4 cup chopped pecans or walnuts

Caramel Icing (Optional)
5 tbsp. butter
3 tbsp. caramel ice cream topping
Dash of salt
1 1/2 cups powdered sugar

Preheat oven to 350 degrees. Spray bread pan(s) with non-stick cooking spray. Set aside.

Whisk together dry ingredients; set aside. In a separate bowl, combine sugar and butter until creamed. Add eggs, mixing well. Add banana, mixing well. Add combined dry ingredients to the banana batter. Stir in chopped nuts. Pour batter into prepared pans.

To make streusel topping: Mash the brown sugar and flour together. Add in cold butter with a fork until uniformly crumbly. Stir in nuts. Sprinkle mixture over the bread batter.

For a large pan, bake 50 to 55 minutes until bread tests done (or bread reaches an internal temperature of 200 degrees.) Let cool in the pan for 10 minutes, then turn onto cooling rack. I prefer using small loaf pans. Depending on your oven, it will take 25-30 minutes for the smaller loaves to bake. Bake until lightly browned and a toothpick inserted into the center comes out clean. Or use the internal temperature given above.

If desired, frost with caramel glaze after the bread has cooled. To make glaze, combine butter and caramel topping in a bowl and microwave 1 minute. Whisk in salt and powdered sugar. Let cool slightly. Drizzle over cooled banana bread. Top with additional chopped nuts, if desired. I used a decorators tube to drizzle the icing.

Friday, April 8, 2016

Same Recipe: More Options

I would rather brown 3 pounds of hamburger than a pound ... no matter if I only need a pound for the recipe. I have a skillet just the right size for the job, and I know there will be less mess and less time invested in the next meal or two if I do a little extra initially.

I have long utilized the same principle when making drop cookies. I triple a basic cookie dough recipe. I divide the dough, stir in some add-ins, and it looks like I've made three or four different kinds of cookies. (Randy is not the only one who does amateur magic around here!) It's a great trick for cookie platters. I still make a few other kinds, but having four to six "different" cookies as a base speeds the process!

But it's been only recently that I've used the same principle when making banana bread. We like plain banana bread. But I've also been mixing in various add-ins for some variety to my tried-and-true Byers Banana Bread recipe.

Depending on how many bananas I have, I can double or triple the recipe. Then, just like with the cookies, I divide the batter and add different stir-ins to each portion. These could include dates and nuts, peanut butter chips, cinnamon chips, mini (or regular) chocolate chips, Craisins and white chocolate chips, brickle chips ... the possibilities are endless. I pour the batters into mini loaf pans. To make sure I know which "extra" is inside, I sprinkle the tops of the loaves with more of the add-ins.

The banana bread freezes well, so it's easy to pull out when we have visitors, during a busy time on the farm or on a day when you just "need" a little banana bread!

I've tried a lot of different banana recipes, but I inevitably circle back around to one found in my well-used Byers United Methodist Church cookbook. 
It  probably wins the prize for the most battered and stained in my whole cookbook collection (and I have an impressive collection).

It takes a rubber band to hold it together these days. On the inside cover, it reads:

A Book of Favorite Recipes
Women's Society of Christian Service of
The United Methodist Church
Byers, Kansas
1972
My mom inscribed: To Kim from Mother, April 1972

The Byers UMC was my childhood church, so I love seeing the names of all the women I remember who shared pews and potluck suppers.
Banana Bread
3/4 cup oil
3/4 cup sugar
1 1/2 cups ripe bananas, mashed
2 eggs
1 tsp. vanilla
2 cups flour
1 tsp. soda
3/4 tsp. salt
1/2 cup buttermilk
1/2 cup pecans, finely chopped (optional)

Cream together oil and sugar. Add mashed bananas, eggs and vanilla, mixing well. Combine dry ingredients. Add dry ingredients to the banana mixture, alternately with buttermilk, beating after each addition. Add nuts, stirring well.

Bake in large loaf pan or two or three small loaf pans at 325 degrees. The large pan takes about an hour to bake, the smaller ones, around 25-30 minutes, depending on your oven. A toothpick inserted in the center should come out clean.

This freezes well.

Recipe Notes:
  • The bananas in the photo aren't ripe enough for this recipe. They are just for decoration!
  • You can leave out the nuts. I always had to leave nuts out of part of it for Jill.
  • If you don't have buttermilk, you can use 1 tablespoon of vinegar, then fill the measuring cup to 1/2 cup. Let sit while you are preparing other ingredients.
***
Today, I'm linked to Weekend Potluck. Visit the hostesses and see tested recipes from across the U.S.


    Friday, November 20, 2015

    Glazed Apple Cider Streusel Quick Bread

    I love a new four-lane highway between Hutchinson and McPherson. For years, those 29 miles inevitably slowed one segment of our trip from home to Manhattan. It never failed that we'd get stuck behind someone who was crawling along, and there was rarely a chance to pass on the heavily-traveled roadway.

    However, much as I love that four-lane highway, I have missed stopping at a roadside market at the tiny "spot-in-the-road" town of Medora. To reach the little white shack now, you have to take an exit and quit zooming along at 70 miles an hour. And, let's face it, we don't take the time. Out of sight, out of mind, I suppose.

    I used to buy apple cider and apples from that little roadside market. This year, I bought my apple cider at a grocery store. And, as I've said before, I've made sure to stock up on Jonathan apples, two bags at a time, to make sure I can savor those tangy seasonal treats for as long as possible.

    I initially bought the cider for a caramel sauce for an apple cake. I knew I could use the leftovers for my own variation of a wassail to serve when I hosted PEO at my house this week. Then I saw a recipe for apple cider muffins and thought they sounded good. But to save time and add my own twists on the recipe, I added a streusel and a glaze with even more apple cider flavor.

    It would be a tasty addition to your Thanksgiving snack table or for breakfast on that special day. Your guests will definitely thank you!

    I slipped a couple of loaves into decorative fall bags and gave them as thank you gifts this week. If you can still find apple cider during December, this recipe would also be great for gifts from the kitchen, since it makes seven mini loaves! It might be worth grabbing an extra container of apple cider during this fall harvest season and freezing it for apple cider goodness later on!
    Glazed Apple Cider Streusel Quick Bread
    For the Bread:
    1 cup butter, softened
    1 cup brown sugar
    1/2 cup sugar
    2 tsp. pure vanilla extract
    4 eggs
    4 cups flour
    2 tbsp. baking powder
    1 tsp. salt
    3 tsp. pumpkin pie spice
    1/2 cup milk
    1 1/2 cups apple cider
    2 cups apples, finely diced

    For the Streusel:
    1/2 cup oatmeal
    1/3 cup brown sugar
    1/4 cup flour
    1/2 tsp. cinnamon
    1/4 cup butter

    For the Glaze:
    1 1/2 cups powdered sugar
    1/4 cup butter
    2 tbsp. apple cider

    Preheat oven to 350 degrees. Prepare mini loaf pans. (For me, this made 7 mini loaves. You could also make larger loaves or muffins, if desired.)

    For Streusel: Combine oatmeal, brown sugar, flour and cinnamon, mixing together. Cut in the butter with a pastry blender until evenly distributed. Set aside. 

    For Bread: Beat the butter and sugars together until creamy. Add the vanilla and eggs; beat again. Stir together the dry ingredients in a separate bowl. Stir together the milk and the apple cider. Alternate adding dry and wet ingredients to the butter mixture until well combined. Stir in the apples. Pour batter into loaf pans (or muffin tins). Evenly distribute the streusel over the batter. Bake until the bread is done, about 25-30 minutes for mini loaves, depending on your oven. (Bake until a toothpick inserted in the center of the loaf comes out dry.)

    Turn out onto cooling racks and cool completely.

    Mix glaze ingredients, adding additional powdered sugar or cider to make it the right consistency. Using a piping tube, pipe glaze in a decorative manner. (Or, you can just spread the glaze, if you prefer.)

    Note:  I used leftovers from a wassail punch I served at PEO this week for the apple cider. (It had apple cider, cranberry juice, orange juice, lemonade, tea and spices). It worked well.

    ***
    Today, I'm linked to the Weekend Potluck. Check out lots of other recipes from bloggers across the country, including the hosts of Weekend Potluck, just in time for your Thanksgiving meal preparation:

    Thursday, May 21, 2015

    Blueberry Almond Crumble Bread


    Everyone needs a little red, white and BLUEberry for their Memorial Day weekend, don't you think? This recipe would be great for a breakfast treat, but, with its crumb topping and almond-flavored glaze, it could also double as a dessert offering for friends and family as they gather for the holiday weekend.

    Randy is hoping I don't wait for a special occasion to make this quick bread again. Blueberries are his favorite fruit, and he is always happy when they appear in baked goods, too. Blueberries have been on sale at my local grocery store the past two weeks, but you could also use frozen berries with a slight adjustment to the recipe.

    The crumb topping and glaze add additional flavor and pizazz to an already-tasty quick bread recipe. The original recipe said to use three mini loaf pans for this recipe. However, that filled them really full, especially by the time I added the crumb topping. I ended up with crumb topping on the bottom of the oven, so the next time I make this, I'll fill the loaf pans less full. If I don't think I have enough batter for a 4th mini loaf, I'll bake the extra in muffin tins or greased custard cups. That's just a word to the wise:  I wouldn't want you to have to clean your oven, like I did!
    Blueberry Almond Crumble Bread
    Adapted from Inside BruCrew Life
    2/3 cup oil
    1 1/2 cups brown sugar
    1 egg
    1 tsp. almond extract
    1 cup buttermilk
    2 1/2 cups flour
    1 tsp. salt
    1 tsp. baking soda
    1/2 cup finely-chopped almonds
    1 1/2 cups fresh blueberries

    For Crumble Topping:
    1/2 cup sugar
    1 tsp. cinnamon
    1/4 cup finely chopped almonds
    1 tbsp. melted butter

    For Glaze:
    1 1/4 cups powdered sugar
    1 tbsp. melted butter
    1 tbsp. milk
    1/4 tsp. almond extract

    Beat together the oil, sugar, egg and extract until well blended. Stir together the flour, salt, baking soda and almonds. Slowly add the dry ingredients alternately with the buttermilk to the sugar mixture until everything is combined. Stir blueberries gently into the batter. Spoon batter into 3 or 4 greased 5 3/4- by 3-inch loaf pans.

    Topping: Stir together topping ingredients. Sprinkle evenly over the top of the batter in the pans. Bake at 350 degrees for 40-45 minutes or until a toothpick inserted in the center comes out clean. Cool in pans on wire rack for 10 minutes before turning bread out onto wire racks to continue cooling. Turn the bread back upright so the topping doesn't fall off. Cool completely before glazing.

    Glaze: Stir together all the glaze ingredients, adding additional powdered sugar or liquid to make it the right consistency. Use a decorator tube to drizzle the frosting over the cooled bread. Let the glaze set up before putting in sealed containers for storage. Bread freezes well.
     
    Recipe notes: 
    •  If you don't have buttermilk (and I usually don't!), put 1 tablespoon of vinegar in the bottom of a 1-cup measure. Fill with milk to the 1 cup line.
    • If fresh blueberries aren't available, you may use frozen blueberries. Combine frozen blueberries with an additional 2 teaspoons of flour before folding into the bread mixture. If you are using fresh berries, you don't need the additional flour.
    • This batter can also be baked as 16 regular-sized muffins. Bake at 350 degrees for 20 to 22 minutes.
    • I used 3 mini loaf pans for this recipe, as the original recipe called for. However, that filled them really full, especially with the crumb topping. I ended up with crumb topping on the bottom of the oven, so the next time I make this, I'll fill the loaf pans less full. If I don't think I have enough batter for a 4th mini loaf, I'll bake the extra in muffin tins or greased custard cups.
    • I doubled the recipe, which I often do when I'm already making a mess in the kitchen. This freezes well. I know that because I've already pulled some from the freezer to serve.

    Friday, October 3, 2014

    An Oktoberfest Treat: Banana Coconut Muffins

    Tomorrow is Oktoberfest in Stafford, America. It's the 25th annual version of Stafford's Fall Festival. What small-town festival is complete without a parade?
    It's also a reunion time for alumni of Stafford High School. Randy will celebrate his 40th class reunion. His sister, Kathy, will gather with her classmates to commemorate 30 years since leaving the hallowed halls of SHS. Jill's class will gather for their 10-year reunion.
    Kinley - Oktoberfest 2013
    This little parade-goer has done some growing since last year, and her little sister will be here for her first Oktoberfest parade. I'm guessing one of them will be more excited than the other.
     
    I imagine many former Stafford students will make informal visits to the old high school, which burned down this past March. (It was no longer being used for classes.)
    Our first Oktoberfest stop will be the Stafford Educational Foundation fun walk and run. Randy is on the Foundation board, so he's helping with the event. Kinley may be my walking companion. We'll see how things unfold tomorrow morning.

    I will pull some of these Banana Coconut Muffins out of the freezer to eat as we head out the door. (They are appropriately dressed in red, black and white muffin wrappers in honor of the SHS Trojan colors.)

    I had a bunch of bananas ripening on the kitchen counter and saw the recipe for Banana Coconut Muffins on one of the cooking blogs I read regularly. I also love using cream cheese in baked goods for both the taste and texture. How can you go wrong, adding mini chocolate chips, coconut and butter brickle bits?

    Speaking of texture, I didn't put coconut in some of the muffins. While Randy is a big fan of coconut, Jill doesn't like it because of its texture. Since part of this recipe was destined for their freezer to welcome baby Brooke, I deleted coconut in some of them.

    If you'd like a little hometown "texture" and are in the neighborhood, you are cordially invited to Stafford's Oktoberfest on Saturday, October 4. Start the day with a walk or run at 8:30 AM to benefit the Stafford Education Foundation. There are downtown arts and crafts and food vendors from 9 to 4, an 11 AM parade, a book sale at the Stafford United Methodist Church from 9 to 2 and free entertainment on a stage at Main and Broadway, beginning at noon. Wiener Dog Races begin at 2 PM. Yep, more than 100 wiener dogs are already registered. We'd love to have you!And welcome home, Staffordites! (Is that what Stafford people are called?)

    Banana Coconut Muffins
    Adapted from Inside Bru Crew Life blog

    3/4 cup butter, softened
    1 8-ounce package cream cheese, softened
    2 cups sugar
    2 eggs
    4 ripe bananas, mashed
    1 tsp. vanilla
    3 cups flour
    1/2 tsp. baking powder
    1/2 tsp. baking soda
    1/2 tsp. salt
    1 1/2 cups shredded coconut, divided
    1 cup toffee bits
    1 cup mini chocolate chips

    Preheat oven to 350 degrees. Place cupcake liners in muffin tins.

    In a large mixing bowl, cream the butter, cream cheese and sugar. Add the eggs and beat well. Stir in bananas and vanilla.

    Combine the flour, baking powder, baking soda and salt, and slowly incorporate into the banana mixture. Stir in 1 cup coconut, toffee bits and chocolate chips by hand.

    Fill cupcake liners or tins 3/4 full. Sprinkle with extra shredded coconut. Bake 20-25 minutes. Coll on a wire rack for a few minutes before removing from the cupcake tins. Cool completely before storing in a sealed container. You may also freeze the muffins.

    Note:  I didn't put coconut in all the muffins, since Jill isn't a fan. The coconut-less version turned out tasty, too. (I scooped out some of the batter into the muffin cups prior to adding the coconut. To keep them identified, I topped each of the coconut version with a sprinkling of coconut on top. It made the muffin tops pretty, too, with the browned coconut.)

    Wednesday, June 25, 2014

    Whole Wheat Banana Biscoff Muffins

    Trends and baking go together like peanut butter and jelly.

    Recipes with Biscoff pop up frequently on recipe blogs these days. So does Greek yogurt. This recipe combines those two recipe buzz words. Add in white whole wheat flour and you have a triumvirate of trendy ingredients. 

    Biscoff spread can be found in the same aisle with the peanut butter. Like its more well-known cousin, it comes in smooth and crunchy varieties. I always choose crunchy, no matter what spread we're discussing. Since one of our harvest crew has a nut allergy, this was a good substitute.

    I had white whole wheat flour in the pantry that Randy brought home from a milling and baking workshop, but regular whole wheat flour would work well, too. And, of course, bananas and chocolate are always a winning combination.

    The muffins originally accompanied a harvest meal and did double duty for breakfast. Since the recipe made so many, I also stashed some in the freezer for later use.

    Time will tell whether we cut any wheat today. We only got 0.10" of rain here last evening, but yesterday's humidity and overcast skies kept us out of the wheat fields for the second day in a row.

    Hopefully, I'll soon need to pull a bag of these muffins out of the freezer because that would signal that we're cutting again. But, whether  you're cutting wheat or not, these muffins will add good flavor to any meal. Enjoy!
    Whole Wheat Banana Biscoff Muffins
    Adapted from Oh Sweet Basil blog

    1/2 cup butter, melted
    1/2 cup plain Greek yogurt
    2/3 cup Biscoff cookie spread
    1/2 cup honey
    1/2 cup white sugar
    1/2 cup brown sugar
    1/2 tsp. vanilla
    3 eggs 
    3 cups white whole wheat flour
    1 cup all-purpose flour
    4 tsp. baking powder
    1 tsp. baking soda
    1 tsp. salt
    2 cups ripe bananas, mashed
    1-2 cups mini chocolate chips (you choose your level of chocolate!)

    Heat the oven to 425 degrees. In a mixer, combine butter and yogurt. Add the Biscoff and honey; mix until well combined. Add sugars and vanilla and mix again. Add eggs, combining well.

    In a small bowl, combine the two different flours, baking powder, baking soda and salt. Add a little to the creamed mixture and mix. Add about a third of the mashed bananas and mix. Continue alternating between flour mixture and bananas, ending with banana. Stir in the chocolate chips. Spoon into muffin cups. (I prefer using muffin liners for ease of removal and for color!)

    Bake 12-15 minutes or until nicely browned and the muffins test done with a toothpick inserted into the center of the muffin. Makes about 30 muffins. You can also put all or part of the batter into mini loaf pans, preventing some of the scooping.


    ***
    I'm linked today to Wake Up Wednesdays. Click on the link to see recipes from blogs across the country.

    Wednesday, May 14, 2014

    Blueberry Orange Muffins

    It was Mother's Day weekend, but it was Randy's favorite fruit that ended up on the breakfast table. I don't think Jill and I were disappointed though.

    I had seen the recipe on one of the food blogs I follow, Inside Bru Crew.  Since we were having guests for the weekend, I decided to give them a try. I had planned to make two different recipes, but I settled for doubling this one. (Grandma time wins out over baking time - hands down - but I also like sticking extras in the freezer for a quick thaw out when needed.)
    The orange juice and zest give just the right citrus flavor to the muffins. And how can you go wrong with a glaze? Everything is better with frosting, right?

    I used frozen blueberries since I didn't have fresh available. Don't thaw the berries before using or you'll likely end up with blue muffins. I like blue, but blue food probably isn't the most appealing. What's your preference when it comes to muffins?
    Blueberry Orange Muffins
    Adapted from the Inside Bru Crew blog
    1/2 cup butter, softened
    3/4 cup sugar
    1 tsp. vanilla extract
    2 eggs
    2 cups flour
    1 tbsp. baking powder
    1/2 tsp. salt
    1/4 cup milk
    3/4 cup orange juice
    1 1/4 cups blueberries
    1 tbsp. orange zest
    Glaze:
    1 tbsp. butter, melted
    1 tbsp. orange juice
    3/4 cup - 1 cup powdered sugar

    Note:  You may use fresh or frozen blueberries. Because fresh weren't available to me, I used frozen blueberries. I didn't defrost before using since that invariably turns the batter blue.

    Beat butter and sugar together until creamy. Add the vanilla and eggs; beat again.

    Stir together the flour, baking powder and salt. Add alternately with the milk and orange juice until just combined. Don't overmix.

    Stir in blueberries and orange zest by hand. Spoon into 15 muffin liners. Bake at 350 degrees for 18 to 20 minutes until golden brown and the muffins test done by inserting a toothpick in the muffin center. Remove and let cool.

    Glaze: Whisk together the glaze ingredients, adding enough powdered sugar to make a moderately thin glaze. Dip the tops of the cooled muffins into the glaze or just put a thin layer on top with a spoon. Let set.

    Store loosely covered. If you store in an airtight container, the glaze soaks into the muffins. You may also add the glaze the day of serving so they don't get sticky.

    ***
    Today, I'm linked to Wake Up Wednesdays. Click on the link to see what's cooking across the nation.

    Wednesday, October 9, 2013

    Coconut Zucchini Lime Bread


    I know it's the season for pumpkin and apples. But our zucchini plants haven't gotten the memo. The early-summer enthusiasm for checking the garden is waning, falling off as quickly as those leaves are tumbling from trees in this brisk Kansas wind.

    But, hidden among the weeds, we've had several zucchinis that have survived in spite of us. They are too big for preparing as a side dish, so I've been grating them down to size. (It's nothing personal - just necessity!)

    Most zucchini bread recipes are heavy on cinnamon and spices. And I like those, too. But this Coconut Zucchini Lime Bread is different. While it may seem more summer-like with its tropical flavors, it's a nice departure from the norm. With the lime-infused glaze, it's a nice wake-me-up start to the day. I made it when Jill, Eric and Kinley came for Oktoberfest this weekend. Even though coconut isn't Jill's favorite thing, she liked this bread. Kinley, on the other hand, preferred Grandpa's scrambled eggs. You can't please everyone, especially a 21-month-old toddler. Enjoy!

    Coconut Lime Zucchini Bread
    Adapted from Jamie Cooks It Up! blog
    3/4 cup oil
    1 1/2 cups sugar
    3 eggs
    2 tsp. lime zest
    1 tbsp. lime juice
    1 tsp. coconut extract
    2 cups shredded zucchini
    2 1/2 cups flour
    2 tsp. baking powder
    3/4 tsp.salt
    1/4 tsp. soda
    3/4 cups flaked coconut
    GLAZE:
    1/2 cup sugar
    2 tbsp. lime juice
    1/2 tsp. coconut extract

    Preheat oven to 350 degrees. In mixing bowl, combine oil and sugar; mix well. Add eggs, mixing well. Add lime zest, lime juice and coconut extract. Add shredded zucchini (I left the skin on.) In a separate bowl, combine flour, baking powder, salt, soda and coconut, mixing well. Add to wet ingredients, stirring just until incorporated.

    Spray two 8- by 4- by 2 1/2-inch loaf pans or four mini-loaf pans with cooking spray. (When you use cooking spray on the whole pan, you will likely get a "fry" line along the edge of the pan. That doesn't bother me, but if it bothers you, spray the bottom of the pan only. You could also use waxed paper or parchment paper on the bottom of the pan for easy release after baking.

    For small pans, bake 20 to 25 minutes. For large pans, bake 35 to 45 minutes. Test doneness by inserting a toothpick in the middle. If it comes out clean, it is ready to come out of the oven. Put waxed paper or parchment paper under the cooling racks. When bread is done, immediately turn out onto prepared baking racks. Glaze immediately.

    Glaze: While the bread is baking, prepare the glaze. Combine sugar and lime juice in small glass measuring cup. Put in the microwave for 1 minute; stir to see if the sugar has dissolved. If it has not, microwave for another minute. Add coconut extract. Set aside until the bread comes out of the oven.

    After the bread is removed from the pans, pour the prepared glaze over the loaves. Attempt to get some of the glaze to stick to the sides of the loaves as well as the tops. Cool.

    Notes:
    • I used mini loaves rather than the regular-sized loaf pans.
    • With other recipes that have a sticky glaze, I've tried to pour the glaze over the bread while still in the pan. While that helps the bread absorb all the flavors, it usually leads to having it stuck in the pan. If you're just making it for home, though, you could keep it in the pan and just cut slices from it. That would maximize the lime-glaze flavor.
    ***
    Need other ways to use those large zucchinis that need to be grated to be tamed? Try:

    or

    ***
    Today, I'm linked to Wake Up Wednesdays. Click on the link to check out lots of yummy recipes!