Monday, December 31, 2018

Mud Wrestling: A Cattle Roundup

 35 ... the number of things that went wrong as we brought cattle home from summer pasture.

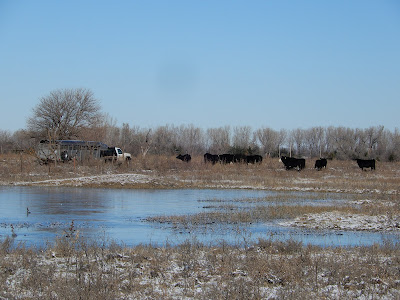
Truthfully, I'm not sure that number is high enough. But, as I stood waiting on the tractor to again pull the pickup and trailer through mud and muck, it's what went through my mind. It was more like mud wrestling than farming around here this fall.
By the way, the number is really there because of the pole's former life as an electric pole. But years ago, it got a second "career" as part of a loading chute at the Ninnescah Pasture.

So, am I exaggerating about the 35? Nope. 

First of all, we were a couple weeks behind schedule. We had waited until mid-November, hoping the water on our normal route would recede after the 14-plus inches of fall rain we'd received.

We couldn't wait any longer, so we added 12 miles to each of our trips to and from the pasture, since we had to go the long way around. (We made a total of 12 trips, so that's an extra 144 miles. See? I told you 35 wasn't exaggerating!)

In fact, it rained and deposited another 2 inches or so of rain, and it snowed a couple of times for good measure, including on the night before we were supposed to round up all the cattle at the Ninnescah. 
 Brrrr! At least the sun was shining, making it seem a little warmer.
 
But it was a brisk 4-wheeler ride to find the mamas and babies and get them to cross water into the pens and corral. 
 Still, the ride over the dam on the Ninnescah River was undeniably pretty.
Of course, a few of them were "visiting" a neighbor's pasture, so it added another step to the process. 
The pasture is 320 acres, so there are plenty of places for cattle to hide out. We also had to get some of them to cross the Ninnescah River, and the extra-soggy ground didn't make that job any easier either.
More than once, we thought we'd found them all. But a few stragglers eventually joined their buddies in the corrals. 

The ground was so saturated that a 4-wheel-drive pickup couldn't pull a trailer by itself. So each trip to the pasture also necessitated hooking up the loader tractor to the pickup and pulling it back out to the road.
The mud at the gate eventually led to no traction. And no traction eventually led to wiping out a gate post and tearing up one of the trailers in the process.

At first, Randy planned to have the loaded trailer "limp" all the way home. But one of the tires was leaving a dark mark on the blacktop road, and I started campaigning for an alternative. What if the trailer totally broke down on U.S. Highway 50, a route we had to take for several miles to get back home? I was envisioning trying to transfer cattle from one trailer to another while semis whizzed by.
So, instead, we pulled over at Sylvia and made the transfer there. I was impressed with my husband's backing skills. He didn't need more than one try to get the two trailers positioned end to end.

Getting the cattle to step from one trailer to the other is usually the bigger challenge, he contended. He and his Dad had to do it a long time ago. But the mamas and babies cooperated well. (Maybe they knew we were about at the breaking point.)
We did eventually get all the mamas and babies moved back home. The mamas had their OB/GYN appointments with Dr. Figger ...
... and the babies had their "well-child" checks. 
(And, I could add more to the number of ways things went wrong during that process, too. The hired man got hurt - not badly, thankfully.  But he was out of commission for an afternoon. So I did a lot more heavy lifting than I sometimes have to do. Literally, I did heavy lifting. After we got cows or calves into the lane toward the working chute, I lifted an awkward 20-pound pipe and inserted it behind the final one to keep them in position. When you only have four or five mama cows in the lane at once, that's a lot of lifting! It's the farm version of weight training.)
But, we eventually got everyone moved to their appointed places. Some of the mamas are on sudan or corn stalks while they await the births of their new babies in February. 
The feeder calves are getting their daily rations with the feed truck.
And, for a couple of weeks, I was the feed truck driver and full-time hired hand.
 
However, this fall, we also had some excellent short-term help from a couple of other volunteers. Kinley and Brooke helped me keep the gate blocked.
 They looked over the herd with Grandpa to observe any problems. 
And they just brightened our outlook, in general.
They also helped move some of the mama cows and used their newly-developed hand motions to get them moving out of the trailer and into their winter home. Reading hand signals is an integral part of farm-girl education.
I wonder if they're free next fall?

Note:  We actually moved cattle home from summer pastures in mid-November. I never got the blog post written - visiting granddaughters, holiday preparations, personnel problems ... the list goes on and on. But I still thought we needed a record of this memorable year. And by memorable, I don't mean enjoyable ... except the granddaughters. That part was enjoyable! As I've said in the past, it's important to tell about the hard stuff, too - not just the gorgeous sunrises and sunsets but what actually went on between them.

Friday, December 28, 2018

Cheese Popcorn: A New Year's Eve Snack

WARNING: Neon yellow fingers are a side effect of this snack.

But it's worth it. And it will make your New Year's Eve celebration merrier ... and tastier!

I've always loved cheddar popcorn. Well, let me qualify that. I've always loved the taste of the high-dollar cheddar popcorn at specialty stores. However, the inexpensive metal tins with three different popcorns just didn't satisfy. And my efforts to make a copycat version of the gourmet variety had always fallen short ... until this year.

My friend, Kim Baldwin, who raises Papa Baldy's popcorn with her in-laws, Dwight and Cindy Baldwin in McPherson County, posted a photo showing cheddar popcorn on their Facebook page before Christmas. So I asked her to share their recipe.
 
First of all, I highly recommend Papa Baldy's. (This is an unsolicited endorsement.) They just harvested their second crop of jumbo mushroom popcorn this past September. I've traded in my microwave popcorn for popping this Kansas-grown product on top of the stove.

But, back to the cheddar popcorn.

You need to find cheddar cheese powder. If all else fails, you can open boxes of macaroni and cheese with the cheese packets and collect enough there. However, if you have a place where you can buy cheddar cheese powder in bulk, that's what I would recommend. I got my cheddar cheese powder at Glenn's Bulk Food. I also found white cheddar powder there. But I didn't think it tasted as "cheesy" as the neon yellow variety, so I went with the "real" deal. Thus, the yellow fingers!

You can also order cheddar cheese powder online. And, I think it would also work to use those smaller containers of cheese flavorings you find near popcorn in the grocery store.

This recipe uses ground mustard. I admit: I was dubious. But maybe that's what was missing in earlier versions I'd tried. 

To put the recipe together, I used my circa 1980s green Tupperware bowl. (They call it a "fix and mix" bowl now.) But, if you don't have that, you can use a large, clean brown paper bag. The sealable bowl is less messy, but do what you have to do to get this done. It's worth it.

Papa Baldy's recipe is similar to one I found that was a copycat of Garrett's Popcorn, which is a Chicago staple.
Garrett's is also famous for combining their cheddar and caramel corns in what they call a "Chicago mix."
For that, I used the caramel corn recipe I've used since high school. (Click here for the recipe and ignore the cheese popcorn one I posted then. This version is much better.)

Cheddar Cheese Popcorn
from Papa Baldy's
3 quarts popped popcorn (from about 1/2 cup kernels)**
4 tbsp. melted butter
3/4 cup cheddar cheese powder
2 tsp. ground mustard powder
Salt to taste (I found I didn't need additional salt)

Pop the popcorn and transfer into a BIG Tupperware-like bowl with a lid or a clean brown bag.

Melt the butter and pour over popcorn. Shake to get all popcorn covered.
 

Combine dry cheese and ground mustard. Add to buttered popcorn. Shake again.

Salt to taste. I found it didn't need extra salt with the powder I used.


** Kim says that if it's too "wet," you can microwave the popcorn for about 30 seconds. I never found I needed to do that. However, I used 1/4 cup butter-flavored popcorn oil and 2/3 cup popcorn kernels for the butter and the cheddar cheese mix called for, so I probably had more than 3 quarts popcorn. (I didn't measure.)  I thought it made it plenty cheesy.

Thursday, December 27, 2018

A Christmas Miracle

It was like a Christmas miracle. We added another person to the annual Christmas Eve photo ... and it was actually easier. Maybe it's the fact that the other ones were another year older.

Whatever it was, we'll take the victory. It's not easy getting 10 kids ages 8 and younger to look in the same direction at the same time.

Here's proof from last year:
2017
My parents now have 10 great-grandchildren after another was added in February 2018.
All but the very youngest enthusiastically sang "Happy Birthday" to my Mom, who is a Christmas Eve baby.
Since the grandchildren were little, we've been taking a photo of the birthday girl with the troops.The first one with all seven of them was in 1994.
From left: Abby, Brian, Blake, Mom holding Madison, Jill, Brent & Paige
The grandchildren shot is easier these days.
They ought to be experts by now. My dad got in on the picture this year, too.
We four kids also had a photo taken with them. But I'm my family's photographer, and none of my family took photos. There were plenty of paparazzi at this family photo shoot, so I'm sure I could ask for one.
That's OK. I'd rather be behind the view finder anyway.

And, speaking of traditions, photo Christmas cards are another one for this family. Here's this year's version of the Fritzemeier Christmas card.
We had family photos shot in November. And it's a good thing .. because of that aforementioned aversion to having my photo taken. (Below are the other photos I used on the back of the card.)
Photo credit - Jill Grogg, Manhattan
Demiurge Photography, Manhattan (From Jill & Eric's family session.)
Photo by Jill Grogg, Manhattan
I've been involved in Christmas photo cards for my whole life. It's a family tradition. I starred in my very first one in 1957, as a 6-month-old baby.

The first one with both Jill and Brent was in 1988. Brent would have been about 7 months and Jill was 3.

Christmas Card Photo - 1988
Back when Jill and Brent were little, this annual attempt was captured on film. And you weren't sure what you'd gotten until the film was developed. I have rolls and rolls of film chronicling the misadventures of getting two little kids to look their best in the same frame. The move to digital photography makes the storage problem easier - though it can't help everyone look great in every frame.
My brother took this photo of the whole crew (minus himself) as we gathered for the birthday/Christmas Eve meal. There were 31 of us.

Tradition is a good thing. 

Friday, December 21, 2018

Passing On the Traditions: Part II - Pies

Word to the wise: You don't need three regular-sized pies and two mini-pies to serve seven people a holiday meal. But mom's and/or Grandma's desire to keep everyone happy just may lead to excess pie baking.

Still, it was another opportunity to pass on some holiday traditions to Kinley and Brooke, who visited the week prior to Thanksgiving. Even though I'm slow getting these photos posted, it still gives me a chance to share some favorite family recipes while you may be getting ready for your family's Christmas gatherings.

I didn't take a lot of photos during the actual process. But in a previous blog post, I showed step-by-step directions for making a fruit pie - something that might be helpful if you, too, have beginning bakers who are interested in pie making. (Just click on the link to go to the photos and a recipe for blueberry pie, Randy favorite.)
I had mini pie tins in my cupboard, and I thought the girls would enjoy choosing what kind of pie they'd like to make. Kinley chose cherry.
 Brooke chose apple.
They also loved decorating the tops of their pies and two of the family-sized pies with leftover pie dough. We rolled out excess pie dough and then used cookie cutters to cut decorative shapes.
And they both helped me make the three big pies:
Pumpkin (click HERE for the recipe).
 
Pecan (click HERE for the recipe).
And cherry - see recipe below.

While Kinley was working on her mini pie, Brooke went into the living room and watched a YouTube video with Grandpa. Not having a nap for several days (and a whole lot of extra activities) caught up with her and she fell asleep on the job.
Even bringing in Lily the cat didn't wake her up.
I'm starting to feel like this during the mad rush to get all my baking done before Christmas!

Cherry Pie (9 inch)
From the Betty Crocker cookbook
Never-Fail Pie Crust (Click HERE for recipe. You will use 2 of the three crusts for this pie)
1 1/3 cups sugar
1/3 cup all-purpose flour
2 cans (16 oz. each) pitted red tart cherries, drained
1/4 tsp. almond extract
2 tbsp. butter

Heat oven to 425 degrees. Prepare pastry as directed in recipe. Cut into three equal pieces. Roll bottom crust out on a pastry cloth. Fold into quarters and put into a pie plate.

For filling: Mix sugar and flour. Stir in cherries. Stir in almond extract. Turn fruit into pastry-lined pie plate. Dot with butter. Cover with top crust, which has been rolled out on a pastry cloth.  Seal and flute. Cut slits into top crust to allow steam to escape. Cover edges with pie shields. (I now have silicone ones, and I love them and recommend them!)

Bake until crust is brown and juice begins to bubble through the slits in the crust, about 35 to 45 minutes.