Showing posts with label bridal shower. Show all posts

Tuesday, April 5, 2022

Cooking Up A Surprise


No one who cooks, cooks alone. 
Even at her most solitary, a cook in the kitchen
 is surrounded by generations of cooks past,
 the advice and menus of cooks present,
 the wisdom of cookbook writers.
Laurie Colwin, writer

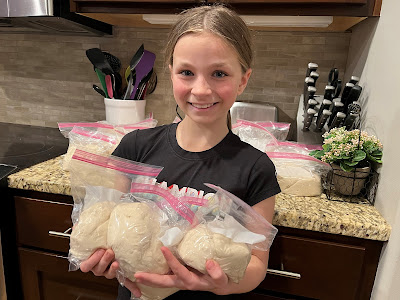
I've been "cooking" up a surprise for Susan and Brent. And I finally got to share the results at Susan's latest bridal shower.
 
I compiled two volumes of recipes from family and friends and presented the cookbooks as my shower gift. I had done something similar for Jill and Eric a dozen years ago. But even in that short time, many of us have shifted how we approach cooking. Instead of pulling down a community cookbook from our kitchen shelf at mealtime, we click on a link on Facebook or Instagram. 
 
So, before I began this months-long project, I asked Jill whether she thought it was still something I should do. And even though she's the "queen" of pulling up recipes on her phone or computer, she encouraged me to do it.
 
Jill's & Eric's cookbook - still in use after 12+ years!
Jill still uses the two-volume cookbook I compiled for them. And, interestingly enough, one of the recipes she contributed to Susan's and Brent's book was a breakfast recipe she received in her homemade cookbook for a Sausage and Grits Casserole. (See recipe at the end of this post. Jill actually served it to Randy and me when we stayed at her house before the shower. And, no, we didn't arrange that ahead of time!)

Susan's mom, Becky, also thought the project was worthwhile. She helped by sharing names and addresses of family members, her friends and important people in Susan's life. One of Susan's friends, Mallory, supplied names and addresses, as did one of Brent's friends, Ben, and his wife, Tori. 

I had to laugh when I opened the envelope with Becky's recipes. On the top was a recipe for Bar-B-Cups.

 
That was a recipe that also appeared on Brent's childhood table. (I still make them and so does Jill.) My mom started making them when the recipe was a winner in the Pillsbury Bakeoff back in the day. (A quick internet search revealed that, yes indeed, the recipe was entered in the 1968 Bake-Off!)

On the back of the card, Becky wrote: "I get the urge to make these every February 16 - no matter where you are!" Those were often Susan's childhood birthday menu request. 


Even the youngest members of the family got involved. Brooke and Kinley both contributed favorite recipes. 
 
 
I figure it will be fun to look back and see their handwriting from their 1st and 4th grade 
years. 


This would have been a project that Randy's mom, Marie, would have loved. And she's not left out. I had a Chocolate Oatmeal Chippers cookie recipe written in Marie's own hand in my own recipe box. I included it in the cookbook. And Becky had a recipe for Susan's Grandma Welch's Toffee Dip, also in her hand, which is nestled in the Appetizer pages. 
 
Randy's sister, Kathy, also used Marie's go-to shower gift as her gift - a pizza pan and other utensils and ingredients needed to make homemade pizza. Kathy used one of her cards to include the same recipe that Marie also always included with her gift.  

Several family members from Brent's side of the family attended. They all shared recipes, too.
 
To get the recipes, I wrote a note to friends and relatives from both sides of the family. I enclosed matching recipe cards and asked them to send two of their favorite recipes. After I sent the letters, I loved going to the mailbox and discovering recipe cards and notes tucked among the bills and newspapers. It was like getting Christmas cards and letters, but it lasted longer since I'd given people plenty of time to respond. Once I had the cards back, I compiled the recipes into two volumes.


Like I'd done with Jill's book, I had a Hutchinson shop engrave metal labels to affix to the cookbook spines, noting that Volume I had soups, salads, vegetables and main dishes and Volume II had baked goods, desserts, appetizers, beverages and holiday. 


I could have typed them all or sent the requests for recipes out by email, but I liked having each friend or family member write out the recipe card in their own hand. It seemed more personal that way. 


Remember that favorite recipe from Jill's own wedding cookbook that I mentioned earlier? She has served it to the family - including to Susan and Brent - at several holiday brunches. It was from Wanda Morrison, who has since passed away. But the recipe lives on in Susan's and Brent's cookbooks. And I guess that's the whole point, isn't it?  

Country Grits & Sausage Casserole
From Jill's and Eric's Wedding Cookbook
2 lbs. ground sausage
4 cups water
1 1/4 cups quick cooking grits, uncooked
4 cups shredded sharp cheddar cheese
1 cup milk
1/2 tsp. dried thyme
1/8 tsp. garlic powder
4 large eggs
 
Preheat oven to 350 degrees. Brown sausage in a large skillet. Drain fat and set aside. Bring water to boil in a large saucepan; stir in grits. Return to a boil, cover, reduce heat and simmer 5 minutes, stirring occasionally. Remove from heat; add cheese and next three ingredients, stirring until cheese melts. Stir in sausage and eggs to grits mixture.
 
Spoon mixture into a lightly-greased 13- by 9-inch pan. Sprinkle with paprika, if desired. Bake at 350 degrees for 1 hour or until golden brown and thoroughly heated. Let stand 5 minutes before serving. Serves 8-10.
 
Note: Casserole may be prepared the day before. Do not bake until morning. 
 
Jill's note: This is one of our favorite recipes we got in our wedding cookbook and wanted to pass it along! It was from Wanda Morrison.  
 
***

And here was a recipe from Randy. It just makes me laugh. And I hope it does the same for Susan and for Brent, who went on many a Ninnescah fishing expedition with his dad.

Fried Catfish
Randy Fritzemeier

After a successful day of fishing on the Ninnescah, bring fish home and filet them. Start cutting behind the ribs to the tail. Then flip piece of fish over and cut off skin. Clean off pieces of fish with fresh water and put in a bowl of water. Add salt and seasonings; let soak for an hour.

Heat pan of oil to frying temperature.

Shake water from fish. Roll fish in Louisiana Fish Fry Mix. Drop in frying oil for 3 to 4 minutes. Don't overload pan. Put in basket with paper towels in bottom to soak up excess oil.

Then eat.

Tuesday, March 8, 2022

Salt of the Earth

If there's a salt shortage in Topeka, you can blame Jill and other mamas with fourth graders at Jay Shideler Elementary.

Randy & I made a stop in Topeka Friday evening before Susan's first bridal shower in Kansas City on Saturday. While Grandpa and Eric took Kinley to volleyball practice, Jill and I stayed behind in the "salt mines" ... so to speak.

The salt dough is being used to construct 4th grade volcanoes this week. 

Other parents had already signed up for the easier stuff - like detergent and other needed supplies. So Jill volunteered to make a a dozen recipes of salt dough for Kinley's fourth grade class project. 

By Friday night, no one else had signed up to bring the rest of the dough. Since Jill and I already had our system down, she texted Kinley's teacher and asked if she wanted her to make all the dough.

"Extremely grateful" was the gist of the return text. 

I measured out the salt and the flour. Jill added the water with the mixer. And we used teamwork to maneuver the completed dough into the quart-sized plastic bags. With the additional recipes, we had to wait on a salt delivery from Eric. Otherwise, we would have gotten it accomplished in an hour. 

As I was taking a photo of the supplies, Jill said that Hudson Cream Flour isn't available at her Hy-Vee Grocery Store, where she purchased everything. Hudson Cream Flour is made at Stafford County Flour Mill, our home county. We are both part of a Hudson Cream Flour baking group on Facebook, and if she needs it for her home baking projects, she gets it at Dillon's. 

I told her that Hudson Cream Flour was too valuable to use for an inedible recipe anyway.

After we got all 22 bags complete, we decided that Kinley was going to need help getting it to her classroom.


She was convinced she could do it ... until she about pulled her arm sockets out with the two grocery bags of dough. Jill dropped it off at the school with the teacher ahead of time.

I wish I was a fly on the wall so I could see the 4th graders using the dough for their volcanoes. Kinley says they built the volcanoes yesterday. She told Jill that she "did a good job" making the dough. Today, they are supposed to paint their masterpieces, and tomorrow is eruption day.

Hopefully, I'll get to see a photo of the finished product.


Salt Dough
2 cups all-purpose bleached flour
1 cup salt
1/2 cup to 1 cup warm water

In a mixing bowl or stand mixer, stir together flour and salt. Mix in water, 1/4 cup at a time. Add water until it forms a doughy consistency, similar to Playdough.

Do not overmix! Overmixing will make it too stringy and hard to form into shapes.

***

That was just first stop on a fun and activity-filled weekend. I shared photos from Susan's & Brent's first bridal shower on Facebook. But there are some blog readers who don't see my Facebook page, so I'm including some here, too.

Brent wasn't there for most of the shower, but he came at the end to help load and transport the gifts home. It was fun for me to get to meet some of their friends.

Jill, Brooke and Kinley also were there to take in the festivities.


 Susan's friend, Mallory, added lots of special touches for the brunch.


The moms were both glad to be there!


I can't wait to do it again in a few weeks! Shower No. 2 is coming up then!

But we weren't done with the fun. We also went to Dave & Buster's. 


And just in case we hadn't done enough for the day, we ended the day at Kinley's tennis tournament.

A good time was had by all. (That was the tagline on social news in weekly newspapers like The Stafford Courier back in the day.) 

Thursday, October 14, 2021

Chocolate Pistachio Shortbread Cookies


When you're looking for "fancy" cookie recipes, you don't necessarily spend a lot of time in the "bar cookie" realm. But the Chocolate Pistachio Shortbread Cookies came highly recommended.

Jill made them for a work event and said they were fairly quick and easy, yet had elements of fancy. She found it on one of her favorite baking blogs, Sally's Baking Addiction. Those two "recommendations" were enough for me to add the wedge-shaped cookies to my cookie trays for the August bridal shower.

The Chocolate Pistachio Cookies are on the right side of the tray. (Sorry for the bad church basement lighting.)
 

The simple recipe is "fancified" with melted chocolate, finely-chopped pistachios and a sprinkle of sea salt. That simple dash of salt is enough to tickle taste buds in a sea of sweet choices. Not that the cookies aren't sweet. They are. The salt just adds another dimension, along with the salted pistachios.

Give them a try. And let me know what you think!

  Chocolate Pistachio Shortbread Cookies 

Adapted from Sally's Baking Addiction

 
1 cup butter, softened to room temperature
1/2 cup granulated sugar
1/4 cup brown sugar
1 tsp. vanilla extract
1 tsp. salt
2 1/4 cups flour
2/3 cup finely-chopped pistachios
Topping
1/3 cup finely-chopped pistachios
8 oz. semi-sweet chocolate
Sea salt to sprinkle
 
Preheat oven to 325 degrees. Line two 9-inch cake pans with parchment paper, leaving enough overhang around the sides to easily lift shortbread out. Set aside.
 
In mixer bowl, beat the butter on high speed until completely smooth. Add sugars and beat until smooth and creamy, about 1 minute. Add vanilla, salt and flour and beat on low speed, gradually increasing to high speed as the mixture combines. Add 2/3 cup of finely-chopped pistachios. Dough will be crumbly.

Press 1/2 of the dough into each of the prepared cake pans, pushing it down well. Bake for 30 minutes or until lightly browned on top and around the edges.

Remove from the oven; cool for 10 minutes. Use parchment paper to carefully remove shortbread from the pan. While the shortbread is still warm (not hot), cut each pan into 12 wedges. Allow to cool completely.

Topping:
Melt the chocolate in the microwave in 20-second intervals, stopping and stirring after each time, until chocolate is melted and smooth. Dip the shortbread ends into chocolate and sprinkle with 1/3 cup chopped pistachios and sea salt. Allow chocolate to completely set before storing. 


Thursday, September 30, 2021

Spiced Cappuccino Cookies

It's appropriate to serve cookies with Hugs and Kisses for a bridal shower, isn't it? These Spiced Cappuccino Cookies fit the bill.  And now that summer finally seems to be loosening its grip on the weather, cappuccino flavor sounds good for fall, too, don't you think?

True confessions: I save WAY too many recipes. I will never get all of them tried on the County Line. But a church bridal shower gave me plenty of reasons to dig through my recipe pile for inspiration. The cappuccino cookies were from Taste of Home. And you just never know what recipe is going to appeal to you in a given moment. You (OK, I) just might need it.

Of course, those printed recipes are another problem. I spent part of the pandemic clearing out extra paper and other minutia from our farm house. I did all right for awhile, but I'm back to printing recipes that again threaten to topple over in a kitchen cabinet. (The younger generation I know all use their phones for their cooking adventures. I like having that printed recipe in front of me ... mainly so I don't have to touch my phone with sticky fingers.)

The original recipe called for a Hershey's Hug. But when I stood in the candy aisle and saw the Cookies and Cream Kisses, I chose those instead. And they added a little extra crunch to the cookies.  

I am a coffee drinker, so I really liked the mild coffee flavor the espresso powder added to the cookies. With the cinnamon-sugar coating on the outside, it does taste like a spiced cappuccino. (Not that I have fancy coffee drinks very often.)

If you try them, let me know what you think!

Spiced Cappuccino Kiss Cookies
Adapted from Taste of Home
1/2 cup butter, softened
1/4 cup brown sugar
1/4 cup sugar
1 large egg, room temperature
1-1/2 teaspoons instant espresso powder
1 teaspoon vanilla extract
1-1/4 cups all-purpose flour
1/4 teaspoon baking soda
1/4 teaspoon salt
**
1/2 cup sugar
2 teaspoons ground cinnamon
24 striped chocolate Kisses or Hugs
 
Beat butter, brown sugar and 1/4 cup sugar until light and fluffy. Beat in egg, espresso powder and vanilla. In another bowl, whisk together flour, baking soda and salt; gradually beat into creamed mixture. Refrigerate, covered, until firm enough to shape, about 1 hour.

Preheat oven to 350°. Mix cinnamon and 1/2 cup sugar. Shape dough into 24 1-in. balls or use a cookie scoop. Roll in cinnamon sugar. Place 2 inches apart on ungreased baking sheets or put on parchment paper.

Bake until lightly browned, 10-12 minutes. Immediately top with chocolate kisses, pressing lightly. Cool slightly on pans. If your kitchen is hot, you may want to have space in your freezer to place your cookies to set the chocolate Kiss or Hug. 

Makes 2 dozen.  Note - I doubled the recipe.

Taste of Home Test Kitchen Tips

  • Add the espresso powder with the egg and vanilla instead of the flour mixture to ensure that it dissolves.
  • This dough is a little sticky, but it can be rolled into balls after chilling for an hour.
  • These cookies taste like a snickerdoodle with a hint of espresso.

  •  

    Tuesday, August 31, 2021

    Citrus Butter Cookies

    These Citrus Butter Cookies were the Beginning Foods winner at this year's Stafford County Fair. (Good job, Lainey!) The judges raved about them. So I added them to my list for the bridal shower cookie trays. 

    They use not 1 - not 2 - but 3 citrus fruits. Lemon, lime and orange zest and juice help give tartness to the sweet treat.

    Earlier this month, my friend, Gayla, sent me an article from Midwest Living on the cookie contest at the Iowa State Fair. (Click here for a link to the magazine article.) It was interesting for a couple of reasons.

    Gayla and I used to judge foods at the Kansas State Fair. I always judged the special contests - like the Spam contest (yep, that's really a thing) and the Hershey's chocolate cake contest. So she knew I'd like the story about the behind-the-scenes action at the Iowa State Fair.

    She may not have known it, but it also interested me because my son-in-law's parents - Alan & Christy - have been urging us to come to the Iowa State Fair for several years now. It's never worked out in a farming schedule, but we hope to at some point. Alan just retired from Iowa State Extension and also was in extension in Kansas earlier in his career. So their involvement and love of all things "fair" (and 4-H) runs just as deep as ours - maybe even deeper.


    There were 590 cookies entered in multiple categories at the Iowa fair. Those are weeded down to 65 of the best. And, ultimately, three overall winners were chosen. That particular year, it was a Mojito Bar that walked away with the champion ribbon. 

    The writer and judge writes about feeling queasy by mid-morning - even just taking a bite of each cookie she judged. I can relate. I remember at the end of some more sweet-focused contests at the Kansas State Fair, I was ready for cheese curds or something salty.

    Ironically, Randy & I are currently in Iowa, but we missed the 2021 Iowa State Fair (August 12-22) by a few days. We arrived for the National Master Farm Homemakers Guild convention in Des Moines on Sunday. As state president of the Kansas Master Farm Homemakers Guild, I am our state's voting delegate to the convention. Today (August 31), we're supposed to have High Tea at the Governor's Mansion, Terrace Hill (among a full day of other activities).

    I wonder if they'll serve cookies ...

    If you try Citrus Butter Cookies in your kitchen, let me know what you think.

     Citrus Butter Cookies
    From The Pioneer Woman (via the Stafford County Fair)
     
    2 c. (4 Sticks) Salted Butter, Softened
    1 1/2 c. Sugar
    2 whole Large Eggs, Separated
    4 c. All-purpose Flour
    3 tbsp. Orange, Lemon, And Lime Zest (approx 1 Tablespoon Each)
    2 tbsp. Orange, Lemon, And/or Lime Juice (2 Tablespoons Total)
    Icing
    3 c. Powdered Sugar
    2 tbsp. Whole Milk
    2 tbsp. Orange, Lemon, And Lime Zest
    Juice Of 1/2 Lime
    Juice Of 1/2 Lemon
    Dash Of Salt
    Extra Zest, For Decorating

    Preheat oven to 350 degrees.

    Cream butter and sugar until combined. Add egg yolks and mix until combined (set whites aside for the icing.) Add the zest and the flour and mix until just combined, then add juice and mix until combined.

    Scoop out heaping teaspoons of dough, then roll them into balls between your hands. Place on a cookie sheet and bake for 13 minutes. Remove from the oven and keep on the cookie sheet for 3 to 4 minutes. Remove from the pan with a spatula and allow to cool completely before icing.

    To make the icing, combine 1 egg white with the rest of the icing ingredients. (See notes below.) Whisk thoroughly until combined, adding either more powdered sugar or more juice until it reaches a pourable but still thick consistency.

    Drizzle the icing across the cookies in several lines, then do it again in the other direction. (I used an old-fashioned decorator tube.) Sprinkle with extra zest before the icing sets.

    Notes:

    • I used a cookie scoop to form uniform balls.
    • I had trouble sprinkling the zest for decorating the iced cookies. So I combined it with a tiny bit of granulated sugar so that I could more evenly distribute the zest.  
    • I did halve the recipe since I was making many varieties of cookies for the bridal shower. 
    • I used 2 tbsp. of melted butter in my frosting instead of whole milk. I like the flavor that butter adds to icing. 
    • I did NOT use the egg whites in the icing. The Pioneer Woman says if you prefer not to use raw egg whites, you could substitute meringue powder. I used neither the powder or the raw whites.


    Thursday, August 19, 2021

    Red Velvet Cookies


    If you're a fan of the Food Network, you've probably heard southern competitors on baking shows lay claim to the Red Velvet phenomenon.

    Just like most things these days, there appears to be a difference in opinion about that. But no matter the history, these Red Velvet Cookies are a pretty and tasty addition to cookie platters.

    I've made Red Velvet Cakes and Cupcakes before, but when I was looking for ideas for a bridal shower, the Red Velvet Drop Cookies from Sally's Baking Addiction caught my eye. The bride-to-be has selected a palette of burgundy, pinks and blush, so I thought the red-tinged cookies would be a pretty addition to the cookie trays for her shower.  

    The ancestry of the classic red-tinged cake may not actually be the South. Velvet cakes became popular in the 1800s when American cooks began using almond flour, cocoa, or cornstarch to break down the protein in flour. From those modifications, a finer textured cake emerged – dubbed velvet cake. That innovation was followed by sister cakes, the mahogany cake and devil’s food cake. 

    Controversy over the color of the cake is still debated: Some believe it’s caused by a chemical reaction between the cocoa and acid, while others attribute the brown sugar, originally named red sugar. Then, in the 1930s, the first modern red velvet cake was served at the Waldorf Astoria in New York City and then later tickled the taste buds of Canadians when after it was served at Eaton’s Department Store in Toronto. 

    Red Velvet cake as we know it today is probably because of a marketing ploy. A food-dye and extract salesman John A. Adams and his wife, Betty, tasted the red velvet cake at the Waldorf. In 1938, the government passed the Food, Drug, and Cosmetic Act, enforcing regulations on food coloring. Adams decided that red velvet would be his train to success, and as an act of marketing prowess, the couple opted to sell more dyes and extracts. In the 1940s, they released a mahogany cake recipe that used red food coloring. The recipe was printed on cards and sold with vanilla, red dye, and artificial butter flavoring – a popular additive during World War II when butter was rationed.

    It also included a recipe for icing, known as boiled-milk frosting, made with milk, flour, butter, and sugar. Red velvet became popular in Texan homes and Midwest state fairs, eventually spreading to the South where it is now a regular at Emancipation Day parties and Juneteenth celebrations – a gathering of red food items that symbolize the blood shed during slavery and the Civil War.

    There was a resurgent interest in red velvet when the cake was featured in the 1989 film, Steel Magnolias.

    These Red Velvet Cookies aren't just a pretty face: They also taste mighty good. If you try them, let me know what you think!

    I used dark chocolate Hershey's Kisses, but you can choose your favorite Hug or Kiss variety.

    Red Velvet Drop Cookies

    1 1/2 cups + 1 Tablespoon all-purpose flour
    1/4 cup natural unsweetened cocoa powder
    1 teaspoon baking soda
    1/4 teaspoon salt
    1/2 cup unsalted butter, softened to room temperature
    3/4 cup light or dark brown sugar
    1/4 cup granulated sugar
    1 large egg, at room temperature
    2 teaspoons pure vanilla extract
    1 Tablespoon milk
    1/2 teaspoon gel red food coloring (or alternative)*
    3236 Hershey’s Kisses, unwrapped
     
    Coating 
    1/2 cup granulated sugar
     
    For Cookies:
     
    Whisk the flour, cocoa powder, baking soda, and salt together in a medium bowl. Set aside.

    Using a hand mixer or a stand mixer fitted with paddle attachment, beat the butter, brown sugar, and granulated sugar together on medium speed until creamy, about 2 minutes. Add the egg and vanilla extract and mix on high until combined, about 1 minute. Scrape down the sides and bottom of the bowl as needed.

    Pour the dry ingredients into the wet ingredients. Add the milk and food coloring, then then mix on low speed until everything is combined. The dough will be sticky. If you want a more vibrant hue, beat in more food coloring a little at a time. Cover and chill the dough in the refrigerator for at least 2 hours (and up to 3 days). If chilling for longer than a few hours, allow dough to sit at room temperature for at least 15 minutes before rolling and baking because the dough will be quite hard.

    Preheat oven to 350 degrees. Line large baking sheets with parchment paper. Set aside. Also, make sure there’s room in your freezer because the cookies will need to be placed inside to prevent the chocolates from melting.

    Roll & coat: Scoop and roll cookie dough, about 1 Tablespoon of dough each. Roll each ball in the 1/2 cup of sugar and arrange on the baking sheet about 3 inches apart.

    Bake for 11-13 minutes or until the edges appear set. Centers will look very soft. Remove cookies from the oven and cool for just 5-10 minutes on the baking sheets.
     
    Set the chocolate: Press a Hershey’s Kiss into the center of each, then using a thin spatula, immediately transfer the cookies to a large plate or a few smaller plates (gently– they’re soft). Place the plate(s) of cookies in the freezer for 10 minutes to quickly set the chocolate kiss in the cookie.
    Remove from the freezer and serve.

    Cookies stay fresh covered at room temperature for up to 1 week.

    Tuesday, August 10, 2021

    Cookies with a Twist (of Lime)


    Cherry limeades were a special treat at Grandma Marie's house. After she died, I brought the juicer home because my kids had such great memories of making limeades with their grandma. I still use it when I'm juicing lemons or limes for a recipe, even though Jill always says, "I should put a new juicer in your Christmas stocking."  

    Marie would combine fresh limes and sugar-free Cherry 7-Up and serve it up with ice and a straw. Sounds tasty on a hot summer day, doesn't it?

    I have been baking lots of cookies for a bridal shower at church later this month and stashing them in the freezer. The bride has chosen burgundy, pinks and blush colors for her color palette. So when I saw the recipe for Cherry Limeade Cookies, I thought they were perfect. They fit in with the color scheme, and they provide that favorite summery Cherry Limeade flavor in cookie form.

    While they haven't gotten the bridal shower seal of approval yet, they did get good reviews from both me and Randy. 

    I was on a parts run to Pratt for Randy last week. And I just might have stopped at Sonic for a liquid version of Diet Cherry Limeade. 

    Mmmmmm! These cookies taste like summer. If you give them a try, let me know how you like them!


    Cherry Limeade Cookies
    Cookies:
    1 cup butter, room temperature
    1/2 cup granulated sugar
    1 teaspoon vanilla extract
    2 tablespoons maraschino cherry juice
    2 1/2 cups all-purpose flour
    1/2 cup chopped maraschino cherries
     
    Tart Lime Glaze:
    1 1/2 cups powdered sugar
    Juice of 1 large lime (1 1/2 - 2 tablespoons)
    Zest of one large lime
     
    For cookies, in bowl of your stand mixer fitted with paddle attachment, mix butter and granulated sugar together for 1 minute on medium speed until combined. Add in vanilla extract and cherry juice and mix until smooth.

    Turn mixer to low and add in flour until incorporated, scraping sides and bottom of bowl as necessary. Dough will be thick. Fold in chopped cherries.
     
    Cover dough and refrigerate for at least 1 hour.

    Preheat oven to 375°F. Line baking sheets with parchment paper and set aside. Scoop out chilled dough using a small (1 tablespoon) cookie scoop. Roll the dough into balls and place on the prepared baking sheet, 2 inches apart.

    Bake for 12 - 15 minutes until set and edges just begin to turn golden. Transfer cookies to a wire rack to cool completely.

    For glaze, in a medium bowl whisk together powdered sugar, lime juice, and zest. Dip tops of cooled cookies into glaze, or alternately you can spoon glaze on top of cookies.

    Store airtight at room temperature for up to 3 days. Makes about 36 cookies.