Showing posts with label Mexican meal. Show all posts

Tuesday, May 27, 2025

Summer Heat: Crock Pot Cool


May is the official Beef Month for Kansas. But it's beef month every month of the year at our house. I'm getting low on a lot of meat cuts as we wait for beef to be ready for harvest and processing.  But I've still got a few roasts at the bottom of the chest freezer.

Beef is Kansas’ top contributor in output to the state’s economy at $11.7 billion, according to the Kansas Department of Agriculture. Additionally, the sector supports the most jobs—direct, indirect and induced—in the state at more than 38,600. 


Kansas ranks third in the nation in three commodity groupings: all cattle and calves, cattle on feed and commercial red meat production. Kansas produces more than 5.8 billion pounds of commercial red meat production, or 10.7% of the U.S. total.


Even though we've retired from active farming, we still own our cow herd, managed by the Millers. 

As we approach the hot days of summer, the slow cooker is my friend.

Actually, I love using my slow cooker all year. Like the old cookbook says, "Fix It and Forget It." When I saw a recipe for Slow Cooker Shredded Beef Tacos on one of the blogs I read, Six Sisters' Stuff, I printed it off. And this time, I actually tried it ... rather than it just getting added to the pile of "to-try recipes" that seems to find its way onto my kitchen counter.

I served the meat as the protein for soft tacos with all the usual Mexican-meal suspects - Mexican rice, beans, queso and chips. I stuffed the tacos with meat, lots of shredded lettuce, tomatoes, grated cheese, salsa and a little sour cream. 


We had enough meat for several meals. The meat can also be used in enchiladas, in protein bowls or on top of tostados. Since it wasn't too spicy hot, I also made some into BBQ beef for supper sandwiches.  For people who like things spicier than we do, you could add additional peppers or a favorite hot sauce. 

I just love planned overs that end up looking brand new. Don't you?

If you're looking to add some of that good Kansas beef to your table, give this versatile recipe a try!


Slow Cooker Shredded Beef Tacos

2 1/2 pounds beef chuck roast
1 oz. taco seasoning
1 cup salsa verde
15 ounces corn, drained
1/2 cup beef broth
Soft taco shells
Taco toppings (shredded cheese, sour cream, tomato, shredded cheese, salsa, chopped onions, etc.)
 
Place roast in the slow cooker and cover with taco seasoning. Pour salsa verde over top. Add one can of drained corn and 1/2 cup beef broth. (You can make broth using water and bouillon, if desired.) 
 
Cook on high for 3 to 4 hours or low for 6 to 8. When it is finished cooking, pull from the slow cooker and shred, removing excess fat and bone. Place it back in the slow cooker when finished. Mix the shredded beef with the corn and liquid. Serve with your favorite taco toppings. 

Note: I like to use the Crock Pot liners to make clean up easier.


Tuesday, April 29, 2025

Chicken Chipulos


Most of us don't need Cinco de Mayo to add Mexican flavors to our dinner table. And I know there's nothing at all authentic about this Mexican-adjacent recipe. But, if you're looking to celebrate Cinco de Mayo on May 5, this new-to-us recipe was tasty. 

I volunteered to make a casserole dish for a PEO fundraiser. When the committee forwarded the recipe for Chicken Chipulos, I must admit I had to Google "chipulos." It's basically a chicken taco casserole prepared in layers. 

No matter what it's called, it even got a "thumbs up" from my beef-loving husband. So, I decided I'd make it for my next time cooking for the Stafford Core group. Core is an organization that helps individuals and families overcome poverty. Each week, they meet for educational sessions. Just as important, they connect with a community of other people who are there to listen and support them. Each week, community organizations provide a meal for those gathered. I organize the efforts for my church's turn at a meal, usually about once a quarter. Both at home and at Core, I served it with Spanish rice, lettuce salad, sour cream, chips and salsa. For even more Mexican flair, you could also add refried beans, chili con queso and guacamole - or a combination thereof!

While the original recipe used canned chicken breast, I purchased chicken tenderloins that were on sale at my local grocery store. I had seen a recipe for preparing chicken in a slow cooker to use for chicken tacos, so I gave that method a try. I combined two large packages of the chicken tenderloins with one packet of taco seasoning, one packet of ranch dressing mix and 2 cups chicken broth and let the slow cooker do the work. After it was cooked, I refrigerated the meat until the next day, then used a method Jill had told me about to shred the chicken. Doing a little at a time, I put the cooked, cooled chicken in my Kitchenaid mixer with paddle attachment. I let the mixer do the shredding for me, rather than pulling it to shred or chopping it in bite-sized pieces. It worked great, and I will definitely use that method again. 

If you try it, let me know how you like it. It was a hit at Core, too.

Chicken Chipulos

1 can condensed cream of chicken soup 
1 can condensed cream of mushroom soup
1 can (4 oz.) diced green chilies
3 cups shredded, cooked chicken
1 onion, finely diced
8 oz. sour cream
2 cups shredded Cheddar cheese
8 10-inch flour tortillas 

To prepare: Preheat oven to 350 degrees. Combine soups, chicken, green chilies, cooked onion and sour cream in a medium-sized bowl. Set aside. 

Rip tortillas into bite-sized pieces and layer 1/3 onto the bottom of a prepared 9x13 inch baking dish. Layer 1/3 chicken mixture on top, then a layer of cheddar cheese. Repeat two additional times, making sure to end with cheese on the top layer. Bake in preheated oven for about an hour and serve. 
 
Notes: 
  • The recipe I got from my PEO sisters used 2 cans - 12.5-ounce each - of chicken breast meat. I bought chicken on sale at my local grocery store and threw it in my slow cooker with 1 packet of taco seasoning, 1 packet of ranch seasoning and 2 cups chicken broth. After it cooled, I shredded it, using the paddle attachment of my Kitchenaid mixer. Jill had recommended that method for shredding chicken after cooking, and it worked great!
  • The original recipe didn't call for cooking the onion ahead of time. However, I wanted to make sure that the onion was cooked through. I combined my diced onion with a little splash of water and covered with plastic wrap, then microwaved until it was tender.  
  • The recipe said to rip tortillas. I used clean kitchen shears. 
  • While the recipe didn't say to do this, I put a very thin layer of the chicken and soup mixture on the bottom of the pan before adding my first layer of tortillas. My rationale was to prevent burning the tortillas or making them too hard. That worked well. (I still used the bulk of the first third of soup mixture on TOP of the first layer of tortillas.)


Thursday, October 12, 2017

Tacos with Pineapple Salsa

As I type this, the thermometer is valiantly trying to climb above the 40-degree mark. And I'm thinking that, as usual, I have impeccable timing ... NOT.

Sharing this recipe in July or August or even September would have been the smart thing to do. After all, that's the height of grilling season, and grilling is the genius behind these Chili Lime Tacos. But, if I look ahead to the weekend, temperatures will be on the rise. And with tailgaters firing up the grills again for another weekend of college football, perhaps the timing will rival that enviable connection between quarterback and sure-handed receiver. (That's what I'll tell myself anyway.)

Jill and Eric were actually the chefs behind this tasty meal. While they didn't serve it at a tailgate, they did offer it as supper after an earlier K-State football game this fall.
We enjoyed a meal on their back deck after the game with able table-setting assistance from a little K-State football fan. 
Somehow, sharing the recipe got lost among corn reports and hay auctions and unplanned journeys.

So when I saw the photos hanging out in my blog drafts, I decided not to punt until next summer. Chili Lime Chicken Tacos with Grilled Pineapple Salsa was a recipe Jill found at the blog, Carlsbad Cravings. The blog has become one of her new favorites for adding new recipes at their house.

I don't use chicken regularly in my meal planning at home for a couple of reasons:
1)  We have a freezer full of beef.
2)  Randy says he's not a big fan of chicken.
However, if he orders chicken "something" at a restaurant, I always give him "the look," questioning why I so fastidiously avoid the bird on our home menu. And, for the record, he thought these tacos were mighty good.

Chili Lime Tacos 
with Grilled Pineapple Salsa

1 recipe all-purpose chili lime chicken (below)
1 recipe grilled pineapple salsa (below)
4 flour tortillas or 6-8 small corn tortillas
1/2 cup favorite cheese, more or less

Prepare Chili Lime Chicken and Grilled Pineapple Salsa according to directions. To assemble, grill tortillas lightly. Top with chicken, salsa and cheese as desired. Add guacamole and other taco toppings as desired. May serve with rice, chips, beans, etc.

Chili Lime Chicken
1 lb. chicken breasts pounded to 1/2-inch thickness
Chili Lime Rub
2 tbsp. olive oil
1 tsp. chili powder
1/4 to 1/2 tsp. chipotle chili powder (optional for more heat)
1/2 tsp. ground cumin
1/2 tsp. smoked paprika
1/2 tsp. onion powder
1/2 tsp. garlic powder
3/4 tsp. salt
1/4 tsp. pepper
1 tsp. brown sugar
2 tbsp. fresh-squeezed lime juice
Lime zest from 1 lime

In small bowl, whisk chicken rub ingredients together and rub evenly over chicken breasts. Time permitting, allow chicken to sit for 30 minutes at room temperature or refrigerate up to 8 hours, then bring to room temperature before cooking.

To grill: If chicken has been refrigerated, let sit at room temperature for 15-30 minutes. Grease and preheat the grill to medium heat, 375 to 450 degrees. Grill chicken undisturbed for 5-7 minutes per side or until chicken is cooked through. (An inserted thermometer should read 165 degrees F.) Remove chicken from grill and let rest 5 minutes before slicing. Garnish with extra fresh lime juice, if desired.

Note:  You may use the stovetop to cook the chicken, using a large, nonstick skillet over medium-high heat

Grilled Pineapple Salsa
(Makes 3 1/2 cups)
1/2 ripe pineapple, trimmed and sliced
1 large red bell pepper, seeded and quartered
1 whole jalapeno pepper
1/2 small red onion, peeled and cut in half
1 1/2 cups loosely-packed cilantro leaves, finely chopped
1 tbsp. lime juice
1/4 tsp. ground ginger
1/4 tsp. ground cumin
Salt and pepper to taste
Olive oil

Grease grill and heat to medium-high heat. Drizzle red onions with olive oil and thread onto a metal skewer. Drizzle red bell pepper and jalapeno with olive oil to lightly coat.

Working in batches as needed, depending on the grill size, grill pineapple and vegetables at medium-high heat until tender and lightly charred all over, about 12 minutes for onions, turning occasionally; and about 8 to 10 minutes for the pineapple, or until caramelized, flipping once; 6 minutes for the red bell peppers, flipping once; and jalapeno for 3-5 minutes, turning occasionally.

Once cool enough to handle, dab off any excess oil on vegetables with paper towels. Devein and de-seed jalapeno pepper and dice. Chop pineapple and remaining grilled vegetables into bite-sized pieces.

Stir together pineapple and all veggies, spices and cilantro in a large bowl. Can be served immediately, but it's better chilled.


Friday, August 7, 2015

Mexican Chorizo Skillet

Served with fresh garden tomatoes and sweet corn from Baldwin Farms
If you're a regular reader, you know I'm boycotting Chipotle. (See my Five Words to Ruin a Date with a Farmer post.) Even my 3-year-old granddaughter has to choose an alternative to the "rice and beans place" if we're paying for the meal.

So, I will just beat them at their own game. My version will be less expensive, and it won't offend me or my other farmer friends.

Jill tried this Mexican Chorizo Skillet and emailed the link to me and to Brent. She told us it was from her favorite blog. I was just a little offended. But I like Iowa Girl Eats, too, so I let it slide. Well, sort of: I did email her back and say, "Your FAVORITE blog???!!!"

After we got that straight, I did give it a try. I've never used chorizo before, so I wasn't sure whether it would be too spicy for us. Somehow, our kids have more adventurous palates when it comes to the spice factor.

But the rice and beans smoothed out the spicy meat mixture. Randy rolled up the mixture in a flour tortilla. I topped a dinner-sized salad with the meat mixture. Recipe success! Take that, Chipotle!
Mexican Chorizo Skillet
(with Sweet Potatoes, Rice and Black Beans)
Adapted from Iowa Girl Eats

1/2 tbsp. extra virgin olive oil
1 small sweet potato, peeled and chopped into 1/2-inch cubes (about 1 1/2 cups)
1/4 cup chopped onion
6 oz. Mexican pork chorizo
1/2 cup black beans
1 3/4 cups chicken broth
1/2 cup salsa verde
1/2 cup long grain white rice
Add-ons:  Chopped cilantro, guacamole, shredded lettuce, shredded cheese, salsa, ranch dressing, tortilla strips or chips, etc.

Put olive oil in a large skillet and meat to medium. Add chopped sweet potatoes and onions; saute for 4 to 5 minutes or until potatoes are just beginning to turn tender. Add chorizo, then turn heat up slightly. Saute until cooked through, breaking up the chorizo as it cooks.

Add black beans, chicken broth and salsa verde to the skillet. Turn heat up to bring to a boil. Add rice; stir to combine. Place a lid on top, turn heat down, and simmer until rice is tender, 15 to 18 minutes, adding more chicken broth at the end, if needed (I didn't need to).

Serving optons:
  • Sprinkle with any of the add-ins. Serve as is - with a fork or use chips as your eating utensils.
  • Put mixture in a flour or corn tortilla and roll up for a soft taco. Top with desired add-ons.  
  • Make a dinner-sized romaine salad with fresh tomatoes and other veggies. Top with about 1/2 cup of the meat mixture and any of the other add-ins. Drizzle with salsa and ranch dressing and enjoy! (Not pictured)
***
An update on my internet saga: I finally got a phone call from a service technician Wednesday, after a full week of not having internet access at home. And he isn't coming until August 12. Let's hope he loads the truck with all possible tools/repairs/equipment needed, since he'll be coming from Wichita. And, at that point, I will have been without internet for 2 weeks. I wish I had more options! I am thankful to my parents, the church and the Hutchinson Public Library for helping connect me to the web, but it sure isn't as convenient as my house!

Friday, February 20, 2015

Quick Beef and Salsa Skillet

It's all about that beef, 'bout that beef (no chicken).

(Inexplicably, I have the song, "All About That Bass," playing on my mind's soundtrack. And since beef is in our freezer and my Farmer would pick it any day over chicken, it seemed to work.)

This Quick Beef and Salsa Skillet has a lot going for it.
  1. It uses some of the beef in my freezer.
  2. It uses one skillet, so it's quick and easy to prepare and clean up. 
  3. It's got a Mexican flavor flair.
  4. You can control the "heat" by using your favorite prepared (or homemade) salsa. You could also add more chili powder to amp up the spice.
  5. At our house, it produces leftovers. (Revisit the quick comment above.)
I know some people don't believe in using convenience items like Bisquick. You can definitely make your own drop biscuit dough and use that instead.

Pair the skillet meal with a fresh green salad with lots of veggies and you have dinner (or lunch or supper - whatever your terminology) ready to go in a snap.

It's all about that beef, 'bout that beef (no chicken).
 
Quick Beef and Salsa Skillet
From the Bisquick Cookbook
3/4 to 1 lb. ground beef
1 jar (16 oz.) thick and chunky salsa
1 can (15-16 oz.) red kidney beans, drained and rinsed
1 can (8.5 oz.) whole kernel corn, undrained
1 can (8 oz.) tomato sauce
2 tsp. chili powder (divided)

1 1/2 cups Bisquick
1/2 cup water

1/2 cup shredded Mexican blend cheese

Cook beef in 12-inch skillet over medium heat, stirring occasionally until brown; drain. Stir in salsa, beans, corn, tomato sauce and 1 teaspoon of the chili powder. Heat to boiling; reduce heat to low.

Stir Bisquick, remaining 1 teaspoon of chili powder and the water together until soft dough forms. Drop by 6 spoonfuls onto the simmering beef mixture.

Cook uncovered for 10 minutes. Cover and cook 8 minutes longer. Sprinkle with cheese. Cover and cook about 2 minutes or until cheese is melted.

Serves 6.

Note: You can make this as mild or as spicy as you and your family like by anything from mild salsa to hot.

Wednesday, May 1, 2013

A Cinco de Mayo Casserole


There's not much authentically Mexican about this casserole. But it is authentically tasty. This cook of English-Scottish ancestry thinks that the ingredients have a Mexican flair. So if you're looking for a tasty way to celebrate Cinco de Mayo on your family's table this May 5, this recipe is a contender.

We prefer mild Mexican flavors, but if you like your food spicier, you can use a more heat-packed pepper than the green chilies. You can also use hot chili beans and spicy refried beans.

It makes a really big casserole, so I like using it for church potlucks. Unless you're feeding a crowd, you can make half a recipe. (I realize it's not the most convenient to use just half a can of refried beans and chilies, but the other ingredients are easy to divide. Maybe you can have another Mexican-inspired meal and use the remainder of the cans later in the week.)

Enjoy for Cinco de Mayo - or any other day of the week. (Links to some of our other favorite Mexican-inspired meals are at the bottom of this post.)
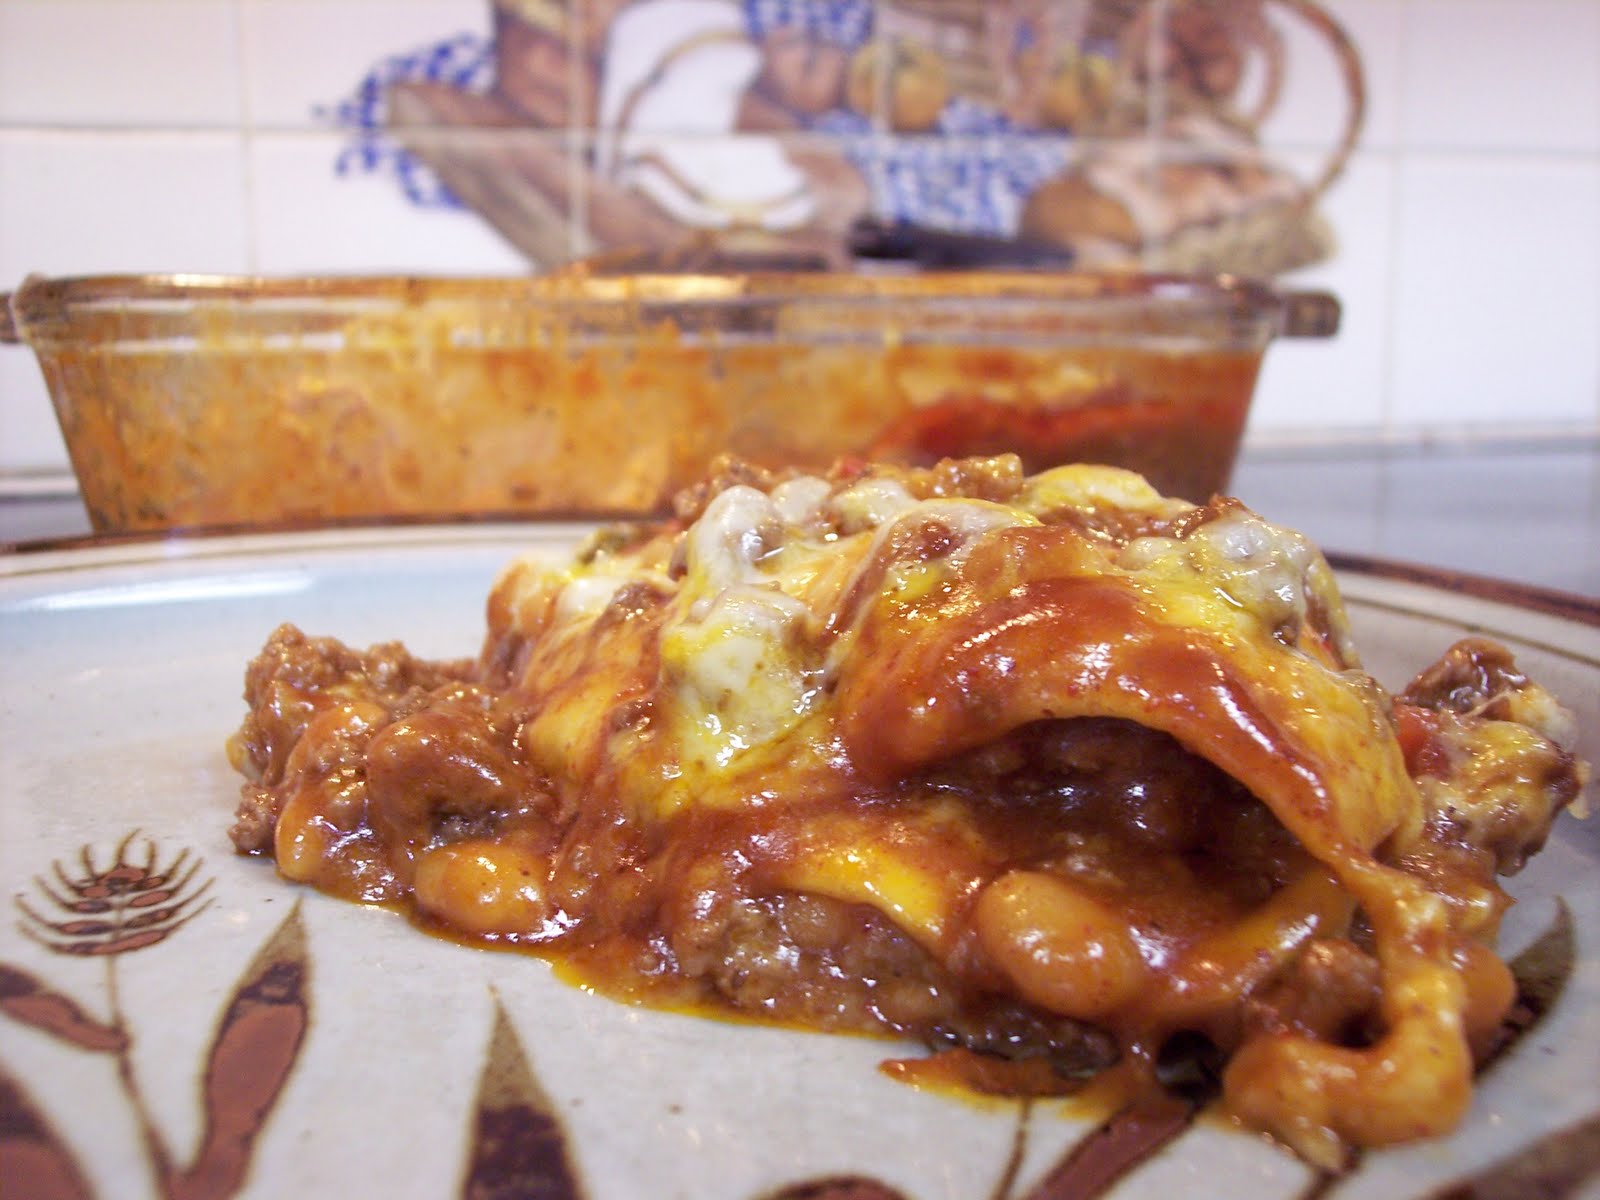
This is how it looks before adding toppings.
Mexican Tortilla Casserole

1 1/2 lbs. hamburger, browned and drained
Minced onion to taste (or 1/2 a regular onion, chopped)
1 pkg. flour tortillas
2 cans chili beans
1 can fat-free refried beans
1 small can chopped green chilies
2 cups marbled cheese
8 oz. sour cream (regular or low-fat)
6 eggs
Toppings: Chopped lettuce, chopped tomatoes, chopped olives, chopped onions, chopped pepper, additional shredded cheese, guacamole, other toppings as desired

Brown hamburger with minced onion. Drain; set aside. Cut tortilla shells into bite-sized pieces; set aside. (I usually use clean kitchen shears.)

Combine chili beans, refried beans, chilies and browned hamburger, mixing well.

Put a thin layer of bean/meat mixture in bottom of prepared pan. Add 1/2 of tortillas and a layer of cheese. Repeat, ending on top with the bean/meat mixture.

Beat together the eggs and sour cream. Pour over the prepared casserole. Bake at 350 degrees for 1 hour. Cool slightly. Right before serving, top with chopped lettuce, tomatoes, onions, etc., as desired.

Note: The original recipe calls for a 13- by 9-inch pan. I have a slightly larger white casserole dish that I use for this and it still is really full. If you don't have a larger pan, you may want to divide it into two smaller casseroles and freeze one. (Don't put the egg layer on before you freeze it. Then, when you're ready to serve it, remove from freezer to thaw, and add the egg mixture before baking.)

***
Here are some other County Line recipes with a Mexican flair. (The photos may not be my best, but the recipes are tried and true!) Just click on the links below each photo to get the recipes.


 ***
Today, I'm linked to Wichita blogger Ashley's What's in Your Kitchen Wednesday? Check out what other food bloggers are talking about this week!

Thursday, August 16, 2012

Quick Beef and Salsa Skillet

Great with a green salad with lots of veggies!
Haute cuisine, it is not. Hot and hearty food, it is.

This Quick Beef and Salsa Skillet uses biscuit mix. I am perfectly capable of making biscuits from scratch, but this is a quick and easy way to get dinner on the table in a hurry. We like Mexican-inspired meals. Using Mexican corn and kidney beans was a tasty way to stretch the hamburger. Choose your favorite salsa because it plays a central role in the taste of this dish.

This recipe cooks on top of the stove, which is a bonus during hot summer days. And even with milder temperatures forecast for the rest of this week, it's still nice to use the same pan for browning the hamburger and then putting together the rest of the recipe.

A caveat: Because you are basically steaming the biscuits to cook them, they aren't going to get crusty and brown like they would if you were baking them in a hot oven. So realize that the biscuits are more like dumplings. And, if browning is important to you and yours, you could stick the skillet in the oven for a few minutes. Just make sure the skillet is ovenproof.

Enjoy!

Quick Beef and Salsa Skillet
Serves 6

1 lb. ground beef, browned and drained
1 jar (16 oz.) thick and chunky salsa
1 can (15-16 oz.) kidney beans, drained and rinsed
1 can Mexican corn, undrained
1 can (8 oz.) tomato sauce
2 tsp. chili powder (divided)
1 1/2 cups Reduced Fat Bisquick
1/2 cup skim milk
1/3 cup shredded Mexican blend cheese

Cook beef in 12-inch skillet over medium heat, stirring occasionally until browned; drain. Stir in salsa, beans, corn, tomato sauce and 1 teaspoon chili powder. Heat to boiling; reduce heat to low.

Stir Bisquick, remaining chili powder and milk together until soft dough forms. Drop by 6 spoonfuls onto simmering beef mixture.

Cook uncovered for 10 minutes. Cover and cook 8 minutes longer. Sprinkle with cheese. Cover and cook about 2 minutes or until cheese melts.

Notes:
  • Use a salsa you really enjoy. It can be as hot or as mild as you and your family prefers.
  • I ended up with 7 spoonfuls of biscuit batter, but that worked out fine. I was just guessing how big each "dumpling" needed to be and ended up with extra. I don't think it matters that much, other than the recipe is supposed to serve 6. Randy will gladly eat another dumpling, so that's not a problem!

Tuesday, October 25, 2011

A Matter of Semantics

I'm a fan of "planned overs." It sounds so much better than leftovers, don't you think?

If I'm getting a skillet dirty by browning hamburger, I usually brown more than I need for one meal. I then stick it in the refrigerator, where it can become something entirely different the next day.

But I recently had taco meat leftover from a PEO luncheon. We made taco salads for the ladies luncheon, and then I made them for Randy & myself the next day. But with some of the remaining taco meat, I tried a new recipe, Taco Burgers from Food.com.

They will definitely be on the menu again for supper or for a hot meal to take to the field.

Taco Burgers
1 lb. hamburger
1 medium onion, minced
1 envelope taco seasoning
1 cup shredded lettuce
1 large tomato
1 cup shredded Cheddar cheese
Taco sauce (not picante, but the smooth sauce)
6 hamburger buns

Brown hamburger and onions in a skillet on medium high heat until meat is no longer pink. Drain well. Add taco seasoning (don't add water to the mix). Toss with the meat to coat, cooking for about 5 minutes longer.

Lightly butter the inside of the buns and toast in skillet or under broiler until nicely browned. (I also sprinkled grated cheese on the buttered buns before broiling.) Top each hamburger bun with taco meat, shredded lettuce and tomato and drizzle with taco sauce.

A recipe note: I already had my taco meat prepared from earlier. I usually get taco seasoning from Glenn's Bulk Food store near Hutchinson, but any packaged mix will do or you can make your own taco seasoning with spices in your cabinet.

If you're looking for another way to use leftover/planned over taco meat, try Taco Pizza. It's another favorite around here.

Or use planned-over taco meat in this Chuckwagon Tortilla Stack. It's a recipe from our daughter Jill's kitchen.

Enjoy!

***

I'm linked today to Farm Chick's Kitchen. Check it out!

Wednesday, June 8, 2011

Wholly Guacamole

I must admit: I am probably more likely to buy guacamole than I am to make it. I don't know why. It's not that hard or time consuming to make.

When we were at Jill's & Eric's over Mother's Day weekend, she served us homemade guacamole with panini sandwiches. It was delicious (and it wasn't just because I wasn't cooking.)

The hardest part of making guacamole is selecting the right avocados. Other than that, it's a breeze. For the record, the experts say the best way to tell if an avocado is ready for immediate use is to gently squeeze the fruit in the palm of your hand. Ripe, ready-to-eat fruit will be firm yet will yield to gentle pressure.

That's all great in theory, but sometimes I get fooled. Selecting an avocado sometimes mimics selecting the perfect watermelon or cantaloupe. Easier said than done.

The guacamole is a great accompaniment to the Chicken Enchilada recipe from yesterday's County Line or any Mexican meal.

Jill served the guacamole with paninis made on their George Foreman grill. It's an assemble-your-own meal. She usually has several varieties of breads. She buys unsliced specialty breads, then slices them fairly thick since they are smashed down in the grill.

Then she supplies a variety of sandwich meats, grilled chicken cut into strips, different cheeses, thinly sliced peppers and thinly sliced onions. (You can even caramelize the peppers and onions a bit in a saute pan.) Then she has mustards, spaghetti sauce and flavored mayonnaise you can add before or after putting the panini on the grill. A little guacamole could also go on the inside of the sandwich before grilling.

Put a little butter on the bread before you pack your selections between the two pieces. Add your fillings of choice, smash between the grill. There's usually room for two sandwiches at a time on the grill.

Cook until browned and enjoy!

Wholly Guacamole
Jill got the recipe from the Joylicious website
(serves 4-5)
  • 3 ripe avocados, pitted and skin removed
  • 2 ripe roma tomatoes, small diced
  • a handful of cilantro, cleaned and finely chopped (omit if you do not like cilantro)
  • 1/2 medium purple onion, peeled and finely chopped (Jill used green onion)
  • 1/2 lime, juice only
  • 1 tsp salt

Place all ingredients in a mortar and pestle or large bowl. If you do not own a mortar and pestle you can mash the avocados with a fork or potato masher. Thoroughly mix the ingredients — if it needs more acid, add more lime, a little at a time. Same goes for salt. Place in large bowl and serve with tortilla chips. If not serving immediately, cover and refrigerate.

You can also use guacamole on sandwiches, salads, meats and use it for dips for pita wedges, pretzels, crackers, etc.