Showing posts with label meals to the field. Show all posts

Friday, September 9, 2016

Field Trip: Philly Cheesesteak Sandwiches

Grade school students aren't the only ones who take field trips. I do my share, too - though I'm not visiting the zoo or the science museum.

Instead, I'm carting meals to the field. Nothing says "fine dining" like a meal spread out on a car trunk. (I am willing to bring collapsible chairs to the "party," but Randy prefers to stand up after sitting in the combine or tractor.)

Around here, wheat harvest time requires the most "field trips" - sometimes two a day. So it's always nice to find another meal to add to the harvest rotation - or any time I need to take a portable meal to the guys, whether they're working ground or cutting fall crops.
For these sandwiches, I started with a recipe of Slow Cooker Beef and Vegetables. I love using my Crock Pot during the hot days of summer, since it helps keep the kitchen cool and still produces a hot meal. But, honestly, I like using my slow cooker anytime: Get the ingredients gathered and going and then don't think about it for several hours!

Before I added the vegetables to the slow cooker for the last 30 minutes of cooking, I pulled some of the beef and broth. I thought the meat would be perfect for a second harvest meal - Philly Cheesesteak Sandwiches. And the guys raved about them. After that, these sandwiches definitely went on the meals-to-the-field list.

I cut up two peppers (I used one whole red, 1/2 orange and 1/2 yellow, but you could also use green) into thin strips, then added a sliced sweet onion to a large nonstick skillet. I sprayed with cooking spray and just let the veggies caramelize in the pan over medium-high heat. When they started sticking, I just added a little water and continued cooking until the veggies were tender.

To prepare the hoagie buns, I split them and buttered the inside. Then I sprinkled with Swiss cheese. (You can use mozzarella or provolone as well.) I put it under the broiler until the buns and cheese were toasty.

After the vegetables were done, I added the beef to the skillet to heat back through. After putting the meat and veggie mixture on the prepared buns, I sprinkled with additional cheese and stuck the meat-and-cheese-covered sandwich bottoms back under the broiler until the cheese was nice and bubbly.

One slow cooker recipe = two delicious meals = two satisfied customers!
Kansas Farm Wife's Philly Cheesesteaks
Beef and broth from Easy Beef & Vegetables Slow Cooker recipe
1 large red pepper
1 large yellow pepper (or 1/2 yellow and 1/2 orange. Can also use green)
1 large sweet onion
Provolone, mozzarella or Swiss cheese - sliced or shredded
Hoagie buns
Butter

Thinly slice the peppers and onion and put in a large non-stick skillet that has been sprayed with cooking spray. Cook until the vegetables are tender. If they start to burn, add a little water and continue cooking until softened to taste.

Add the beef and broth and heat until warmed.

Split the hoagie buns. Butter, then sprinkle with cheese. Put under broiler until the cheese is bubbly and the bun edges are lightly browned. Remove from oven.

On the bottom bun, spoon a portion of the beef and vegetable mixture. Top with additional cheese. Put back under the broiler until the cheese is melted and bubbly. Top with the top bun and serve.

If you're taking them to the field, wrap in aluminum foil and put them in a thermal container so they stay hot for delivery. Add fruit, homemade cookies, homemade pasta salad, chips or any other accompaniments you prefer.

Click here for the pasta salad you see in the above photo.

Click here for the cookie recipe.

***
Today, I'm linked to Weekend Potluck, hosted by these bloggers. Check out the tried-and-true recipes from them and other foodies!

Friday, November 13, 2015

Zesty Italian Wraps

Pheasant and quail hunting season opens in Kansas this weekend. This recipe doesn't have a thing to do with how to prepare the birds harvested this weekend. (I admit it: I'm not your go-to girl on that front!)

But maybe it could be a snack or a lunch packed in an insulated cooler and eaten by orange-vested, boot-wearing hunters ... before they prepare the "catch of the day" after the sun goes down, of course. (I will remain optimistic for the hunters.)

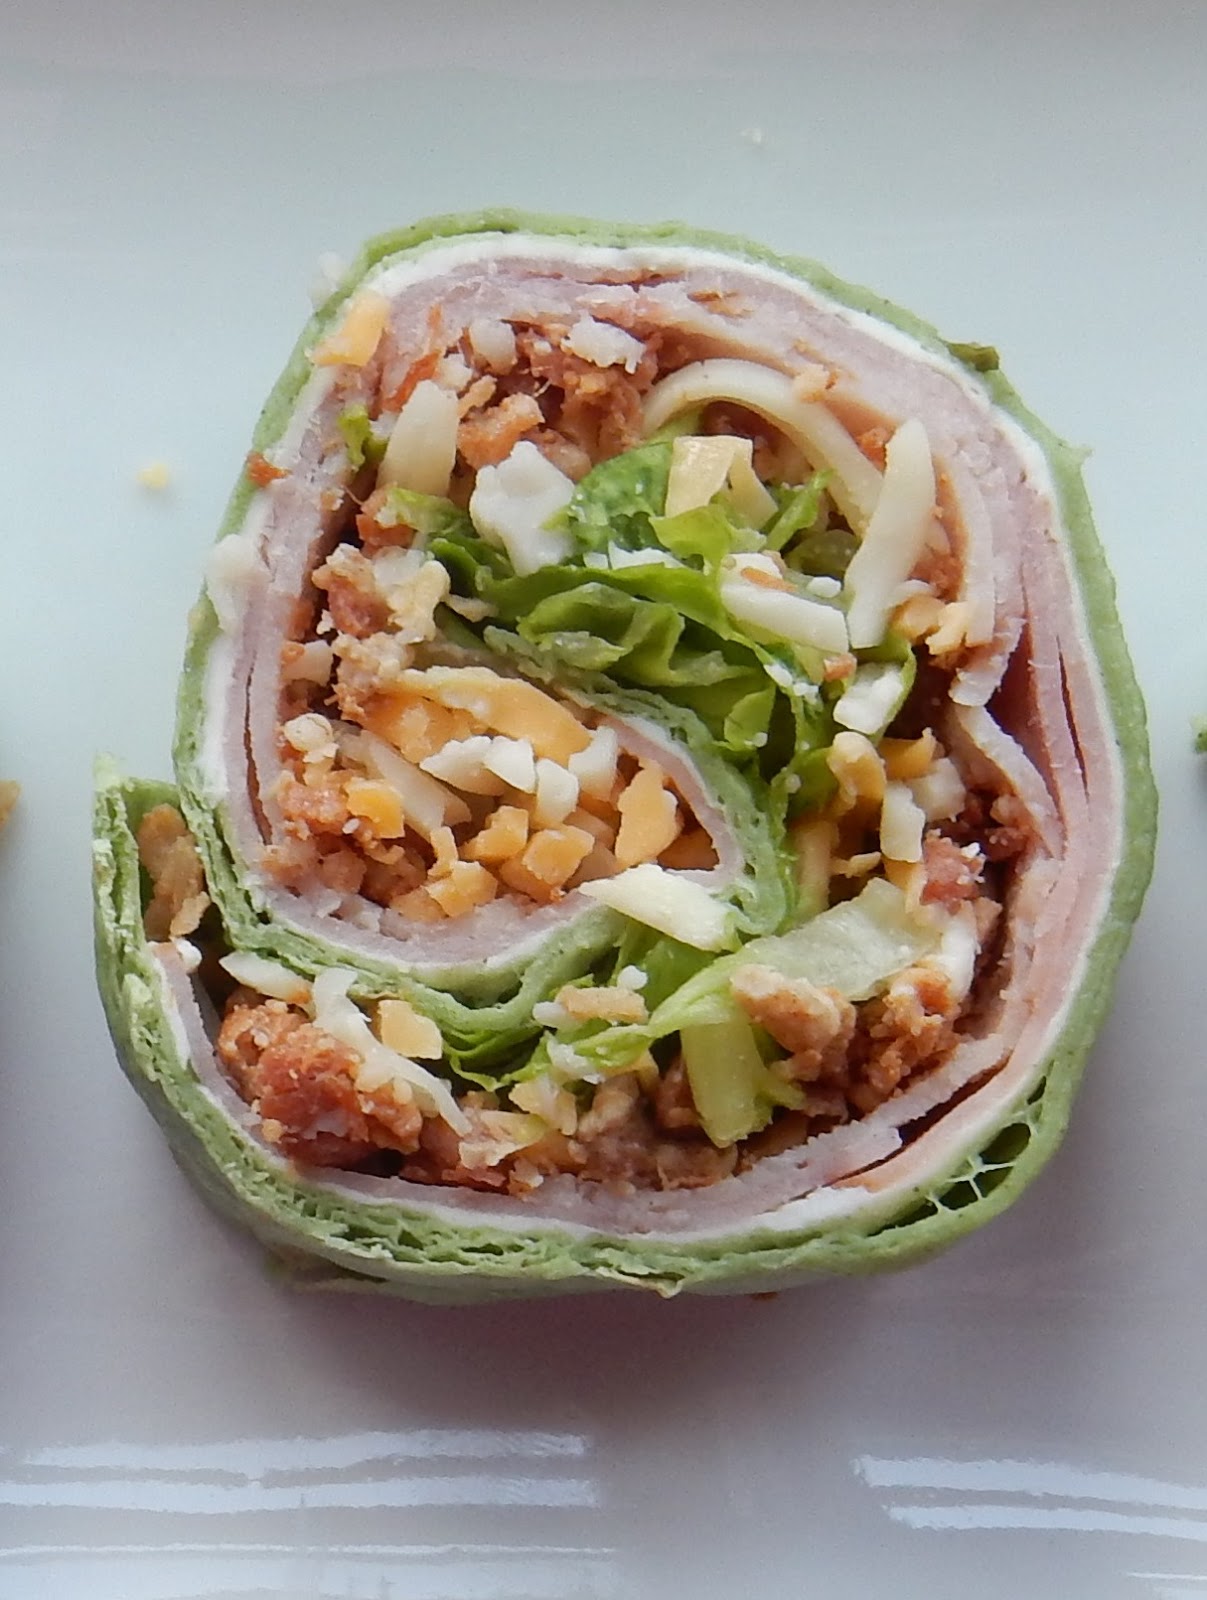
I didn't prepare these Zesty Italian Wraps (and pinwheels) for a hunting trip. But they did make the menu as sandwich wraps when I took meals to the field while planting wheat earlier this fall. I also included them as "pinwheels" for the national Master Farm Homemaker convention the Kansas ladies hosted in August.  They are a spicier addition to a sandwich tray than the Turkey Club Pinwheels I also served.
The Zesty Italian pinwheel is in the center, while the Turkey Club Pinwheels flank it.
I didn't grow up in a family of hunters. Randy may go out for a little while on opening day, but he is certainly not a man obsessed with the sport. He will be more likely to watch college football on Saturday afternoon than go back out and hunt, unless a buddy calls him for an outing. (But I think that's more about the comradery than traipsing through CRP grass in search of the elusive pheasant or quail, who always seem to know when the season stars. (We saw our fair share this summer as we traveled our dirt roads to and from the fields. They will likely be in hiding this weekend, though!)

Since football is also the sport on my mind in the fall, I'll also offer them as a tailgate option. No matter the setting - by the side of the road or in a recliner for football viewing - I hope you'll enjoy!

Zesty Italian Wrap or Pinwheels
Flour tortillas (I used tomato for color)
Ham, thinly sliced
Salami, thinly sliced
Pepperoni slices
Provolone cheese slices
Shredded romaine lettuce
Banana peppers
Zesty Italian dressing

Layer meats, cheese, lettuce and banana peppers on top of a flour tortilla. Drizzle dressing carefully over the top. Roll the wrap up tightly. Serve as a wrap or cut into pinwheels for serving on a sandwich tray. (If you cut into pinwheels, it helps to refrigerate for about 1 hour before cutting.)

***
Today, I'm linked to the Weekend Potluck. (Thanks to them for featuring my Apple Sundae Cake last week!) Visit these hosts and see what's cooking in other kitchens across the country:

Friday, October 16, 2015

Sloppy Joe Cornbread Bake

Serve the casserole with a green salad.
Meals on Wheels: It's a necessity during busy times on the farm. The guys have their favorites. Jake likes Taco Pizza. Randy likes Italian Meatball Subs. Both are fans of Funeral Sandwiches (which I've renamed Baked Ham and Cheese Sandwiches because we don't need a downer title during a busy time on the farm).

I've done Reuben Crescent Bake and Kentucky Hot Brown sandwiches. Homemade Taco Hamburger Helper has made an appearance on occasion. Add homemade cookies, fruit, chips and something to drink, and it's a mobile feast.

When I saw the recipe for Sloppy Joe Cornbread Bake on Sunflower Supper Club's blog, I knew it was one I wanted to add to the thermal meal carrier rotation this year. Plus, it featured hamburger. Since our freezer always has plenty of beef raised here on the County Line, it's an easy centerpiece to any meal.

It was a hit with both guys, so I'm sure it will make repeat appearances. Actually, it made some repeat appearances as leftovers for Randy, since it made a 9- by 13-inch pan. Thankfully, he is not opposed to leftovers ... especially if they taste this good!
Sloppy Joe Cornbread Bake
Adapted from Sunflower Supper Club
1 box (8.5 oz.) cornbread mix
1/3 cup milk
1 egg
1 can (14.75 oz.) cream-style corn
2 1/2 cups (10 oz.) shredded Cheddar cheese, divided
1 1/2 lbs. ground beef
1 cup diced onion
1/2 cup diced green peppers
1 clove garlic, minced
3/4 cup ketchup
3/4 cup favorite BBQ sauce
1/4 cup brown sugar
1 tbsp. Worcestershire sauce
1 heaping teaspoon yellow mustard
1/2 tsp. salt
1/4 tsp. black pepper
Diced green onions or cilantro for garnish

Preheat oven to 400 degrees. Spray a 13- by 9-inch baking pan with cooking spray.

Combine the muffin mix, milk, egg, corn and 1/2 cup of the shredded cheese. Mix well and pour into prepared pan. Bake for 20 minutes.

While the cornbread layer is cooking, brown the ground beef with diced onions, green peppers and garlic in a large skillet. Drain grease. Add ketchup, BBQ sauce, brown sugar, Worcestershire sauce, yellow mustard, salt and pepper. Bring to a simmer and continue cooking on low for about 5 minutes.

Remove cornbread from oven and poke the top with a fork to make holes in the cornbread. Spoon the beef mixture evenly over the cornbread. Top with remaining 2 cups of cheese.

Return to the oven and bake 15 minutes. Let sit for 5 to 10 minutes before serving. Garnish as desired.

Note: If you want classic Sloppy Joe taste, use 1 1/2 cups ketchup and omit the BBQ sauce.

Friday, October 9, 2015

Turkey Club Pinwheels

Flexibility is a good thing. It comes in handy on a farm, when plans change because of weather ... or machinery breakdowns ... or personnel.

It's also valuable in a recipe. I first made these Turkey Club Pinwheels for the national Master Farm Homemaker Convention in Hutchinson. We Kansas ladies provided a light supper and snacks in the hospitality room the first night. I was supposed to bring sandwiches, but I thought the occasion called for some pizzazz along with good taste. I'm sure people would have eaten plain old ham sandwiches, but we were trying to make a good impression, right?

Turkey Club Pinwheels to the rescue. They didn't last long in the hospitality room. Then, during wheat planting, they made a repeat appearance in the guys' thermal lunch bags. This time, I served them in the form of a wrap, instead of cutting them into lady-like slices.

Either way, they were a hit. They could also be a tasty addition to a football tailgate or a Royals' baseball viewing party. Need a change up in your sandwich menu? Send in these Turkey Club Pinwheels. 
 
Turkey Club Pinwheels
Recipe adapted from Inside Bru Crew Life
4 oz. cream cheese, softened
1/4 cup Greek yogurt
1 tbsp. dry ranch dressing powder
1/2 cup shredded Cheddar Jack cheese, divided
1/4 cup cooked, crumbled bacon, divided
4 8-inch soft tortilla shells (I used spinach for color)
Slivered deli ham
Slivered deli turkey
Shredded romaine lettuce
24 grape tomatoes (opt.)
Ranch dressing for dipping (opt.)

Mix together cream cheese, yogurt and ranch dressing powder. Spread 1/4 of the mixture over each of the four tortillas. Place thinly-slivered deli ham over the cream cheese mixture, then top that with a layer of deli turkey. Sprinkle with cheese and bacon. Top with shredded romaine lettuce.

Roll up, folding sides in as you go. Wrap in plastic wrap and refrigerate for 1 hour. Cut each tortilla into 6 slices. If desired, add a toothpick topped with a grape tomato. Makes 24 pinwheels. Or you may also serve as wraps. (Makes 4.)

Notes: 
  • You may cook and crumble your own bacon or use real packaged bacon bits to save time. 
  • You may want to serve some ranch dressing on the side to use as a dip. 

***
Today, I am linked to the Weekend Potluck. Check out all the other yummy recipes there. It is hosted by:

Friday, June 19, 2015

Two by Two: You'll Want S'More


Kind of like Noah's Ark, I package cookies two-by-two to get ready for wheat harvest. A few weeks ago, I made (and doubled) my basic drop cookie recipe. Then, I divided the dough into four parts and threw in different add-ins for variety. (Click on the link to see some of our favorite combinations!)
I packaged them two-by-two and put them in snack bags in the freezer. Then, I can pull out the cookies I need each day for special evening meal deliveries.

But when I saw a bar cookie recipe for Peanut Butter S'Mores Bars, I decided to add to my arsenal of freezer goodies.
The familiar summertime taste of marshmallows and chocolate is bolstered by peanut butter in the dough, as well as peanut butter chips nestled in the oozy, marshmallowy goodness.
For more ideas for harvest treats or meals, you can use the search engine on Kim's County Line, found in the upper left of the blog. Type in "cookies," "bar cookies," "salads," "main dish," "Mexican," "beef," etc. I only publish the recipes that we've tried and given good reviews! (But you don't have to be a farm family to enjoy some of these tried-and-true favorites!)
Peanut Butter S'mores Bars
Adapted from Six Sisters Stuff
1 cup butter, softened
2/3 cup peanut butter
1 cup brown sugar
3/4 cup sugar
2 eggs
1 1/2 tsp. vanilla
3 cups flour
1/2 tsp. salt
1 tsp. baking soda
1 cup chocolate chips (milk or semi-sweet - your preference)
1 cup peanut butter chips
1 3/4 cups miniature marshmallows

Heat oven to 350 degrees. Spray a 10- by 15-inch pan with baking spray.

In a large mixing bowl, mix together butter, peanut butter and sugars. Cream well. Add eggs and vanilla; mix well.

Add dry ingredients, just until blended. Fold in chocolate and peanut butter chips and marshmallows.

Spread batter into prepared pan and bake for 20 minutes or until light golden brown. (Ovens vary. I just got a new oven and things take longer to bake. With my old oven, 20 minutes would have been too long, so know your oven.) They will seem a little gooey, but they set up when cooled.

Wednesday, June 26, 2013

Harvest Meals: Don't Go Off Half-Baked!

Homemade cookies (hidden in lefthand corner, grapes, macaroni salad and baked ham & cheese sandwiches were on the menu for supper last evening.
Meals on wheels - country style. After 32 years, maybe I should come up with a theme song. I'm thinking the tune to "Love Boat." OK, maybe not.

When we were first married, I worked in Hutchinson, so I delivered evening harvest meals, while my mother-in-law, Marie, made the bigger noon repast. After I "retired" from The Hutchinson News when Brent was born, I expanded my repertoire to noon meals, too.

For the most part, the harvesters comes to the house for noon, and I deliver the evening meal. (Yes, I know I'm lucky.) If the custom cutters don't arrive in time and we end cutting "up north," as we call it, the delivery expands to both meal times. That was tricky in 1988, when Brent was a month old or so during his first harvest.

It's definitely less complicated than it used to be when the kids were little. While I was dirtying every pot and pan in the kitchen, they also needed attention. But it was a great adventure for my two "helpers" who enjoyed the picnics and the after-dinner entertainment - a ride on the combine with Daddy or Grandpa.
Jill would have been about 20 months old during the harvest pictured here. To serve the meal back then, I usually brought a blanket and spread it out on wheat stubble in the shade created by the combine or a truck.
I have tried-and-true recipes that I use every harvest. I make BBQ meatballs and serve them with potato casserole, corn casserole, or homemade macaroni and cheese. Part of the meatball recipe gets a pizza sauce for submarine sandwiches. I make a roast early in the harvest meal rotation. Yesterday, we had some of the leftover roast beef incorporated into beef and noodles over mashed potatoes. More of the beef ends up as BBQ supper sandwiches. Grilled hamburgers or BBQ sandwiches may be teamed with Sweet and Sour Beans. One of the guys' favorite suppers is Taco Pizza, a long-ago recipe contest winner from The News. An easy dessert that has already made a repeat appearance this year is Peach Butter Brickle Cobbler. (I could go on for quite some time finding links, but today's meal requires my attention. If you need additional menu ideas for harvest go-to meals and sides, I'm glad to share. Email me at rkjbfarms@gmail.com)

Some years, I've been both truck driver and meal person. When I fill both roles, the evening meal is cold sandwiches and fixings. 

But let me get to the latest addition to the harvest repertoire,  In the past, I've served hot ham sandwiches. Yesterday, though, I tried a variation. When Jake asked me what they were called, I had to admit, "Funeral Sandwiches." Really.

It was one of those church potluck offerings that had all of us talking. First, we were talking about how good it was. Then, we were talking about the recipe title. Surely someone could have come up with a better name than Funeral Sandwiches. Katie Minks brought them to a church potluck this spring. I was not the only one who requested the recipe. I'm not sure whether I'm the only one rebelling and renaming the recipe.

From this day forth, I believe I will declare them Baked Ham Harvest Sandwiches instead. I took these marinated, baked ham and Swiss sandwiches to the field last evening. Whether you serve them at a funeral, a church potluck, around your kitchen table or in the wheat harvest field, they will get good reviews. I paired them with macaroni salad, green grapes and cookies.
The sandwiches are marinated in a buttery sauce with both sweet and savory components. The recipe says they can be marinated for anywhere from 4 to 24 hours. The first time I made the recipe, I marinated for 24 hours. That really allowed the marinade to soak in. When marinated that long, they were definitely a sandwich to eat with a fork, not your hands. With repeat performances, I didn't marinate as long, and they were less sticky. They are good either way, but I still serve them with a fork - especially when there's wheat dust involved.
Baked Ham Harvest Sandwiches
(aka Funeral Sandwiches)
Recipe from Katie Minks from church potluck

1 pkg. King's Hawaiian Sweet Rolls
1/2 to 1 lb. high-quality ham deli meat
Swiss cheese, thinly sliced
1/2 cup butter, melted
3 tbsp. Worcestershire sauce
2 tbsp. mustard
2 tbsp. brown sugar
Dash of onion powder

Note: I saw King's Hawaiian Sweet Mini-Sub Rolls and used those the first time I made these (and when I took the photo on the real plate). I've since made them with regular-sized rolls because that's what I could find.

Spray 9- by 13-inch pan with baking spray. Cut the rolls in half and line the bottom of a baking pan with the bottom of the rolls. Layer the ham slices, then cheese and place the top half of the roll on top.

Mix together all remaining ingredients. Pour over the buns, drenching each one. Cover tightly and marinate anywhere from 4 to 24 hours.

Preheat oven to 350 degrees. Bake for 15 minutes, uncovered, or until cheese is melted and bun tops are golden brown.

Note: The last two times I've made these, I've put cheese on the bottom bun before topping with ham, more cheese and then the bun top.

Last night, I threw the scenery in for free as a bonus to the harvest meal. I'm nice like that.We may not have a tablecloth, but we have ambiance.

***
Today I'm linked to Ashley's What's In Your Kitchen Wednesday at Kitchen Meets Girl. Click on the link to see some 4th of July treats and other ideas from food bloggers.

Tuesday, October 25, 2011

A Matter of Semantics

I'm a fan of "planned overs." It sounds so much better than leftovers, don't you think?

If I'm getting a skillet dirty by browning hamburger, I usually brown more than I need for one meal. I then stick it in the refrigerator, where it can become something entirely different the next day.

But I recently had taco meat leftover from a PEO luncheon. We made taco salads for the ladies luncheon, and then I made them for Randy & myself the next day. But with some of the remaining taco meat, I tried a new recipe, Taco Burgers from Food.com.

They will definitely be on the menu again for supper or for a hot meal to take to the field.

Taco Burgers
1 lb. hamburger
1 medium onion, minced
1 envelope taco seasoning
1 cup shredded lettuce
1 large tomato
1 cup shredded Cheddar cheese
Taco sauce (not picante, but the smooth sauce)
6 hamburger buns

Brown hamburger and onions in a skillet on medium high heat until meat is no longer pink. Drain well. Add taco seasoning (don't add water to the mix). Toss with the meat to coat, cooking for about 5 minutes longer.

Lightly butter the inside of the buns and toast in skillet or under broiler until nicely browned. (I also sprinkled grated cheese on the buttered buns before broiling.) Top each hamburger bun with taco meat, shredded lettuce and tomato and drizzle with taco sauce.

A recipe note: I already had my taco meat prepared from earlier. I usually get taco seasoning from Glenn's Bulk Food store near Hutchinson, but any packaged mix will do or you can make your own taco seasoning with spices in your cabinet.

If you're looking for another way to use leftover/planned over taco meat, try Taco Pizza. It's another favorite around here.

Or use planned-over taco meat in this Chuckwagon Tortilla Stack. It's a recipe from our daughter Jill's kitchen.

Enjoy!

***

I'm linked today to Farm Chick's Kitchen. Check it out!

Friday, August 5, 2011

Ham and Cheese to Go

(Obviously, this photo was taken during harvest, but the sandwiches are good year-round.)
Pull up a chair. No chair? OK, pull up a pickup endgate.

Yes, this is a ham sandwich. But as they say on all those food shows, "This sandwich is elevated."

I have no idea what that means. But the guys like these sandwiches. Since I haven't seen Bobby Flay in any fields lately, I guess I won't worry about what he thinks.

These hot ham and cheese sandwiches have been on evening supper runs for years. The idea for them came from a Calvary Baptist cookbook.

Growing up on a farm, I've made - and eaten - my share of ham sandwiches. But a sprinkle of dill weed gives these that little something extra.

The original recipe from Gerry Ann Hildebrand makes 24 servings. Instead of making a bunch and freezing them, I usually make them as I need them.

You'll need:

  • As many sandwich buns as you need for hungry people
  • Butter spread
  • Mustard
  • Dill weed
  • Thinly sliced ham
  • Swiss cheese (I like good quality cheese, not processed cheese)

Spread the butter on each side of the buns. Top with mustard (as little or as much as you'd like. At our house, Brent didn't want any mustard at all.) Sprinkle with a little dill weed. Add your ham and Swiss cheese. Wrap in foil and heat in a 350-degree oven until the cheese is melted, and the ham is warmed through. (Or, if you don't want to heat up your oven, you can do it in the microwave ... without the foil, of course.)

Then cart it to the field. They are also something easy to make and grab on your way to a t-ball game or 4-H meeting, and it costs way less than running through a drive-through. (Of course, maybe you're like me, and there's no drive-through to drive through anyway!)

Add some fruit, a few chips and cookies, and you've got a quick and tasty meal with not much time or effort.

Thursday, August 4, 2011

"Mac"imum Taste

(Sorry the photo's not better. I should have realized that before we ate all the salad.)

I have way too many cookbooks. Shhhhh! Don't tell my husband.

On the other hand, he probably wishes I would sometimes consult those cookbooks and make something different on occasion. Like many cooks I know, I can get stuck in a rut. When I'm in a time crunch, I tend to make something in my repertoire that doesn't require pulling a cookbook from the shelf.

Some cookbooks just sit and look pretty on the shelf. Others are true workhorses. The best ones are those from church groups or hometown organizations, mainly because they are down-to-earth, everyday recipes that don't require a trip out of town for ingredients.

One of my favorites is A Taste of Tradition, a holiday collection of recipes by the Stafford Oktoberfest Committee. It is a hometown book, but there's another reason it's a favorite: It was one of the last big projects my late mother-in-law, Marie, worked on before her untimely death.

I love the sentiment on the title page:
These recipes were contributed voluntarily by citizens and friends of the Stafford community. To exchange recipes is an age-old custom. To share a favorite recipe symbolizes friendliness and goodwill.
There are people who don't share recipes. One church lady I knew went to her grave with her homemade cheese sandwich spread recipe. The church bazaar hasn't been the same since. I doubt they need to enjoy cheese spread sandwiches in heaven, but maybe I'm wrong.

This Macaroni Salad recipe is from the cookbook. It is Margie Milton Reiling's recipe, though I've made a few changes along the way.

It made an appearance this year with meals taken to the field. I served it for both the kids' high school graduation parties. It would be a great side dish to take to a picnic. Of course, with the current temperatures, I would suggest an indoor picnic. Enjoy!
Macaroni Salad
1 lb. pkg. macaroni (use shell, rotini, elbow, whatever you have)
1 large chopped green pepper (I used colored peppers.)
1 small bunch green onion, cut up finely (original recipe called for 1 red onion)
4 shredded carrots
1 can sweetened condensed milk
1/2 cup vinegar
2 cups mayonnaise (I use light Miracle Whip)
1/3 tsp. salt
1/4 tsp. black pepper
2 tsp. dried dill weed (this is my addition)
1/3 lb. sharp Cheddar cheese, cubed (original recipe uses American cheese)

Cook macaroni according to package directions. Rinse in cold water; drain. Mix sweetened condensed milk, vinegar, salt, pepper, dill weed and mayonnaise. In large bowl, mix macaroni and chopped vegetables. Pour mayonnaise mixture over macaroni mixture; mix well. Add cubed cheese; mix again. Chill at least 1 hour before serving.

If you wanted to make this into a main dish salad, you could add some cut-up grilled chicken.

Friday, October 22, 2010

A Recurring Theme


I just noticed something. My recent bar cookie recipes seem to have a recurring theme ... chocolate and caramel.

But it's hard to argue with those two ingredients, so there you have it. You will just have to cope with this redundancy.

This was my first time to try the recipe for Oatmeal Carmelites, but I'm sure they will also be a recurring theme on the County Line.

I love using bar cookie recipes because you don't dirty as many pans and they are accomplished quickly. That has been a priority this fall as I delivered meals to the field during wheat planting and milo harvest.

Enjoy!

Oatmeal Caramelites
1 1/2 cups softened butter or margarine
1 1/2 cups brown sugar
2 cups flour
2 cups quick oatmeal
1 tsp. soda
1/2 tsp. salt
1 pkg. (12 oz.) chocolate chips
1 cup nuts (I used pecans this time, but walnuts would also be good)
1 1/2 cups caramel syrup
6 tbsp. flour

Cream together butter and brown sugar. Mix in 2 cups flour, oatmeal, soda and salt. Press half of the crumb mixture into a 9- by 13-inch pan, which has been sprayed with cooking spray.

Bake at 350 degrees for 10 minutes. Then sprinkle chocolate chips and nuts over baked crust. Combine caramel syrup and 6 tablespoons flour; mix well and drizzle over chips and nuts. Sprinkle remaining crumbs over topping.

Bake at 350 degrees for another 15 to 20 minutes or until golden brown.

Monday, October 18, 2010

And the Award Goes To ...

I am about to lose my nomination for the Farm Wife of the Year Award with this admission, but here goes: Taking meals to the field is getting really old.

Getting a meal ready is nothing out of the ordinary around here. But meal delivery adds a whole other dimension. There's packing the hot stuff in a thermal container and the cold stuff in a cooler and schlepping all the carriers to the pickup for delivery. (And, then, there's remembering to include a fork ... and a napkin.) Then you reverse the process and tote it all back in the house, where the pile of dirty dishes awaits. Sigh ... big, BIG sigh!

On my Bible study day last week, I needed to come up with a plan that I could accomplish while I was gone all morning. Slow cookers to the rescue! In fact, I used two of them.

I cooked a roast in one slow cooker. After it was tender, I shredded it and combined it with commercial barbecue sauce to make BBQ Sandwiches. In the other Crock Pot, I did a variation of baked beans, since I was looking for a change-of-pace side dish for my lunch crew.

The Sweet and Sour Beans would be a great potluck dish to take to a church dinner, too.

Maybe I made inroads toward a nomination for the fictitious award with the tasty meal. (I was always losing my Mother of the Year Award nomination when the kids were home, too, but that's another story!) For the record, the guys have been appreciative. And I do know it's helped speed up at least part of the wheat planting and milo harvesting process.

***

As usual, I made a few variations to the original recipe, which I've detailed below.

Enjoy!


Sweet & Sour Beans
1 can butter beans
1 can yellow wax beans
1 can pork and beans
1 can kidney beans
1 can green beans
1 lb. bacon
1 large onion
1/3 cup vinegar
1/2 tsp. garlic salt
1 tbsp. liquid smoke
1 1/4 cups brown sugar
2 cups ketchup

Drain all beans but the pork and beans.

The original recipe said to cook 1 pound bacon until crisp; drain and set aside. Then, saute the onion in the bacon grease. I didn't do that. I used some jarred, already prepared real bacon bits and I stirred in some minced onion. I'm sure it would have been tasty the other way, but I just didn't have the time and I didn't figure anyone needed the grease.

So ... going on: If you've sauted the onion in the skillet, add all the ingredients except the beans and simmer for 20 minutes.

Pour sauce over beans in casserole dish. Sprinkle crumbled bacon over top. Bake at 350 degrees for 1 1/2 to 2 hours.

As you can see from the photo, I dumped everything into a Crock Pot and cooked it on low while I was gone all morning. It worked just fine.

Wednesday, October 13, 2010

Impossibly Easy Lasagna Pie

I was looking for a new way to use my freezer full of hamburger AND a recipe I could transport for yet another meal to the field.

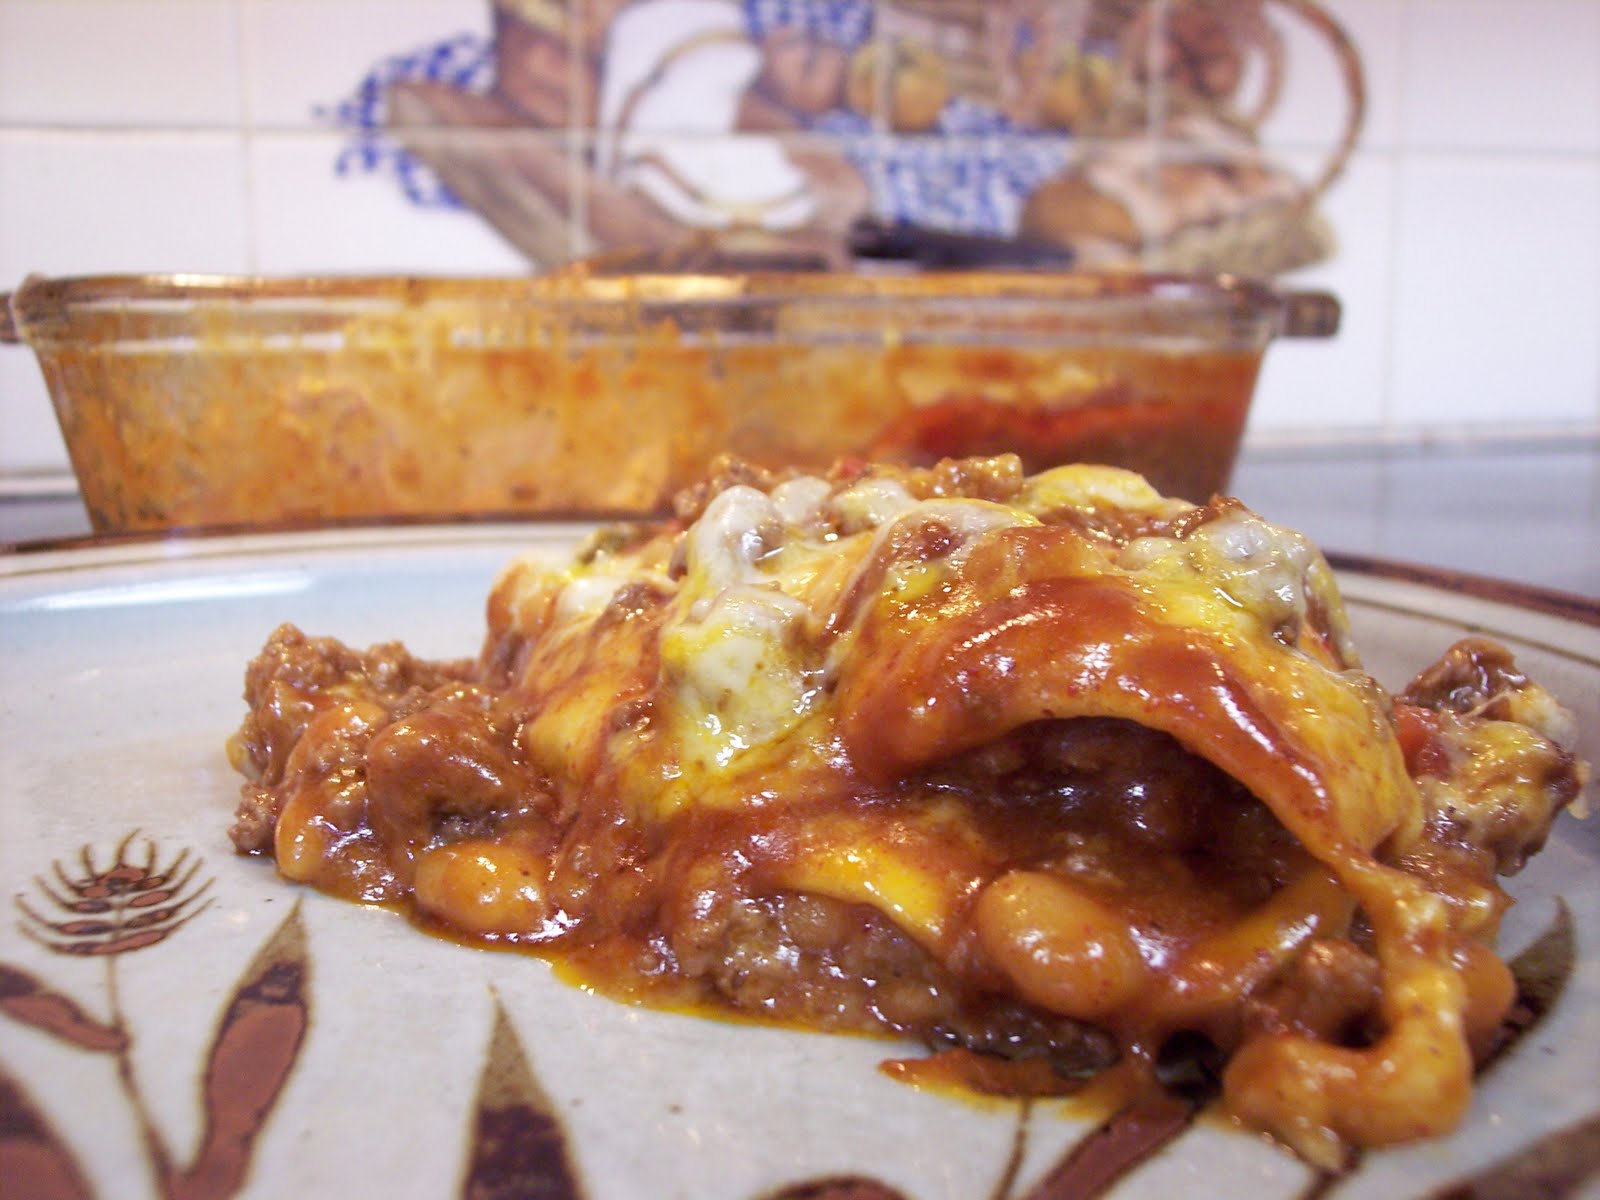
I solved both with Impossibly Easy Lasagna Pie. It got good reviews.

I hope it does at your house, too. Enjoy!

Impossibly Easy Lasagna Pie
1 lb. ground beef
1/2 cup thick and chunky tomato pasta sauce
1/3 cup ricotta cheese
3 tbsp. grated Parmesan cheese
1 tbsp. milk
1/2 tsp. salt
1 cup shredded Mozzarella cheese
1/2 cup Bisquick
1 cup milk
2 eggs

Heat oven to 400 degrees. Grease 9-inch, deep-dish pie plate. Cook beef in skillet (I threw in a few minced onions) over medium heat, stirring occasionally, until brown. Drain. Stir in pasta sauce; heat until bubbly. Put half of the meat into prepared pie plate.

Mix ricotta cheese, Parmesan cheese, 1 tablespoon of milk and salt. Drop cheese mixture by spoonfuls onto beef mixture.


Sprinkle with 1/2 cup mozzarella cheese.


Top with remaining beef mixture.

Stir together Bisquick, 1 cup milk and eggs until blended. Pour into pie plate over meat mixture.

Bake 30 to 35 minutes or until knife inserted in middle comes out clean. Sprinkle with remaining 1/2 cup mozzarella cheese. Bake 2 to 3 minutes or until cheese is melted. Let stand 5 minutes before serving.

NOTE: I probably used 1 1/2 pounds of hamburger, so I added another 1/4 cup pasta sauce as well. Also, I didn't have any chunky spaghetti sauce, so I used what I had. It turned out fine.

The recipe says it serves 6. If you do cut the lasagna pie into six pieces, each slice has: 350 calories, 21 g fat, 134 mg cholesterol, 680 mg sodium, 14 g carbohydrate, 26 g protein.

Diet Exchanges: 1 starch, 1 medium-fat meat, 1 fat.

Tuesday, September 28, 2010

Fall Chill = Fall Chili


A chill in the air equals chili on the menu.

Fall officially arrived on the County Line yesterday. I pulled on a sweatshirt for the first time this autumn when the open windows overnight made for a brisk morning, even inside the house.

So as I was leafing through a recipe book in search of a meal to take to the field for Randy & Jake, chili seemed the perfect choice. Jake is disking ground ahead of Randy drilling wheat. To save time, I have been taking the noon meal to the field. (Let me clarify: To save time for them, I'm taking meals to the field.)

This was a new recipe for me, but it will definitely be repeated. I found it in a Bisquick cookbook I purchased at school several years ago.

I modified it a bit. The original recipe didn't have beans, but I threw in a small can of chili beans and reduced the amount of chili powder. We're not huge fans of ultra-spicy, so I left out the red pepper sauce entirely. But if your family likes spicier chili, it would be easy to bump up the heat with chili powder, hot sauce or jalapenos.

I had more biscuit dough than I wanted to use for the dumplings. I wanted the dough to be well-cooked in the middle, and I wasn't sure how it would cook in the steamy environment. By the time the dough expanded in the chili, I was glad I'd baked four biscuits separately.


Randy liked the dumplings in the chili, but he also enjoyed the crisper texture of the baked biscuits.

I have an insulated carrier that I used to transport the bowls of chili to the field to keep them nice and warm.

It was the perfect meal for a beautiful fall day.

Chili with Corn Dumplings
2 lbs. hamburger, browned with minced onion
1 can (15.25 oz.) whole kernel corn, undrained
1 can (14.5 oz.) stewed tomatoes, undrained
1 small can chili beans
1 can (16 oz.) tomato sauce
2 tsp. chili powder (you may add more if you like things spicier)
1 1/3 cups Bisquick
2/3 cup cornmeal
2/3 cup milk
1/2 cup shredded Cheddar cheese (opt.)
A sprinkle of dried cilantro or parsley, if desired

Brown hamburger with minced onion in 4-quart Dutch oven (or similar pot) until beef is browned; drain well. Reserve 1/2 cup of corn. Stir remaining corn with liquid, tomatoes, tomato sauce, chili beans and chili powder into beef mixture. Heat to boiling; reduce heat. Cover and simmer 15 minutes.


Mix Bisquick and cornmeal. Stir in milk, cheese and reserved corn just until moistened. (My photo of this step wasn't worth posting - sorry!)

Heat chili to boiling. Drop dough by rounded tablespoonfuls onto chili. Sprinkle lightly with dried parsley or dried cilantro. Reduce heat to low. Cook, uncovered, 10 minutes. Cover and cook about 10 minutes longer or until dumplings are dry.


The original recipe called for 2 tablespoons of chili powder and 1 teaspoon of red pepper sauce. We don't like things that hot, but you may adjust accordingly. The original recipe also didn't call for cheese in the dumplings, but that was a tasty addition.

Enjoy!

Tuesday, June 22, 2010

Special Delivery

Harvest Crew 2010: Eric, Jake, Monica and Randy

Who needs a pizza delivery guy when you have me? Well, come to think of it, a delivery person bringing hot, fresh Elroy's Pizza from town might be a nice change of pace.

But, alas, Elroy's doesn't deliver, so it's up to me to get meals to the field. So far, the harvest crew has come to me for the noon meal. I deliver the evening meal to the field.

When we move "up north" - as we call one location - I'll probably deliver both the noon and evening meals.

It's definitely less complicated than it used to be when the kids were little. While I was dirtying every pot and pan in the kitchen, they also needed attention. But it was a great adventure for my two "helpers."

I think Jill would have been 1 1/2 at the harvest pictured here.

Back then, I would bring an old blanket, which we'd spread out on the freshly cut wheat stubble. Jill would usually find a lap to sit on, though. These days, I don't take a blanket to spread out. I usually just use some old towels as a makeshift tablecloth on the car trunk.

Rides with Daddy were often included as the after-dinner entertainment.

Brent was a just a little over a month old at his first harvest. Thankfully, he slept through a lot of meals that year, though I did hire a teenager to help me with meal preparation and childcare.

Yesterday, I found a couple of old clippings from my days writing the "At Home with Kim" column for The Hutchinson News.

In June 1990, when Jill would have been 4 and Brent had just turned 2, I wrote: "In fiction, dinner for eight conjures up images of a cozy little dinner party, the men in black tie and the women in slinky evening gowns. In my world, the only black the men are wearing is an ample smear of oil from cantankerous combines and trucks. And the only thing clinging to the women is scratchy cheat, sweaty shirts and itchy wheat dust.

"It's harvest time, and dinner for eight is a time to throw a little fuel into the body's engine between swaths cut from golden carpets of grain or slow trips to Zenith in trucks "air-conditioned" the old-fashioned way.


"For me, it's a race against time to get a well-balanced, tasty meal on the table before noon, all the while tap-dancing around Brent's own Gleaner cutting imaginary wheat on my kitchen floor."


In June 1992, Jill was 6 1/2 and Brent had just turned 4.

I wrote: "Jill and Brent think picnics are loads of fun, especially if they get rides on the combine with Daddy or Grandpa Melvin for dessert. On rides to the elevator with Grandma Marie, they have the important job of getting the ticket.

"They get pop for supper every night, which never happens in 'real life.' And they get to have 'guest-es', as Brent calls them, for dinner every single day."

It's always a challenge to remember all the utensils needed when packing up a meal for the field. On one harvest meal run when the kids were little, I forgot the Dutch apple pie that was the intended dessert. It's not that the harvest crew was going to go hungry. But it was still frustrating for this Type A "caterer."

Even though it's not food, one accessory is almost as mandatory: Wet towels help the harvesters wipe away the wheat dust and grime before the meal.

I had already planned my noon meal for today by the time I found the 1992 column. Ironically, the recipe included in the 18-year-old newspaper clipping is what's on the menu today. BBQ Meatballs is obviously a tried-and-true harvest main dish. But it's one I use all year.

These freeze well. In fact, the ones we are having today are ones I pulled from the freezer. I'll pair them with a potato casserole, green salad and fresh banana muffins. Enjoy!

BBQ Meatballs
3 lbs. hamburger
2 cups quick oatmeal
1 can evaporated milk
1 tsp. salt
2 tsp. chili powder
1/2 tsp. garlic powder
1/2 tsp. pepper
1 cup chopped onion
2 eggs

Spray baking dish with cooking spray. Mix all together ingredients and form meatballs. (I usually use an ice cream scoop to make uniform balls.) Place in single layer in baking dish and cover with sauce below or use your favorite barbecue sauce. Bake, uncovered, at 350 degrees for 1 hour.

I usually use Curly's Barbecue Sauce these days. But if you want to make your own, here's the recipe:

Sauce
2 cups ketchup
1 1/2 cups brown sugar
1/2 tsp. garlic powder
1/2 cup chopped onion (or onion powder to taste)
2 tbsp. liquid smoke

Mix all together and pour over meatballs.

***
This other recipe is one my mother-in-law, Marie, used when she had to take the noon meal to the field. She had a pan that fit into a Styrofoam caddy. I seriously considered bringing that container home when we cleaned out her kitchen. But after years of using it for harvest transport, it was grungy, at best. I have my own thermal containers and coolers that are looking a little worse for wear these days. But they still do the job.

When the kids were little, I did the meals, and Marie drove the truck. But I usually used this recipe for one meal since it combined the meat and veggies into one dish. She called it "Baked Steak Meal in One." I renamed it "Harvest Helper."

Harvest Helper
4 minute cube steaks
1/2 cup flour
2 tbsp. shortening
2 cups diced potatoes
2 cups diced carrots
1 can green beans
1/2 cup chopped onion
1 cup sliced celery
2 cans beef broth
2 tbsp. lemon juice
1/4 tsp thyme leaves
1 bay leaf
Pepper

Cut steaks into strips 1/8-inch wide (meat cuts easier if partially frozen). Dredge meat in flour and brown in hot shortening. Combine vegetables, browned meat and lemon juice. Put in 2 1/2-quart casserole. Cover with beef broth. Cover casserole and bake at 275 degrees for 4 hours. Or bake at 350 degrees for 1 1/2 hours, stirring once or twice during baking.

Monday, June 7, 2010

Fudge Bars


Sometimes you just don't want to take the time to make drop cookies. This Fudge Bar recipe is a never-fail, go-to recipe for just such an occasion.

And they are nutritious, right? Well ... they have oatmeal. And they are saying that a little chocolate is good for you, right? (I hear my dietitian daughter whispering in my ear: "They said a little dark chocolate, Mom!")

OK, you will just to overlook the fact they also have sweetened condensed milk, margarine and plenty of brown sugar. Details, details ... Don't let those get in the way of a good cookie recipe!

As always, moderation is the key. Even my daughter the dietitian says so!

These are great for taking to the field for the evening supper run. Enjoy!

Fudge Bars
1/2 cup margarine or butter
2 cups brown sugar
2 eggs
2 1/2 cups flour
1 tsp. soda
1 tsp. salt
2 tsp. vanilla
3 cups quick oats

Fudge Filling:
1 pkg. chocolate chips
1 can sweetened condensed milk
2 tsp. vanilla
2 tbsp. butter

For crust: Cream butter and sugar. Add eggs and vanilla, mixing well. Mix flour, salt and soda and add to creamed mixture. Add oats.

For filling: Melt together all ingredients in a microwave-safe bowl using 70 percent power and cooking 1 minute at a time until ingredients are melted and smooth. Take care not to burn chocolate.

Spray 15- by 10.5-inch pan with cooking spray. Spread 2/3 of the oatmeal mixture in a bottom of the prepared pan.

Cover with chocolate filling. Sprinkle rest of oatmeal mixture on top.

Bake at 350 degrees for 15 to 20 minutes or until the oatmeal mixture is lightly browned. Cool; cut into squares to serve.