Showing posts with label gardening. Show all posts

Thursday, January 20, 2022

New Livestock Trend on The County Line


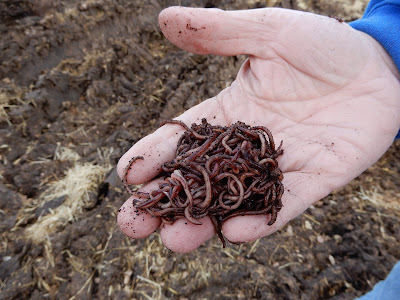
We've spent plenty of money on livestock through the years. But I'm not sure I ever anticipated spending money on worms. 

Yep, worms!

I will keep the hit to the bank account confidential. (You're welcome, Randy.) And the 2,000 Red Composting Worms are the BEST RATED, after all. It says so right on Uncle Jim's Worm Farm's website in capital letters. And, just like an infomercial: Get 1,000 live mealworms absolutely FREE with your order!

I wonder what the FedEx delivery guy thought. Hmmmm ...

I know what my resident farmer/gardener thought: He had visions of giant tomatoes and squash dancing in his head. (Who needs sugarplums?)

Randy's quest for the best garden on the section actually started earlier. In late September, he dumped straw from a bale onto the garden spot, along with more hay from the nearby calving shed. I wondered out loud about the weeds and seeds inherent in the straw. But, really, what do I know?

He added some quality "organic matter" from our cattle lots in October.


It looked like plenty to me.
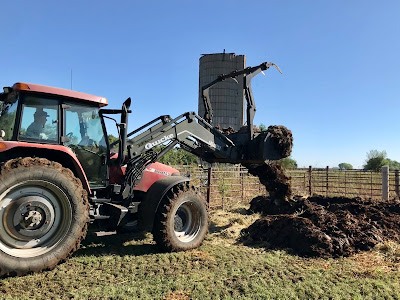

Is there such a thing as too much of a good thing? 
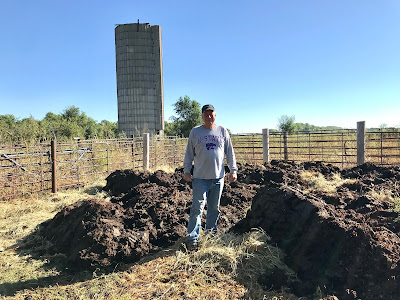
He had me take photos because he wanted to send them to his friends. (I prefer photos of cute calves, but to each his/her own.) After it settled for awhile, he decided to add worms to the mix. I have to admit this blurb from the website (complete with interesting capitalization) made me laugh out loud - for real!

Now let’s face it! You probably aren’t the average Guy or Gal if you’re interested in worm composting! You’re obviously environmentally aware, economically savvy and eccentrically right on target. After all, it’s not like purchasing toothpaste, toilet paper or groceries…

Okay, so you're not the average Work-A-Day, Head in the Clouds, Normal Sort of Person. You've seen some kind of Earthly, Organic, Natural Potential in Red Worms... Check this list of these Nature's Wonder Workers' Uses and Benefits and you'll see just how insightful you truly are. Possibly a little Strange, but None-The-Less, Insightful.

From Uncle Jim's Worm Farm's website

With this ringing endorsement from Uncle Jim, how could he resist?

Adding Red Wigglers and European Nightcrawlers to your lawn, garden or compost pile is one of the smartest and most environmentally friendly things you'll ever do. Why? Because their castings are one of nature's finest plant nutrients: 7 times richer in phosphates, 5 times richer in nitrogen and 11 times richer in potash than the average lawn soil. On average, each worm will produce their body weight in castings every day. Worms can double their population every 90 days.

And, according to Uncle Jim, you can never have too many worms. Worms naturally will lay less eggs as their population becomes too dense within an area. 

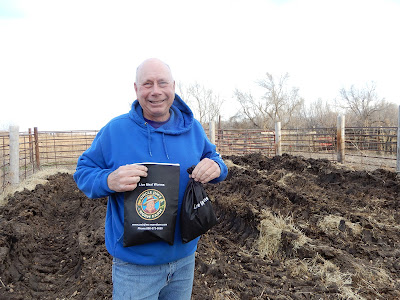
The Red Wigglers and the mealworms came in two separate sacks, along with colorful flyers about handling the new "livestock" on the farm.

We've experienced plenty of wind advisories, severe weather advisories, winter weather advisories and the like ... but this was a first for a Worm Advisory (complete with two exclamation points)!!

Randy didn't waste time adding his new wiggly friends to the garden spot in early December.


Jill's father-in-law (and our friend), Alan, says Randy's giant compost pile could provide a little supplemental retirement income. It sure looks to me like there is plenty of organic material to go around ... especially after all those worms do their work!


Tuesday, August 4, 2020

Garden Fresh Tomato Quiche

Thickly-cut homegrown tomatoes nestled between a couple of pieces of bread and cozied-up to some salty, crisp bacon and fresh lettuce make for a favorite summer lunch or supper around here. But when Randy deposited another half-full bucket of tomatoes by my kitchen sink, I went in search of another way to use our summertime bounty.

I've made Panzanella Salad a couple of times, and we enjoy that, too. But a Garden Fresh Tomato Quiche was another delicious addition to our summer table and a way to use some of those succulent tomatoes.

I had a homemade crust in the freezer, which sped the process for a noon meal. (This is a link to my sister's Never Fail Pie Crust, which has become the go-to recipe for Jill and me. The pie crust recipe makes 3 crusts total, so I'd banked the extra in my freezer for just such an occasion.) If you prefer to use a refrigerator crust, I won't tell!
After reading through several options, I chose a Taste of Home recipe as the jumping-off point, since that recipe site rarely steers me wrong. Of course, I had to tweak a few things to make it my own.

The original recipe called for dried thyme. I prefer dill, so I substituted that spice. If you have fresh dill,  basil or thyme, you could use fresh herbs instead. It always takes more fresh herbs for a recipe if you're substituting for the dried version.

Thinking of our favorite BLTs, I also sprinkled the bottom layer of cheese with some already-crisped bacon bits - real ones, of course. You could fry your own or, if you had some leftover ham in the fridge, you could add it for your meat-loving diners.

My pie shell was smaller than 10 inches. With the addition of the bacon and the smaller crust size, I couldn't squeeze all the egg/cream mixture in. I saved some of that mixture in a lidded jar and cooked it separately another day. Even though I retained some of the liquid, a little of the egg mixture floated onto the crust. But it just added a little extra "gold" around the edge of the pie. But try not to overfill the crust because you don't want a mess in your oven!

After it was golden and brown, I served the quiche with additional sliced tomatoes and vinegar-soaked cucumbers, also from Randy's prolific garden. The onions in the quiche and some fried potatoes were additional bounty from the garden.

If you try it, let me know how you like it!
Garden Fresh Tomato Quiche
Adapted from Taste of Home
1 unbaked 10-inch pie crust
2 tbsp. butter
1 cup chopped onion
4 large tomatoes, peeled, seeded, chopped and drained
1 tsp. salt
1/4 tsp. pepper
1 tsp. dried dill
2 cups (8 oz.) fiesta cheese, shredded (or use sharp Cheddar or Monterey Jack, if you prefer)
4 large eggs
1 1/2 cups half and half
Bacon or ham (optional)

Par-bake your pie shell at 425 degrees for 5-7 minutes until the bottom is lightly browned. BEFORE baking, put pie weights in the bottom of the crust to prevent the crust from puffing up or sliding down the side of your pan. Cover the edges with pie shields before baking. Remove from oven.

In a large skillet over medium-high heat, saute onion in butter until tender. Add the tomatoes, salt, pepper and dill. Cook over medium-high heat about 10 to 15 minutes. Remove from heat. I still had a fair amount of liquid, so I did a quick drain of the tomato mixture with a colander to remove additional moisture.

Sprinkle 1 cup cheese into the bottom of the par-baked pie shell. Cover with tomato mixture. Sprinkle with remaining cheese.

In a small bowl, beat eggs until foamy. Beat in cream. Pour into pie shell.

If you haven't already covered your crust with pie shields, do so before baking. Bake at 425 degrees for 10 minutes. Reduce heat to 325 degrees. Bake 40 minutes longer or until top begins to brown and a knife inserted in the center comes out clean. Let stand 10 minutes before serving.

Recipe notes:
  • After putting 1 cup of cheese in the bottom of the pie pan, I sprinkled with packaged real bacon bits. You could also add leftover ham, if those at your summertime table prefer some meat in their main dish!
  • If possible, use a deep-dish pie plate and crust to get all of egg-milk mixture in the pan. Don't overfill or you'll have a mess in the oven. If you aren't able to pour in all the liquid, refrigerate the leftovers to use in a small tart or other application another day.
***
Need other ways to use tomatoes while they're plentiful this summer? Try these other County Line-tested options:


Tuesday, June 16, 2020

BLT Farmer's Market Salad

It's farmer's market season. What better way to celebrate summer tidings with a yummy BLT Pasta Salad that can double as a main dish or side dish?

Jill sent me the recipe for this salad after she tried it from one of her favorite cooking blogs, Carlsbad Cravings. I'm always glad to get a little inspiration for something new. I don't know whether you're like me, but I can get stuck in a recipe rut. I suppose that's especially true since all our meals for nearly 3 months were straight from my home kitchen.

Even better? It was perfect timing to take advantage of the fresh vegetables that are beginning to ripen in Randy's garden. If you're like me and gardening isn't your thing, a farmer's market or the grocery store produce section will provide the seasonal summer flavor for your dinner table.

The recipe makes a lot, so I kept all the components separate. That way, I could use just enough romaine, Parmesan and bacon, and there were no soggy leftovers. Then I mixed it up fresh for the next meal.

Since our most abundant garden crop thus far is summer squash, I diced up some raw squash to include with the other veggies. Diced cucumbers and other fresh veggies found at the farmer's market would provide color and variety, too. And that dressing is good on anything.

 
Since it's not a meal without meat around here, I served seasoned and grilled chicken and steak along with the salad. If you're planning a 4th of July BBQ or a family potluck, you can feed a lot of people with the original recipe - with or without the meat - making it all at once.

Some of this may end up in to-go containers for harvest meals this week - something cool and refreshing on hot, windy Kansas summer days. (Randy tried a couple of test samples of wheat yesterday afternoon, but ours was too wet. He'll try again today. With a few others in their combine cabs, the peer pressure is mounting!)

My favorite flour brand - Hudson Cream Flour - posted this meme yesterday morning on their Facebook page. It made me laugh! This flour is produced in our county at Stafford County Flour Mills:
From Hudson Cream Flour's Facebook page - Stafford County Flour Mills
Whether it's part of your harvest meal line-up or just finds a spot on your dining room table, give it a try and let me know what you think!
BLT Farmer's Market Salad
Adapted from Carlsbad Cravings blog
12 oz. farfalle pasta or medium shells
1/2 lb. asparagus, tough ends removed then cut into 1-inch pieces
1 cup frozen peas, thawed
1 yellow bell pepper, chopped
1 pt. cherry tomatoes, quartered
4 cups roughly chopped romaine lettuce
1/2 cup freshly-grated or shaved Parmesan cheese
8 oz. thick cut bacon, cooked and chopped
Recipe of Lemon Chive Dressing

Lemon Chive Dressing
2/3 cup mayonnaise or salad dressing
1/3 cup olive oil
2 tbsp. red wine vinegar
2 tbsp. fresh lemon juice
1 tbsp. freshly-grated lemon zest (approximately 1 lemon)
1 tbsp. Dijon mustard
3/4 tsp. salt
1/2 tsp. EACH sugar, dried oregano, dried parsley, pepper
1/4 cup chopped fresh chives (or 1 tbsp. dried - You can also use the tops of green onion)

Dressing: Whisk together all ingredients for dressing. Refrigerate until ready to use. 

Pasta Salad: Cook pasta in salted water just short of al dente. Add asparagus to pot and cook with pasta for 1 additional minute. Drain the pasta and asparagus. Rinse with cold water, then toss with a drizzle of oil oil to keep pasta from sticking.

To serve immediately: Add all salad ingredients to a large bowl. Once pasta has cooled, add dressing and toss until evenly coated. Season with additional salt and pepper to taste. Serve immediately.

To serve later: Add pasta, asparagus, peas, bell peppers and cherry tomatoes to a large bowl and toss with half of the dressing once the pasta has cooled. Cover with plastic wrap and refrigerate. Prepare the lettuce, bacon and Parmesan and refrigerate separately. 

When ready to serve, add the lettuce, bacon and Parmesan and the remaining dressing and toss until evenly combined. Taste and add a splash more lemon if desired and salt and pepper to taste.

NOTES:
  • Since I was just feeding the two of us, I kept ingredients separate. Then, as I wanted to make the salad, I combined enough lettuce, pasta/vegetable mixture, dressing, Parmesan and bacon to serve for just one meal. That way, I could have fresh salad every time! 
  • I had green summer squash from the garden, so I diced up some raw squash and added it to the veggies. You could also add cucumbers and other in-season vegetables as they are available in your garden or from the farmer's market.  
  • Add grilled chicken or grilled steak to make it a full meal.

Tuesday, April 7, 2020

Victory Garden

World War II-era poster - from Wikipedia
Randy started planting a garden last week. I was in the midst of a group text with our daughter, son-in-law and his parents, so I sent a couple of photos of Randy using his new toy - a rototiller left behind by our last hired man.

Alan - Eric's dad - quipped, "Is he planting his Victory Garden?"

I told him that it appeared he was planning to stockpile vegetables to combat Covid-19 with enough seed potatoes and onion sets to feed us and our neighbors, too.

But Alan's tongue-in-cheek response made me remember a Victory Cookbook I had retrieved when I helped my mom clean out my Grandma Neelly's kitchen cabinets.

The falling-apart cookbook was titled Victory Cookbook. I stored it in a plastic bag because it's so fragile. But I dug it out from the back of my cookbook stash again. It was dated 1942 and was compiled by the Ladies of the W.S.C.S. of the Byers Methodist Church. (Women's Society of Christian Service was the precursor to today's United Methodist Women.) As I looked through the cookbook, I found recipes from both my grandmothers, as well as childhood neighbors.
The cookbook was produced during World War II. Children collected scrap metal. Families did without sugar and other staples. Women in some parts of the country had to go to work in factories and other jobs outside the home to fill the void left by men who were serving overseas.
In Victory Hints, found at the front of the cookbook, it says, in part:
Victory is more than just another word. It is a challenge to the ingenuity of womanhood. Victory means taking care of and making the most of what we have. It means saving time and strength as well as material things.
(I love the divider pages in the cookbook.)
I saw the Vegetables divider, and it looked like a simplified version of World War II posters promoting the Victory Garden plan.
Photos from Wikipedia
According to Wikipedia, Victory gardens, also called war gardens or food gardens for defense, were vegetable, fruit, and herb gardens planted at private residences and public parks in the U.S., United Kingdom, Canada, Australia and Germany during World War I and II. In war time, governments encouraged people to plant victory gardens not only to supplement their rations but also to boost morale. George Washington Carver wrote an agricultural tract and promoted the idea of what he called a "Victory Garden." They were used along with rationing stamps and cards to reduce pressure on the public food supply. These gardens were also considered a civil morale boost  in that gardeners could feel empowered by their contribution of labor and rewarded by the produce grown. This made victory gardens a part of daily life on the home front.
Randy called the co-op at Zenith to ask about getting a bucket full of fertilizer at the dry bulk bins. He says he has a "scientific blend" of half a bucket of 18-46-0 DAP and two scoops each of potash, K-Mag, lime, zinc and 40 Rock. It was blended by "Arm strong." (Isn't he full of jokes today?)
He broadcast the mixture in the garden plot.
Then he incorporated it using the rototiller. He has seed potatoes and onions planted, and he has dreams of adding green beans and carrots along with tomatoes when the time is right. I'm supposed to save my empty egg cartons so he can start seedlings.
As he says, it looks good for the time being because he has time to tend it. Check back with us in the summer when he's too busy already. (And if you're a long-time reader, you know I'm not a gardener.)
Now, if only we could plant toilet paper rolls and produce toilet paper we'd be set!
 Maybe the toilet paper hoarders need to read the verse at the beginning of the Victory Cookbook:


Friday, September 11, 2015

Parmesan & Pesto Baked Tomatoes


We've had a bumper crop of tomatoes this year ... no thanks to me. However, our tomatoes are about to call it quits, but Eric's parents sent some Iowa-grown tomatoes home with us after Brooke's big birthday party. So I'm still savoring homegrown tomatoes before I have to give them up for the tasteless grocery store versions this winter.

We've eaten our share of BLTs and I've sliced them up into fresh salads. Just cut and salted, they've provided a taste of summer as a simple side dish. I've made panzanella several times. Cheese Dreams have taken me back to my childhood and my old Betty Crocker for Boys and Girls Cookbook.

But, when I saw the recipe for Parmesan Pesto Baked Tomatoes, I thought this would add more variety to our garden bounty.

It's a super easy recipe, which you can easily adapt for two or 10 (as long as you have enough tomatoes). I used prepared pesto on top of the homegrown tomatoes, then sprinkled with freshly-shredded Parmesan cheese.
I served it with Beef Enchilada Mac & Cheese, but it would be a tasty and colorful accompaniment to many main dishes. Enjoy!

Parmesan Pesto Baked Tomatoes
Adapted from Skinnytaste

4 medium tomatoes, halved
Salt & pepper, to taste
Basil pesto (purchased or homemade)
Freshly-shredded Parmesan cheese

Preheat oven to 400 degrees. Arrange the tomatoes on a baking tray. Lightly sprinkle with salt and pepper. Top each with about 1 teaspoon pesto and a generous sprinkle of freshly-shredded Parmesan cheese. Roast the tomatoes until the Parmesan cheese is slightly browned and melted, about 18 to 20 minutes. Remove from oven and serve immediately.

Tuesday, July 29, 2014

Kinley: Renovation Inspector

Kinley here, reporting from my Uncle Brent's house in Manhattan.

Grandma and I have not been given permission to reveal details about the remodeling taking place. Maybe it will be like the big reveal on HGTV's "Fixer Upper" or "Property Brothers." But I thought I'd come supervise the renovations on Saturday evening.

The contractor was off for the weekend, and Uncle Brent needed some extra help. While my Daddy helped with some heavy lifting, I performed a close-up inspection of the new flooring installed just this past week.
To keep things interesting, I decided to ask my crew to construct a fort from an emptied packing box. That gave me the opportunity to check the quality of the work closely and see how the new flooring would perform as a play surface for a discerning 2.5 year old.
I believe it will work admirably.
While I was down there, I checked out the workmanship on the countertop from the underside. Uncle Brent plans to put bar stools there so he'll have plenty of seating to watch football. I wonder if he'll invite me.
Uncle Brent also needed some gardening advice in his backyard. My Dad is more the lawn care guy, but he was busy helping set up a bed frame and helping lift Brent's TV out of the box. My Grandma is not much help when it comes to plants, but she and I went to explore. 
The former owners left Uncle Brent lots of pretty flowers. We wish the plants the best of luck as they transition to their new owner. They are going to need it. (Grandma says that's because she wasn't a very good teacher for Mommy or Uncle Brent went it comes to gardening. She says she's sorry about that, but hopefully, they learned a few other, non-gardening valuable lessons under her tutelage, whatever that means.)

I went back to my house on Saturday evening since I had another engagement on Sunday. Grandma stayed and helped on Sunday. I'm sure she got lonely without me.

Uncle Brent told my Mommy it was probably for the best that we weren't there on Sunday. He said that Grandma is a better worker when I'm not around. Grandma says she might resemble that remark.

Until next time,
Kinley Marie

Wednesday, June 4, 2014

Pretty in Pink

My husband brought me flowers the other day. Some girls get a dozen red roses. I got Rose of Sharon bushes. I think I got the better deal.

This is our second attempt at a home landscaping beautification project. We tried to consult an expert, but, after an initial visit, the company never got back to us. (You don't want our money? Well, OK, I guess we'll figure it out ourselves. That's a scary thought if you know our aptitude for gardening!)

In September 2010, the Ninnescah Rural Electric Company hired tree trimmers to give "haircuts" to trees that could impact power lines. The trees bordering our north drive were old and straggly anyway, so we figured it would be an improvement. Besides, we are big fans of electricity! 
However, after the trees were removed, it quickly became a place for weeds to flourish. So much for beautification!

Last year, Randy planted crepe myrtle along the north drive. We saw it in my folks' yard and liked the look. Though they never got very big, they produced some beautiful flowers in the fall.
These photos of the crepe myrtle were taken in September 2013.
Then, this spring, we patiently waited for the shrubs to green up. We waited. And waited. And waited some more. We called my Mom to see if hers were alive and well. Finally, we faced facts: The crepe myrtles were dead.

Randy talked to Stutzman's Greenhouse, who said others had experienced similar winterkill with crepe myrtle after the extreme cold. They suggested Rose of Sharon to make a hedge barrier. So Randy planted two different varieties. Lavender Chiffon Rose of Sharon is blooming now.
The other variety - Helene Rose of Sharon - says it's summer flowering, so maybe it will hit its peak in a month or so.
Hopefully, they will take off and grow more than the crepe myrtle did. Eventually, they are supposed to grow into shrubs 8 to 12 feet tall and 4 to 6 feet wide. That's the goal. That will make our turn into the north drive a little more picturesque.
We'll see how it goes. Plan C may mean trying AGAIN to get a professional to come to the Never Never Land on the Stafford/Reno County line to give us some pointers. If it were up to me, we'd need to schedule that appointment now. Thankfully, Randy has some ability to grow things. That's a good quality in a farmer, don't you think?